


CONTENTS
SECTION 1: BEFORE USE
Safety warnings
Recommendations
SECTION 2: INSTALLATION
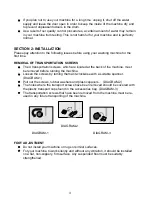
Removal of transportation screws
Foot adjustment
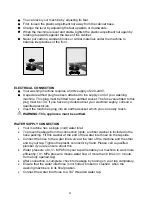
Electrical connection
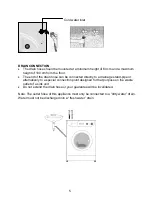
Water supply connection
Drain connection
SECTION 3: TECHNICAL SPECIFICATIONS
SECTION 4: CONTROL PANEL
Start/Pause button
Function indicator lights
Function buttons
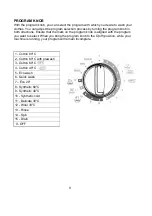
Program knob
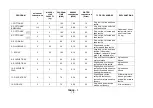
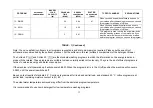
Washing programs
SECTION 5: WASHING YOUR LAUNDRY
Before washing
Running the machine
SECTION 6: MAINTENANCE AND CLEANING
Water inlet filters
Pump filter
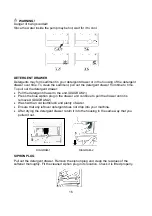
Detergent drawer
Siphon plug
The cabinet
The drum
Limescale removal
SECTION 7: PRACTICAL INFORMATION
SECTION 8: AVOIDING MINOR FAULTS
SECTION 9: AUTOMATIC FAILURE DETECTION SYSTEM
SECTION 10: INTERNATIONAL WASHING SYMBOLS
1


