25
2. Press
TIME
FWD
or
TIME
BACK
to change the time to your requirements.
3. Press
PROGRAM
RUN
to return
to the normal operating mode. If the
temperature still does not rise, it will
continue to call for heat. This normally
indicates the heating system is not
working correctly. You may wish to
consult your furnace manufacturer or
service person. The display will
indicate
CHECK STAT
if one of the
following occurs.
• One of the buttons is stuck down or
in. Check buttons, make sure nothing
is pushing them in.
• The thermostat sensor is not
functioning. If using a remote sensor,
check connections, wiring and power.
• The humidity sensor is not function-
ing. After checking the above, press
PROGRAM
RUN
to reset the
display. If this does not clear the
display, disconnect power for five
minutes. If these checks fail to solve
the problem, the thermostat should be
replaced.
Adjustable Humidity Display.
The room humidity display can be
adjusted to read higher or lower by
following the configuration menu and
adjusting the humidity to a higher or
lower value (up to 20% RH). The
sensed humidity is calibrated at the
factory. If you want to adjust it, refer
to the CONFIGURATION section
(page 4, step 3).
Programmable Automatic
Humidity Reduction.
This feature automatically lowers
humidity when the outside temperature
drops. This is to prevent the interior
windows/walls from reaching the dew
point where water condenses on
surfaces. To achieve automatic
humidity reduction, the thermostat
lowers the humidity when furnace
cycles are long. When the furnace runs
shorter cycles, it increases humidity.
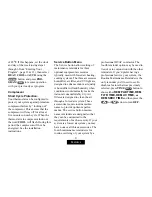
For suggested settings see table below.
Features
Factory default — no humidity
reduction.
Well insulated homes requiring
little humidity reduction.
Poorly insulated homes or homes
with a lot of condensation on
windows/walls.
OFF
LO
HI
If your window insulation is poor, you
need high humidity reduction. If your
window insulation is good, you need
low humidity reduction (factory
setting). Selection of OFF will cancel
this feature. To adjust this feature,
refer to the CONFIGURATION
section (page 4, step 4).
Summary of Contents for 1F95-391
Page 41: ...39 NOTES ...


