EN -11-
INSTALLATION YOUR FRIDGE FREEZER
PART - 3.
It is important that the installation of your fridge freezer is done by a qualified installer.
Otherwise, your product will be out of warranty.
This manual is prepared for an easier, problem free and most importantly safe installation
process. Before beginning installation, it is strongly recommended to read this installation
guide carefully and entirely.
Any problems or questions you might have about the installation process, please contact
customer service or your authorized dealer.
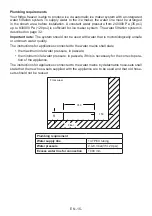
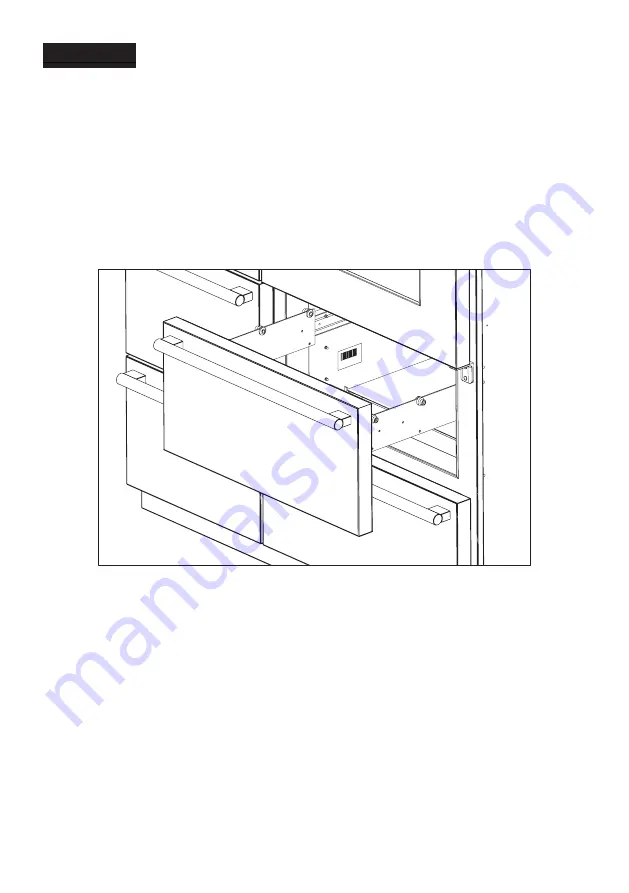
Important product informations , such as model and serial number of the unit are listed in
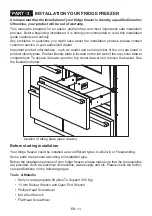
product identity plate. Product identity plate is located on the left wall of the top cooler drawer
compartment. To access it please open the top cooler drawer and remove the basket. See
the illustration below.
location of rating plate (
open drawer
)
Before starting installation
Your fridge freezer could be installed as two different types. As Built-in or Freestanding.
Some parts are optional according to installation type.
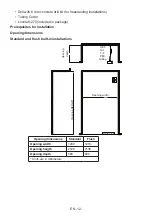
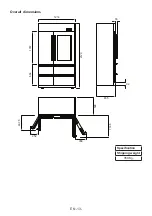
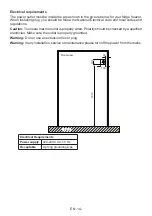
Before the installation process of your fridge freezer, please make sure that the prerequisites
are provided. Such as; electrical connections, water supply and etc. Please check the techni-
cal specifications on the following pages.
Tools & Materils
• Dolly or an appropriate lift (Able To Support 400 Kg)
• 13 mm Socket Wrench and Open End Wrench
• Phillips Head Screwdriver
• M4 Allen Wrench
• Flat Head Screwdriver
Summary of Contents for WR 747 SS
Page 1: ...Fridge Freezer User manual WR 747 SS...
Page 43: ...5 4 10 1 1 2 2 3 3 4 4 5 5 6 6 7 7 45...
Page 44: ...E41 ZONE 4 E42 E43 1 2 E44 170 E50 No Frost 44...
Page 45: ...E01 E02 E11 E12 E13 1 2 3 E14 E15 E16 E17 E31 ZONE 3 E32 E33 1 2 E34 43...
Page 47: ...3 2 3 13 10 12 8 6 12 10 8 9 6 12 10 2 12 10 12 10 8 6 4 12 8 10 12 12 8 3 2 8 6 6 41...
Page 48: ...39 42 41 40 8 6 8 6 8 6 8 6 8 4 3 1 3 1 6 4 6 4 2 5 8 6 2 4 4 2 6 4 40...
Page 49: ...38 5 5 1 4 6 C 5 2 2 39...
Page 50: ...37 4 4 4 4 1 38...
Page 51: ...36 4 3 6 16 24 37...
Page 52: ...35 4 3 5 36...
Page 53: ...34 4 3 3 4 3 4 35...
Page 54: ...33 4 3 2 34...
Page 55: ...32 4 3 4 3 1 33...
Page 58: ...29 4 2 5 Sabbath Sabbath ON OFF 15 4 2 6 Fridge Zone OFF Fridge Zone ON OFF 15 30...
Page 60: ...27 4 2 4 2 1 15 24 C 16 C 2 C 8 C 12 28...
Page 61: ...26 4 4 1 1 2 LCD 3 4 5 6 7 8 9 10 11 LED 12 LED 13 14 27...
Page 62: ...25 50 5 3 3 26...
Page 63: ...24 il gov sviva www 3 2 3 3 220 240V 50Hz 25...
Page 64: ...23 3 3 1 R600a R600a 16 24...
Page 65: ...22 2 13 6 2 14 23...
Page 66: ...21 2 12 22...
Page 67: ...20 2 11 21...
Page 68: ...19 2 10 2 20...
Page 69: ...18 2 9 Loctite 270 120 19...
Page 70: ...17 2 8 18...
Page 71: ...16 2 7 1 4 1 4 PEX 37 17...
Page 72: ...15 2 6 2 L 8 D4X20 16...
Page 73: ...14 2 6 4 2 8 D4X20 4 L 2 M5X16 2 4 D4X35 4 2 6 1 L L M5 L 6 D4X35 15...
Page 74: ...13 2 5 13 14...
Page 75: ...12 2 3 L 24 2 4 13...
Page 76: ...11 2 2 2 240 000 Pa 35 psi 830 000 Pa 120 psi 37 PEX 1 4 2 4 8 3 35 120 psi 1 12...
Page 77: ...10 2 2 1 220 240V AC 50Hz 11...
Page 78: ...9 GT 850 350 10...
Page 79: ...8 2 2 1200 1216 2120 2136 580 600 9...
Page 80: ...7 2 1 400 13 M4 6 Loctite 270 8...
Page 81: ...6 2 7...
Page 82: ...5 1 304 LCD LED LED 6...
Page 83: ...50 220 240 16 5 50 2 15 90 75 3 5...
Page 84: ...CFC HFC WEEE 4...
Page 85: ...8 8 3 3 0 8 3 14 8 2000 3...
Page 86: ...R600a R600a 16 2...
Page 87: ...mA 30 OFF 1...
Page 88: ...52309147...


