background image

Summary of Contents for De Luxe ZIG-ZAG 625

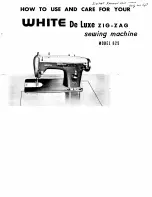
Page 1: ...L i kaim YOUR WHITE De Luxe ZIG ZAG sewing MODEL 625 HOW TO USE AND CARE FOR machine 11...

Page 2: ...p you become thoroughly acquainted with your machine and to assure you of mans hours of trouble free sewing we have prepared this instruction hook Please read it carefully and refer to it whenever you...

Page 3: ...O PREPARE FOR SEWING 10 8 TO COMMENCE SEWING 10 9 TO REMOVE THE WORK 11 10 TO REGULATE 1HE THREAD TENSION 11 12 11 TO REGULATE THE STITCH LENGTH 12 12 TO REGULATE THE PRESSURE ON THE PRESSER FOOT 13 T...

Page 4: ...inder thread guide 3 Drop heed push button 14 Drop Feed release button 5 Vertical arm 16 Bed plate 17 Thread tension indicator 18 Check spring 19 Thread guide arm 20 Needle clamp 21 Peed dog 22 1 ling...

Page 5: ...lly when your bobbin is Pilled CALIBRATED UPPER THREAD TENSION REcULAToR allows the tension of the upper thread to be easily and accurately adjusted according to thread and material weight differences...

Page 6: ...Pig 2 Draw thread from spool over guides then down ward across machine from left to right 3 Pass the thread through the tension discs at the right corner of the base of the machine 4 Now wind the end...

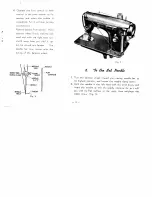
Page 7: ...her The needle bar now moves with the tuning of the balance wheel BAR NEEOLE NEEDLE NEEDLE FLAT TI4PEAD GUARD SCREW NEEOLE SURFACE CLAMP NEEDLE NEEOLEZTHREA0 HOLE ih Fig 3 2 To ihe Sd IVeedle 1 Turn t...

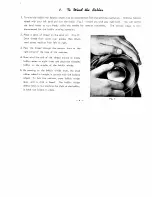
Page 8: ...h your right hand leaving about two inches of the thread end unwound Pig 4 As the bobbin is being inserted in the bobbin case the thread flow is clockwise as before grasp the thread end with your righ...

Page 9: ...old it by the latch with its position finger opposite the notch at the top of the shuttle race Replace it on the center stud of the shuttle Pig 8 5 Then release the latch and press the bob bin case in...

Page 10: ...aise the needle bar to its highest position and take bobbin case out Fig 9 2 Release the KNOBS A pulling them sidewise and the shuttle Pig 9 10 3 After shuttle race and bobbin case have been cleaned p...

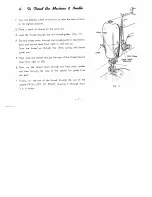
Page 11: ...to the tension discs and around them From right to left and up Draw the thread up through the check spring and thread guide arm 5 Then pass the thread through the eye of the thread take up lever from...

Page 12: ...with it through the hole in the needle plate as shown Fig 12 4 Place both ends of the upper and lower thread behind the presser foot Fig 13 8 Ta eie Seui z 9 1 Place the fabric to be sewn beneath the...

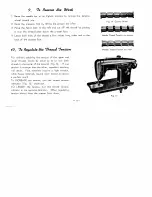
Page 13: ...er and lower threads should be equal so as to lock both threads in the center of the material Pig 1 4 If one tension is stronger than the other imperfect stitching will result Fine materials require a...

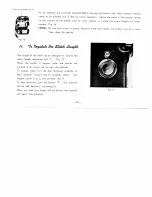
Page 14: ...ter turn at a time Then check for results If Ta e 9 uIcde ifhe S ich J e i94 The length of the stitch can be changed by turning the stitch length regulating dial L pig 1 7 When the number 0 appears un...

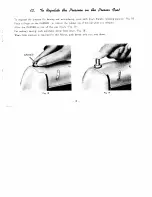
Page 15: ...eleasing pressure Pig 18 Place a finger on the DARNER to cushion the sudden rise of this cap when it is released Allow the DARNER to rise all the way siowly Pig 19 Por ordinary sewing push automatic d...

Page 16: ...avier cloth push the button marked UP to return feed to highest level 2 When the drop Feed button DOWN is pushed down completely the feed will be lowered below the surface of the needle plate This is...

Page 17: ...w one To have your mchino aways in smocth running condition you must keep it oiled at all times No grease is necessary Just a drop of oil is sufficient at each time Oiling points are iliustrated in Pi...

Page 18: ...sheet of newspaper or any other thin paper underneath the material and sew with the shortest stitch possible This will keep your work from gathering BASTIN 1 Reduce the tension of the upper thread an...

Page 19: ...oo tight 3 Bobbin being wound too fully BREAKING OF THE NEEDLE 1 Pulling the fabric while machine is sewing thus causing the needle to strike the needle plate 2 Using bent needle SKIPPING STITCHES 1 U...

Page 20: ...increasing width depending on the position of the ever To return to a previously used width of zigzag stitch after having done some straight sewing or for special types of work such as sewing buttons...

Page 21: ...embroidery Upper end lower thread tensions remain the same as for ordinary sewing Place material or garment with button under the presser foot so that holes in button line up with oblong opening in pr...

Page 22: ...gth of stitch if necessary to get best possible appearance of buttonhole 4 Slightly tighten needle thread tension turning tension regulator to the right IF appearance of buttonhole should not prove sa...

Page 23: ...cutter or buttonhole scissors Be careful to avoid cutting the buttonhole stitching To make reinforced buttonholes introduce gimp of proper size into the small hole at the front of the button hole foot...

Page 24: ...n thumb screw to lock quilter attach ment into place When sewing quilter bar should follow preceding line of stitching same as straight stitch quilting with 23 Sew i 9 aids Remove regular presser Foot...

Page 25: ...28 Turn balance wheel toward you until needle reaches its highest point Raise presser bar and remove regular presser foot Attach hemmer foot Fig 28 Now handle material as follows 1 Fold over edge of...

Page 26: ...an attachment designed as a guide for straight stitching when making wide hems deep tucks or seam width which are greater than presser foot allows lig 31 It is attached to machine as illustrated a ver...

Page 27: ...8 30 3 to to Heavy Duty denim leatherett etc 10 40 Medium heavy drapery fabric velveteen 10 40 2 to to Heavy Duty suiting felt terry etc 12 60 Medium broadclote percale gingham 12 60 linen chintz taf...

Reviews: