background image

All manuals and user guides at all-guides.com

Summary of Contents for Quilt'N Sew 1730

Page 1: ...WHITE li 1 frc 8 X 3 31 31 64 att LLJ1UCSCV IflJCOfli ee3 R It czak Quilt N Sew Instruction Book I t L J All manuals and user guides at all guides com a l l g u i d e s c o m...

Page 2: ...ver operate this sewing machine if it has a damaged vvrd or plug if it is not worldng properly if it has been dropped or damaged or dropped ate water Return the sewing machine to the nearest authorize...

Page 3: ...reduce nsl of injurj switch oft before servicing Close cover before operating maohine SAVE THESE INSTRUCTIONS Tms product is for hooshoid use or equivalentS FOOT CONTROL USA ONLY ELECTRONIC MODEL Use...

Page 4: ...4 Gisanning the reecie thread and labuc chart 25 g steed 26 Solo stitch 2 7 Blind stitch 27 tei ch 28 3 stepsigza 29 juy Wi 51 Ad 1 usting stretCh slitch balance 1 Triple str cjhl stitch 32 Rick rack...

Page 5: ...wHkJ flObC iS iJ 1 irl aso Lv Xl 1S dr eXt iCfl tabk fC inure S wnq JfWC 10 TH COv ge b I kk i I Swr ti coc r i y ou will wv a 1 iwqe ai ht rr slUe ot nacrrc 1 c cj NiI fl Iptr prr cct d nt thi ine du...

Page 6: ...jr u viari fl J 4C PO 3 fyj U e erirww6 erie dct iii Uiaw ng 4 REAR COVER AS AN EXTENSION TABLE t jWti badc metal utip le jfl c vjf irnu ict cIcd ir IFc _d ot rr arm At th i3nd ci the iot5 Ttt u on t...

Page 7: ...spool pin at the back of the machine for storage Drawing 6 2 Asmoo the roar cover from the free arm used as an ex1erson table oy lilting up and removing horn the latch Slide the ear cover away From th...

Page 8: ...C 1 ii 3 uuw ncj 4 AIgn the front cover at tns hinges IReleaso tho top nnge into mu r dJ then rr oao the b utcsm nc nt he Dvi9 1 5 Swing the front cover to inc front ani cnsa fDrawicg 9 E Nil Lc NiJI...

Page 9: ...itch sIctoi 14 Powerf hght switch 15 Plug socket 16 Presser toot lever 17 Thread cutter I 9 AutcrnaUc needle threader 19 Foot roleae lever 20 Presser foot screw 21 Feed dogs 22 Thread guide 23 Needle...

Page 10: ...or remove fabric 3 Lift it to its highest position to change the presser foot or to remove thIck fabric 3 STfTCH WD1H NEEDLE POSITION LAL T re icth it 1h hc pioduceci r nts rna n U rrow r z M St ii U...

Page 11: ...ted easOy according to thickness and type of fabric Super stretch stitch patterns can be selected by turning the same dIa to S mad wherC hne adjustment can be made 6 REVERSE STITCH LEVER It is recomme...

Page 12: ...nlooded to fit in a polarized univ uie ay If the pug coca not ift tuNy intO the outlet revee the does rot t contact a ualihed eiecrIan to instrill the proper Cu not mudt 1 tie pug n any way OFF Turnin...

Page 13: ...iecing foot 2 Oil 3 Buttonhole foot Ziprper foot 5 Eht bbi iis 6 Needles j 4xapcs Twin needlasxi PC 7 Spool pin cap small 8 Spool pin cap large 9 Buttonhole opener with brush 0 Screwdrivers 3 11 Spool...

Page 14: ...wn 4 Pull end ot thread through hole rn bobbm as shown 5 Make sure the bobbin winder shaft is in left position Place bobbin onto shaft with end of thread Corning from top of bobbin Push bobbin winder...

Page 15: ...ver plate wtide pressing the latch to the right that holds the bobbin cover in place See fig 2 3 insert the bobbin making sure the bobbin rotates counter clockwise with the thread off the top of bobbi...

Page 16: ...1 4 ro 1 MC l 1 aV1JH i dO ILLL NGV 3 W I I I All manuals and user guides at all guides com a l l g u i d e s c o m...

Page 17: ...ush lever until the hooked nd passes through the needle eye 2 Guide thread into hooked end and null ti upward 3 Release the lever and needle will be threaded automatically PuN loop oh thread to back o...

Page 18: ...h your nqht hand until the needle comes to its highest position 2 Lightly pull up on the needle thread This will pu 11 a loop of bobbin thread through the needle plate slot 3 Pull both top and bobbin...

Page 19: ...r foot holder snaps onto the toot FEED TEETH LEVER The feed teeth move the fabric under the presser tout as it is sewn The feed teeth hnuld he up for all general sewing I ower the feed teeth tar free...

Page 20: ...MACHINE StNG CHART I STITCH INDICATOR EN HDA TIT W DtAL 1 T H RDtAL 5PRESSER FOOT A S TUJI LJ1t ir 19 All manuals and user guides at all guides com...

Page 21: ...tCH R CK RACK MMAMMi STRETCH O FRIOCK 1 OCERLOCK FEATHER ELASTIC CVLRLOCK 2 STITCH LENGTH CONThOL 4 PRESSER FOOT 3 STITCH WIDTH CON TROL 1 4 Si IND SHELL I R OS 4 A B B F 1 4 A 1 I 5 B B 5 13 B B S H...

Page 22: ...ovnr h ht swtL It I ittih tirr I I Kt 2 Pul both threads under the presser foot toward the back of the machine 3 Place the fabric under the presser toot d ower the sser toot iever 4 Turn the hand whe...

Page 23: ...t stitch at tiqht oedlc po1tiori with needle posthen control at R d Si o w skpp rj on thi loot r hiil 1 tj j tt labnL qonhly vth yjjr Fnd 1LI r F_n itt 01 Th 511 p tio I _sLr Ti tu t triir ii I 0 ri 0...

Page 24: ...ht side att ich ott side Of tpp Io it to foot ii ki r o It tttc tit di p r e OOLt I the ulfriIiit on the left skJe of the foot To sew down ti re ltI skle atLaijt jrit 1er of toot to toot riukier PIPIN...

Page 25: ...TENSION The good iooking appearance of your stitchng is argely determined by the balanced tension of both top and bobiiri threads The tension is well balanced when these two threads lock in the rniddt...

Page 26: ...EDLESJ The tabncs bekyw can bi of un fIber coflon IIrlurk elk wocI synthetc rayon blends They are td as earrp 1r1f wuin1 SIZE Lkht Ua1e 12 80 Wigt1f Chdtorr Crepe Chan9ing the needie 1 Raise the needl...

Page 27: ...iy loosen top thread Stitch Indicator tension for satin stitchin9 Use a backing stabittzer interfacing for the sheer B materials to avoid puckering Li IQ I Thread tension dial The top thread may appea...

Page 28: ...position of needle 4 When cornpoted the stitching is almost invisible on the rrght tde of the fabric S S 5 I Fust nish the raw edge Do this by turning rt under on fine fabrics and overcasting it on m...

Page 29: ...NE Place the right sides of the fabric together and position under the presser foot so that the zg zag part of the stitch sews just over the raw edge SHELL TUCKS Turn under the raw edge and press Plac...

Page 30: ...where the normal zigzag makes only one For this reason ii is highly recommended for overcasting all types of fabrics ft Is also ideal for morxting tears patching sewing toweffing patch work arid atta...

Page 31: ...ed in sleeves or fronts of blouses and dresses To attach two separate pieces of labrle together leave a little space in between To prepare the fabric Fold under the seam allowances on the cut edges an...

Page 32: ...d cuffs to give a professional finish to your jarrnents IF Ljz i AKiH HONEYCOM13 Ei ASrc OyEFLU 1FF fi If F A c i Irc A u iii Dc4 STRETCH STITCHES Stretch slc are nanly tor uso cii knit or si Idbn s b...

Page 33: ...ck seams and overcasts in one to produce a narrow supple seam particularly suited to swimwear sportswear T shirts babywear ri stretch nylon stretch towelling jersey and cotton jersey STRETCH OVERLOCK...

Page 34: ...en HSM 06 26 2007 06 37 AM To WilliamsC SingerCocom cc Elizabeth Swartz USNHSM Husqvarna Subject Fw WHITE 1730 instruction book With best regards An Elmeke Forwarded by An Elmeke Sweden HSM on 2007 06...

Page 35: ...fl OCLL tP 6 I t DC tE IC Odle Itt Mu ate ait ait Ma aneL L All manuals and user guides at all guides com...

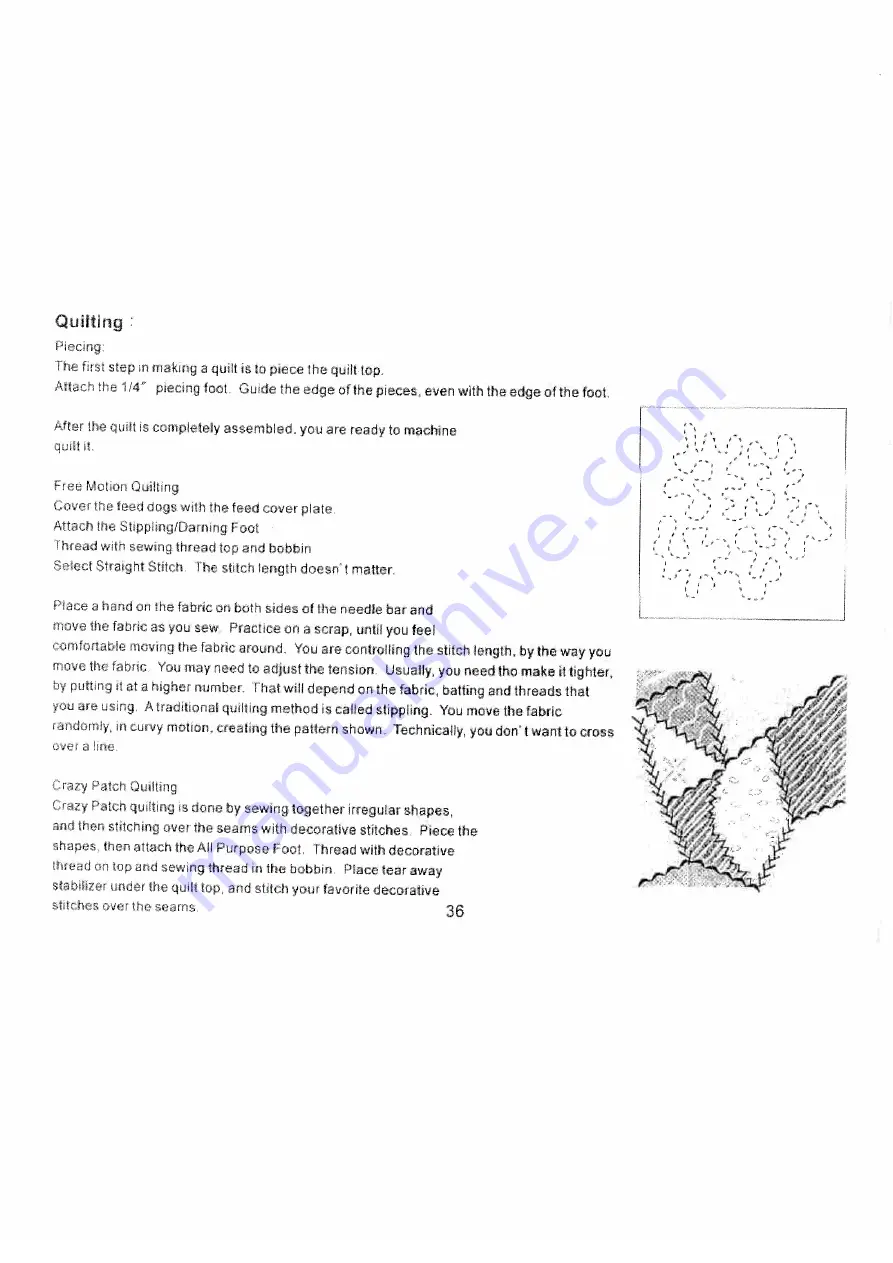
Page 36: ...nd overcastrng in one step cm slightly stretch fabric and non Stretch fabrics such as linen tweed and medium to heavy weight cotton It may also be used for couching over narrow ribbon or yarn or for d...

Page 37: ...e toot faiward so that the needle pierces the fabric at the beginning of the buttonhole ADJUSTING STITCH LENGTH DENSITY AND WIDTH You can also change sutch denstty to your preference withn the buttonh...

Page 38: ...titch length by the way you move the fooric You may need to adjust the tension Usuahy you need iha make it tighter by putting it at a higher numhc I hat will depend on the fabric batting and threads t...

Page 39: ...hotling the stitch length by the way you move the fabric tou may need to adjust the tension Usually you need tho make it tighter by putting rt at a hgher number That will depend on the fabric batting...

Page 40: ...raise needle 2 Bartack 4 or stitches Stop sewing at the left stitch and raise needle to ts highest position 3 Stitch backword to th start of buttonhole mark to complete buttonhole 4 Bartack 4 or 5 sti...

Page 41: ...ttonhole so that zigzag smches cover the cord When completed release the cord from foot pu tt ends of cord forward and snp off extra length FEED COVER PLATE th ted cover p tc hn rincr1 ro jht fecu rI...

Page 42: ...bcl i1 titch ili I 4 SPOOL PINS Ti 2 3 sf ihe UflL1 ro paoI pin bs tor twin ntelc scwinq Set thu pri hns fl111 hn cbl huh t ck uS V ifLg mJc tlntn S1 ris Uiu SpoiI ifl into ie huh of spuu pin tLLLS F...

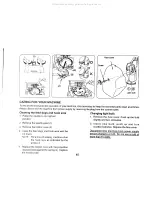
Page 43: ...he face cover Push up the bulb position sflghuy and turn cIockwse 2 Remove the needle plate 1 2 insert new bulb push up and turn 3 Remove the bobbin 3 counterclockwise Replace the face covei 4 Clean t...

Page 44: ...All manuals and user guides at all guides com...

Reviews: