45
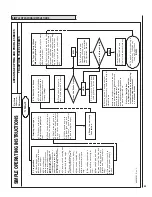
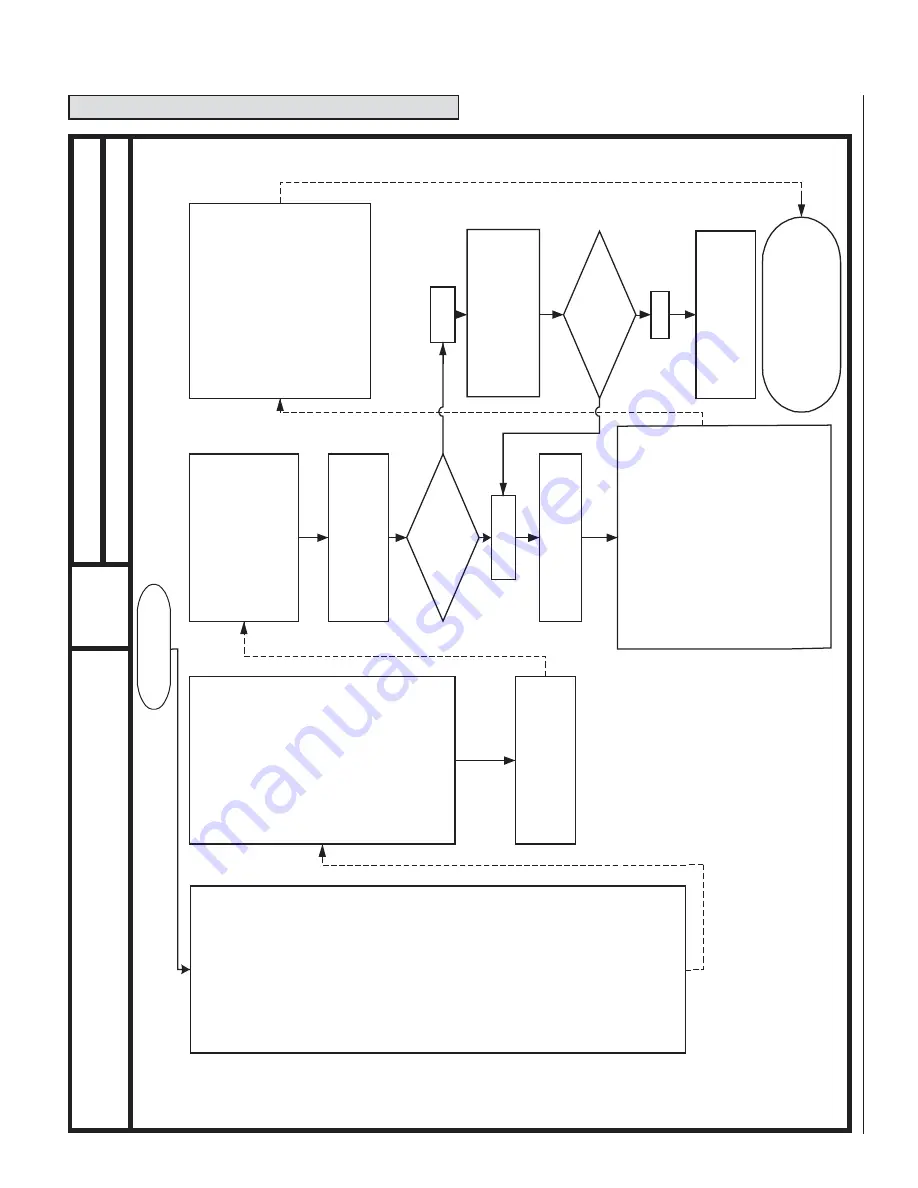
SIMPLE OPERATING
INSTRUCTIONS
Pellet
Stove
Models:
ADVANTAGE OPTIMA AND PROFILE SERIES
TRADITIONS T300P
-2
SERIES
3. Priming the Auger
a]
Fill hopper with pellets
Note: use quality grade pellet
fuel.
b]
Push the on/off button to
turn on the auger motor.
c]
After 2 minutes push the
on/off button. Wait 5 minutes
and push the on/off button to
start.
d]
When pellets begin to
drop from feed tube into
UltraGrate
TM
, push the on/off
button
to stop the auger.
2. Preparation
a]
Check hopper and
remove any materials from
hopper and auger.
b]
Preset damper
c]
Visually check venting and
termination for leakage.
d]
Check UltraGrate
TM
for
proper fit (ensure grate is
set securely in the base).
f]
Check door gasket and
door latch to ensure tight
seal.
g]
Check ash pan and door
for proper seal. Confirm ash
slides are closed securely
(Profile and T300P models
only).
h]
Connect power cord to
grounded power supply
outlet.
4.
Stove is now ready
for start-up.
5. To Start Your
Stove
a]
Push the on/off button
Note: Room air blower and
exhaust blower will run at
start up settings.
7.
Set stove to desired heat
setting (heat select button).
YES
9. To Turn Off Pellet Stove
(Manual Operation Only)
a]
Push on/off button, stove enters
shut down mode.
b]
Pellets stop feeding and the fire
dies down. Approx. one min. later
the room air blower and exhaust
blower change to cool down setting.
Approx. 15 minutes after shut
down cycle begins, stove shuts
off.
NO
7a.
Follow the trouble-
shooting section of the
Homeowner's "Installation
and Operation" Manual.
Does the Stove Light?
8.
After approx. 5 minutes adjust
damper if necessary to obtain a bright
vibrant flame.
Notes: If the damper is too far closed, the
flame will be lazy/sooty and the fuel will
pile up in the UltraGrate
TM
.
too much combustion air.
10.
Thank you for purchasing a
Whitfield or Traditions by
Lennox Pellet Stove.
END
1. Start
Does the Stove Light?
NO
6.
Flame should appear in
stove within approx. 8 minutes.
Contact your
Lennox Hearth Products
Dealer for further assistance.
Refer to "Installation
and Operation" manual for
further instructions in adjusting
damper using thermostat
vs. manual modes.
PLACE DEALER LABEL HERE
If the damper is too far open, the
flame might be extinguished due to
60020191 Rev.
C
e]
Check door switch for
alignment and contact.
Note: Profile 30(-2) models
only.
Note: Damper is preset at
factory for all models except
Optima 3 INS and Profile 30
INS-2 (for these models
set damper at 1/2 open). For
model T300P ensure that
damper has not moved from
it's factory setting of 3 notches
out.
SIMPLE OPERATING INSTRUCTIONS


