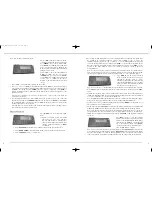
b) For steeply sloping audiograms or unusual configurations an expanded Sensogram may
be performed in additional fre q u e n cy re g i o n s. Select [
E X P
] (see B) to access the
additional frequency regions. Use
[= =›]
and
[‹ = =]
to scroll through the frequencies and
select the desired channel(s) for testing. Select [
BACK
] to exit expanded sensogram mode.
Once the expanded Sensogram mode has been utilized the option to reset [
RSET
] (see B)
appears in the mode window. Choose reset when you want to return to the basic
Sensogram mode.
Note: It is not necessary to perform the Sensogram for every frequency in the expanded mode.
Only test the frequencies of interest. If expanded frequencies are tested the basic Sensogram
screen will not display thresholds. Open the expanded view to see the Sensogram values.
2.
Press [
MODE
] (see B) to enter Feedback
mode. Perform Feedback test in a quiet
e n v i ronment. Instruct client to “Please
remain quiet throughout the entire test and
open your mouth slightly. A series of sounds
will be pre s e n t e d ”. The feedback test should
t a ke about 15-20 seconds per ear.
Note: A series of dashes (- - -) will be displayed if the environment is not sufficiently quiet for testing.
• Press [
TEST
] (see B) to begin the Feedback test. If the test needs to be repeated press [
TEST
]
again.
• Confirm that Feedback values are acceptable. This is indicated in the Feedback window as
“TEST OK”. Insufficient gain for conversational inputs is indicated if the results are displayed
as a series of asterisks (***). Repeat the feedback test.
Note: If appropriate Feedback values cannot be achieved confirm that the hearing aid is appro-
priate for the degree of hearing loss and/or consider earmold/shell modifications.
• You may choose to use estimated feedback data by pressing [
MODE
] (see B). Answer yes,
when prompted
,
to use estimated data.
• The in-situ vent effect [
INS VENT
], as measured by AISA, is displayed as an equivalent vent
diameter in millimeters. The in-situ vent effect is also displayed in the feedback window.
Note: AISA, the Assessment of In-situ Acoustics algorithm, cannot be turned on or off on the
iP5 programmer as it can on Compass. If the detected hearing aid has been previously pro-
grammed on Compass, and AISA had been turned off
, [INS VENT ——mm]
will be displayed
on the iP5.
•
Press [
REF
] (see B) to view the available
gain for each frequency region. Below these
values are the Minimum Gain (MIN) values
representing the minimum acceptable gain
for a conversational input. Press [
BACK
]
(see B) to return to the Feedback window.
Inteo programming is complete.
Note: Once the Inteo hearing aid has been pro g rammed the
FINE TUNE
window will be the
next to appear when the mode button is pressed.
FINE TUNE
will be the first window to appear
when the iP5 pro g rammer is turned on and a pro g rammed Inteo is recognized. You can re t u r n
to the Pre c o n d i t i o n s, Sensogram or Feedback mode at any time by pressing the mode button.
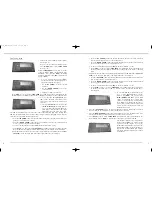
iP5 is now in the Pre-Conditions mode.
1. Choose [
M-B
] in the mode window (See B)
to designate fitting as monaural or binaural.
Use [
ARROW
] key to choose
MON or BIN.
Press [
BACK
] to exit [
M-B
]. An exclamation
point (!) will appear next to [
M-B
] in the
mode window to indicate that a monaural
fitting has been chosen.
2. Select [
VNT
] to choose the vent diameter in
millimeters (mm). Use the up or down
[
ARROW
] key for selection. Press [
BACK
]
to exit [
VNT
]
.
An exclamation point (!) will
appear next to [
V N T
] in the mode
window to indicate that vent size has been
chosen.
Note:
[
VNT
]
is not an available option in an Inteo élan.
3. Press [
= =›
] to access [
AGE
] for the pediatric rationale and [
ABG
] to apply an air bone gap
correction factor. Apply the pediatric rationale if the client is under 5 years of age by select-
ing [
AGE
]. Use the up or down [
ARROW
] key for selection of age group. Press [
BACK
] to
exit. An exclamation point (!) will appear in the mode window to indicate application of the
pediatric rationale.
Note: The age correction is necessary for children under 5 years of age even when the
Sensogram is measured.
4.
For conductive hearing losses press [
ABG
]. Enter the air bone gap for each of the four
frequencies by using the up [
ARROW] keys
in each channel. Press [
BACK
] to exit [
ABG
].
An exclamation point (!) will appear next to [
ABG
] in the mode window to indicate that
air bone gap data have been entered.
Note: Remember to enter the air bone gap for the specific frequency and not the bone conduc-
tion threshold or the average air bone gap
.
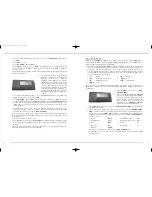
Programming Inteo
1. Press [
MODE
] (see B) to enter Sensogram
mode.
a) Obtain Sensogram using bra c ke t i n g
approach at 500, 1000, 2000, and 4000
Hz.
The number that is flashing repre-
sents the active channel for stimulus pres-
entation. Signal is audible when [
TONE
]
is displayed.
• Press [
UP ARROW
] beneath desired channel to increase the presentation level.
• Press [
DOWN ARROW
] beneath desired channel to decrease the presentation level.
• Press [
TONE KEY
] (see C) to activate tone.
3
2
B
B
C
B
B
IN_IP5_Manual8.qxd 11/28/06 1:12 PM Page 2


