Configuration and setup
Wieland Electric GmbH | BA000870 | 06/2020 (Rev. A)
25
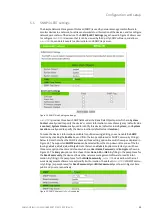
Additionally, you can setup a
SNMP Trap Server
in the network to receive and collect all alert mes-
sages from
wienet SDS
. To configure
wienet SDS
to dispatch alert messages originated from any un-
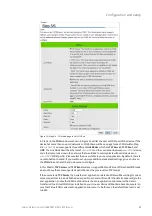
expected incidents, you can fill in the IP Address of the SNMP Trap Server in the field shown in Figure
19. Note that any changes in these settings will take effect after the
wienet SDS
device is restarted.
Under the SNMP Trap Server part, there is a list of
Alert Type
under
Event alert settings
box in Fig-
ure 19. There can be up to two possible actions for each alert event:
and
SNMP Trap
. You can
enable the associated action(s) of each alert event by checking the box under the column of
and/or
SNMP Trap
. When the
box is checked and the corresponding event occurs, it will trig-
ger an action for
wienet SDS
to send an e-mail alert to designated addresses configured in the
Settings
(described in the next section). When the
SNMP Trap
box is checked and the corresponding
event occurs, it will trigger an action for
wienet SDS
to send a trap alert to the designated SNMP Trap
server (specified in the above paragraph). There are five events that will trigger the alarm from
wienet SDS
as listed in Figure 19. However, some event can only be reported by e-mail. These alerts
are useful for security control or security monitoring of the
wienet SDS
device:
•
Cold Start:
This event occurs when there is a power interruption.
•
Warm Start:
This event occurs when the device resets.
•
Authentication Failure:
This event occurs when an incorrect username and/or password are en-
tered which could indicate an unauthorized access to the
wienet SDS
.
•
IP Address Changed:
This event occurs when the
wienet SDS
device's IP address is changed.
•
Password Changed:
This event occurs when the administrator password is changed.
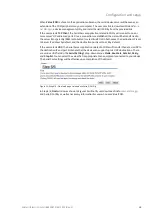
After finish configuring the
SNMP/Alert Settings
, please click on
Save & Apply
to keep the changes
that you have made and to apply your setting. When the saving and applying are finished, the web
browser will remain on the
SNMP/Alert Settings
page. If you want to cancel the change and reset all
changes back to their original values, just click the
Cancel
button.


