3
8. Remove the securing blanking plugs from water pipes.
9. Connect the heater to the water distribution system (Fig. 5 service line marked 14, outlet
marked 15)
10. Switch on the water supplying the heater and check the tightness of the connections.
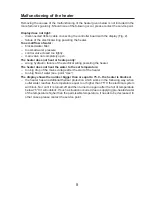
11. Connect the heater to the electrical wiring in accordance with Figure 4.
12. Connect the ribbon cable by inserting the plug with the proper side to the socked marked
“LCD”, see (Fig. 2).
13. Put on the housing and screw it with a fastening screw.
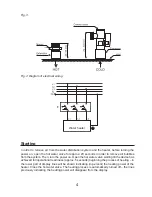
Fig. 2 Display board
with ribbon cable
1. Plug
2. Socket marked “LCD”
3. Display board
Fig. 1 Heater housing
1. Display
2. Button increasing the set temperature
3. Button decreasing the set temperature
4. Memory buttons of the set temperature
5. The screw fastening the housing


