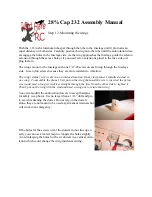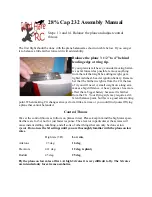
Hinging is a very simple matter. We recommend that you hinge all the control surfaces in two
steps allowing the glue to dry between steps.
Before you start gluing anything, test fit each control surface. Aileron to wing, elevator to stabi-
lizer, rudder to fin/fuse, with the hinges in place. Make sure the hinges go in the holes smoothly
and that there is ample room for the hinge “knuckle” so there is no large gap between surfaces.
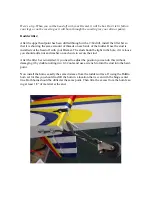
The hinge lines are beveled. The point of the bevel should be at the center of the hinge pin, this
assures that the hinges are aligned and centered on the hinge line.
You may want some extra control surface throw for heavy duty 3d. To do this leave a small gap
between the control surfaces to allow more deflection. If you do this you should probably seal
the gap with some matching or clear covering material.
Once you are certain that they all go together smoothly, take one surface and remove the
hinges. Glue the hinges into the holes securely using the glue you prefer. I have had good suc-
cess with
Gorilla Glue
(available at any Home Depot) because when drying it foams up
slightly and fills the gaps between the hinge and the mounting hole. Check hinge operation
every few minutes, as the glues sets wipe off any excess that oozes from the glue joint.
Using Gorilla glue here is the procedure for hinging.
1. Iron down the covering on the hinge line so there are no loose edges or seams.
2. Put a piece of 2” wide masking tape across each hinge hole so
the hole is centered in the tape.
3. With a sharp razor knife cut away the tape and covering mate-
rial from each hole so only wood is exposed.
4. Again using your sharp razor knife cut the tape along the
pointed bevel edge so the tape can later be pulled away with the
hinges installed.
5. Pour some Gorilla glue in a cup. With a toothpick (break off the
pointed end) pick up as much glue as you can get to stick to a
1” section of the toothpick and then swab the inside of 1 hinge
hole until the sides are generously covered with the glue.
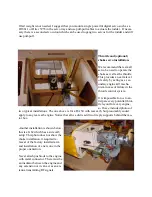
6. Insert the hinges until the point of the bevel is centered on the
hinge pin. Make sure the hinges can be worked, and that the
bent hinge is perpendicular to the edge (see picture).
7. Allow the glue to set for at least two hours, but keep an eye on
it for the first 15 to 30 minutes to be sure the glue’s foaming
Step 3.
Hinging the control surfaces
28% Cap 232 Assembly Manual


