P
OSITION
I
T
PI-150
AND
PI-75
1-10
TP-5129001-J
January 2022
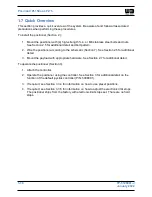
1.7 Quick Overview
This section provides a quick overview of the system. Be aware of and follow all associated
precautions when performing these procedures.
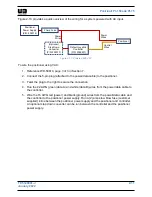
To install the positioner (Section 2 ):
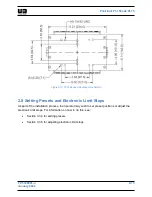
1. Mount the positioner with (4) high-strength
⅜ in. or M8 stainless steel bolts and nuts.
See Section 2.5 for additional detail and bolt pattern.
2. Wire the positioner according to the schematic (Section 7). See Section 2.6 for additional
detail.
3. Mount the payload with appropriate hardware. See Section 2.7 for additional detail.
To operate the positioner (Section 3):
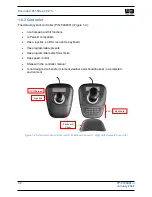
1. Attach the controller.
2. Operate the positioner using the controller. See Section 3 for additional detail on the
function of the default joystick controller (P/N: 5098901).
3. If required, see Section 3.3.4 for information on how to use preset positions.
4. If required, see Section 3.3.5 for information on how to adjust the electronic limit stops.
The positioner ships from the factory with electronic limit stops set. There are no hard
stops.
Summary of Contents for 5061001
Page 2: ......
Page 8: ...POSITIONIT PI 150 AND PI 75 vi TP 5129001 J January 2022 ...
Page 34: ...POSITIONIT PI 150 AND PI 75 2 14 TP 5129001 J January 2022 ...
Page 44: ...POSITIONIT PI 150 AND PI 75 4 2 TP 5129001 J January 2022 ...
Page 50: ...POSITIONIT PI 150 AND PI 75 5 6 TP 5129001 J January 2022 ...
Page 56: ...POSITIONIT PI 150 AND PI 75 7 2 TP 5129001 J January 2022 ...
Page 57: ...POSITIONIT PI 150 AND PI 75 TP 5129001 J 7 1 January 2022 ...
Page 59: ...POSITIONIT PI 150 AND PI 75 TP 5129001 J 7 3 January 2022 ...
Page 61: ...POSITIONIT PI 150 AND PI 75 TP 5129001 J 7 5 January 2022 ...
Page 63: ...POSITIONIT PI 150 AND PI 75 TP 5129001 J 7 7 January 2022 ...
Page 65: ...POSITIONIT PI 150 AND PI 75 TP 5129001 J 7 9 January 2022 ...
Page 67: ...POSITIONIT PI 150 AND PI 75 TP 5129001 J 7 11 January 2022 ...

