5
PPA T46 Personal PA 72-76 MHz Transmitter
6. Select the desired operating frequency. Refer to the
following channel selection chart. Make sure the transmitter
and receiver channels match. Up to eight T46’s can operate
simultaneously on different channels. If this is desired, set
each T46 to 8-channel mode (see Advanced Settings, Step 4).
The frequencies in 8-channel mode correspond to the R35-8
channel set shown in the chart. This preset eight channel/
frequency selection is the only configuration that will allow
simultaneous eight channel use. (FIG. C)
Figure C: Channel Selection Chart
T46 CH
Letter
Freq. (MHz)
R35-8 Ch
1
A
72.1
1
2
B
72.3
2
3
O
72.6
3
4
P
72.8
4
5
I
74.7
5
6
R
75.4
6
7
G
75.7
7
8
H
75.9
8
9
C
72.5
10
K
72.2
11
N
72.4
12
D
72.7
13
E
72.9
14
J
75.3
15
S
75.6
16
T
75.8
17
F
75.5
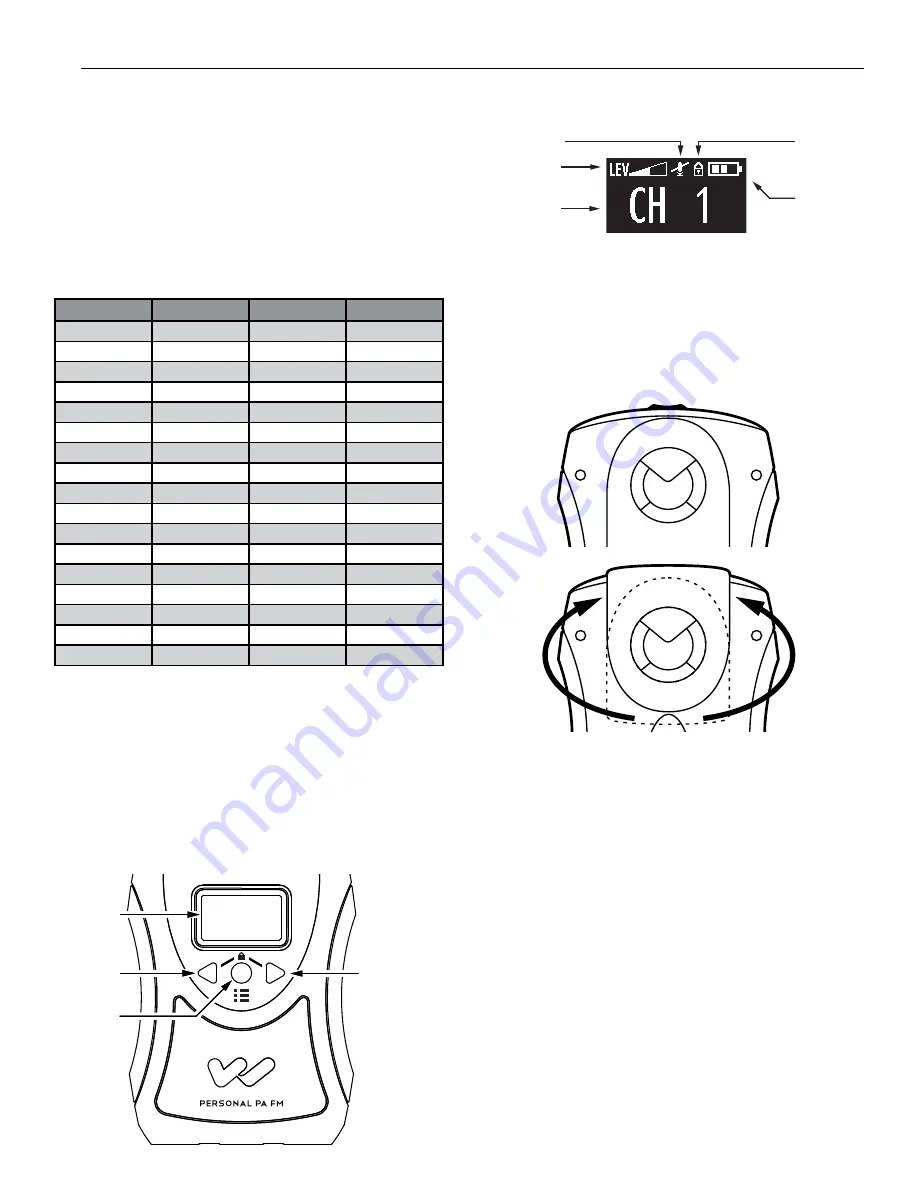
7. Change the transmitter to the desired channel. To access
the channel setting, push the menu button until you see the
channel displayed. Change the channel by pushing the left or
right arrow buttons. Push the menu button to save the channel.
(Figure D, Figure E) Note: To choose by frequency, see
Advanced Settings.
8. To access additional settings, push the menu button repeatedly
until you see the setting you want. If no buttons are pushed,
the screen will time-out and shut off.
Figure D: Menu Buttons
LEFT
ARROW
BUTTON
RIGHT
ARROW
BUTTON
MENU
BUTTON
OLED
DISPLAY
A309
Figure E: Menu Display
A312
MIC + AUX
AUDIO LEVEL
MIC MUTED
SETTINGS
LOCKED
TRANSMIT
CHANNEL
BATTERY
LIFE
9. To install the belt clip on the rear of the T46, position the belt
clip on the back of transmitter. Turn the belt clip 180˚ left or right
to secure the clip. The transmitter can now be clipped onto a
belt. To remove, turn the belt clip 180˚ so the open end of the
clip points up, and gently pull the belt clip off. (FIG. F)
Figure F: Belt Clip Installation
A119
A119
10. Position the headset microphone boom as close to the
speaker’s mouth as possible without actually touching. Lapel
clip microphones should be attached to a collar or lapel, as
close to the speaker’s mouth as possible.
11. When you pause from speaking, you may mute the microphone
by pressing the “ON/OFF/MUTE” button once momentarily. The
button will flash. The front display will also indicate the mic is
muted. To unmute the mic, press the button once momentarily
again. Note: The AUX Audio Input is unaffected by the mic
mute.
12. When the T46 transmitter is not being used, turn the unit OFF
by pressing and holding the “ON/OFF/MUTE” button for three
seconds. The Power On indicator will go off.


