PLA DL210NET Digi-Loop™ DSP Induction Loop Amplifier
17
4. CONFIGURATION MENU
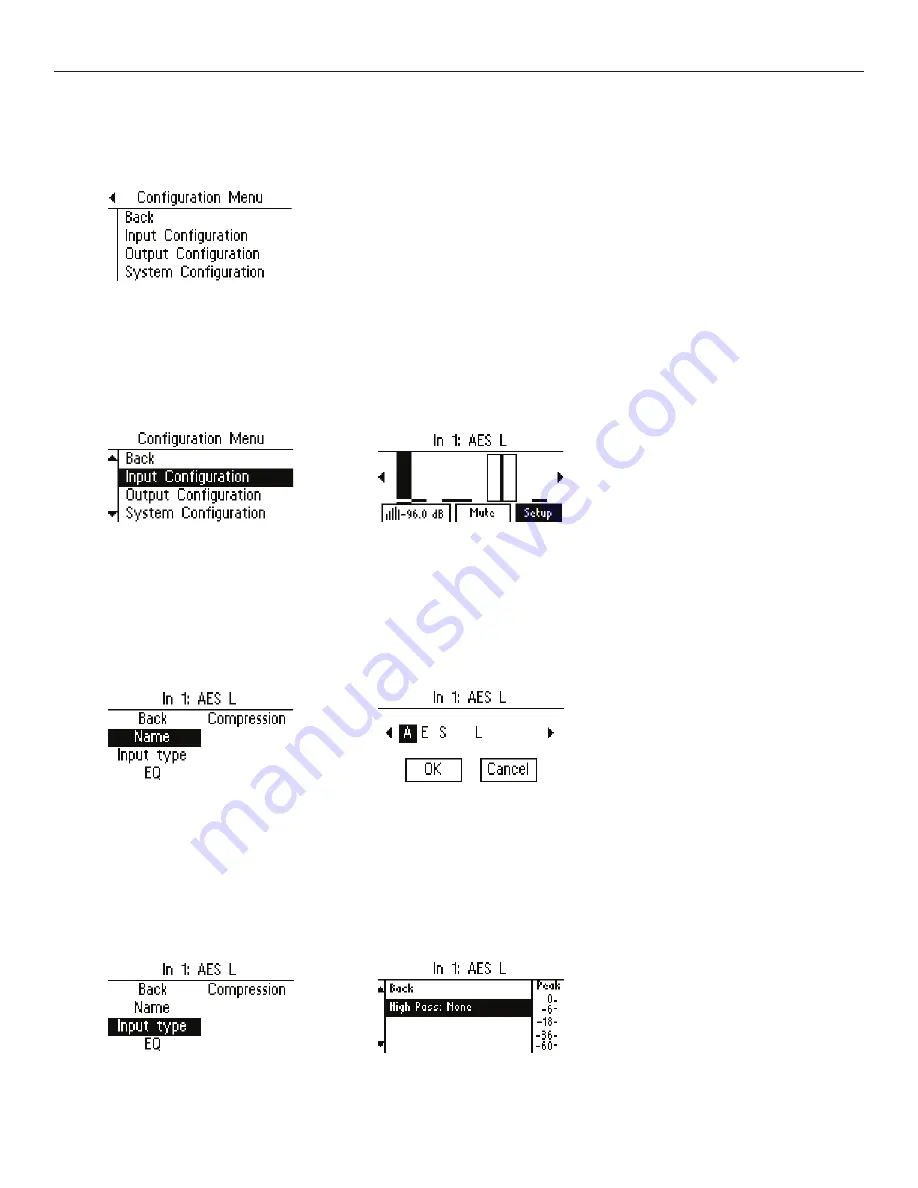
The configuration menu is where most of the amplifier settings and fine-tuning is performed. This menu is where Inputs and Outputs are
configured and system parameters are set up, stored and recalled.
5. INPUT CONFIGURATION
Each of the inputs can be configured individually. To set up Input 1, enter “Input Configuration”. Input 1 is the first input you can adjust,
so it is already selected. Rotate the knob to get to “Setup” and push the knob to enter setup.
5a1. Name
This allows you to name the Input. To change the name, select the first character and rotate the dial to change letters/numbers.
When the character you want is displayed, push the knob in to select that character and move to the next position. When finished
with the last character of the name, rotate knob until “OK” is highlighted; then push the knob in to save the name.
5a2. Input Type
The options for input type depend on which input you are setting up. For the AES input (shown below), the only adjustment is
a High Pass Filter crossover point (frequency) and attenuation. If setting up the Mic/Line inputs, the 3-pin Phoenix Connector
can be programmed to accept various levels: Line +4dBu, Line +8dBu, Line -10dBV, or Microphone. 48v Phantom Power is
automatically turned on when “Microphone” is selected. Before using a microphone, check the owner’s manual specifications
about the use of phantom power.


