Installing Your Furnace
18
Gas Supply and Piping (continued)
CHECKING THE GAS PIPING
Test all piping for leaks. When checking gas piping to the furnace
with gas pressure less than 1/2 PSI, shut off manual gas valve to
the furnace. If gas piping is to be checked with the pressure at or
above 1/2 PSI, the furnace and manual shutoff valve must be
disconnected during testing. (SEE WARNING). Apply soap
solution (or a liquid detergent) to each joint. Bubbles forming
indicate a leak. Correct even the slightest leak at once.
WARNING:
Danger of property damage, bodily
injury or death. Never use a match or open flame
to test for leaks. Never exceed specified pressures
for testing. Higher pressures may damage the gas
valve and cause over-firing which may result in
component(s) failure. L.P. gas is heavier than air
and may settle in any low area, including open
depressions and it will remain there unless the area
is ventilated.
Never attempt start-up of unit before thoroughly
ventilating the area and smelling near the floor for
gas odor.
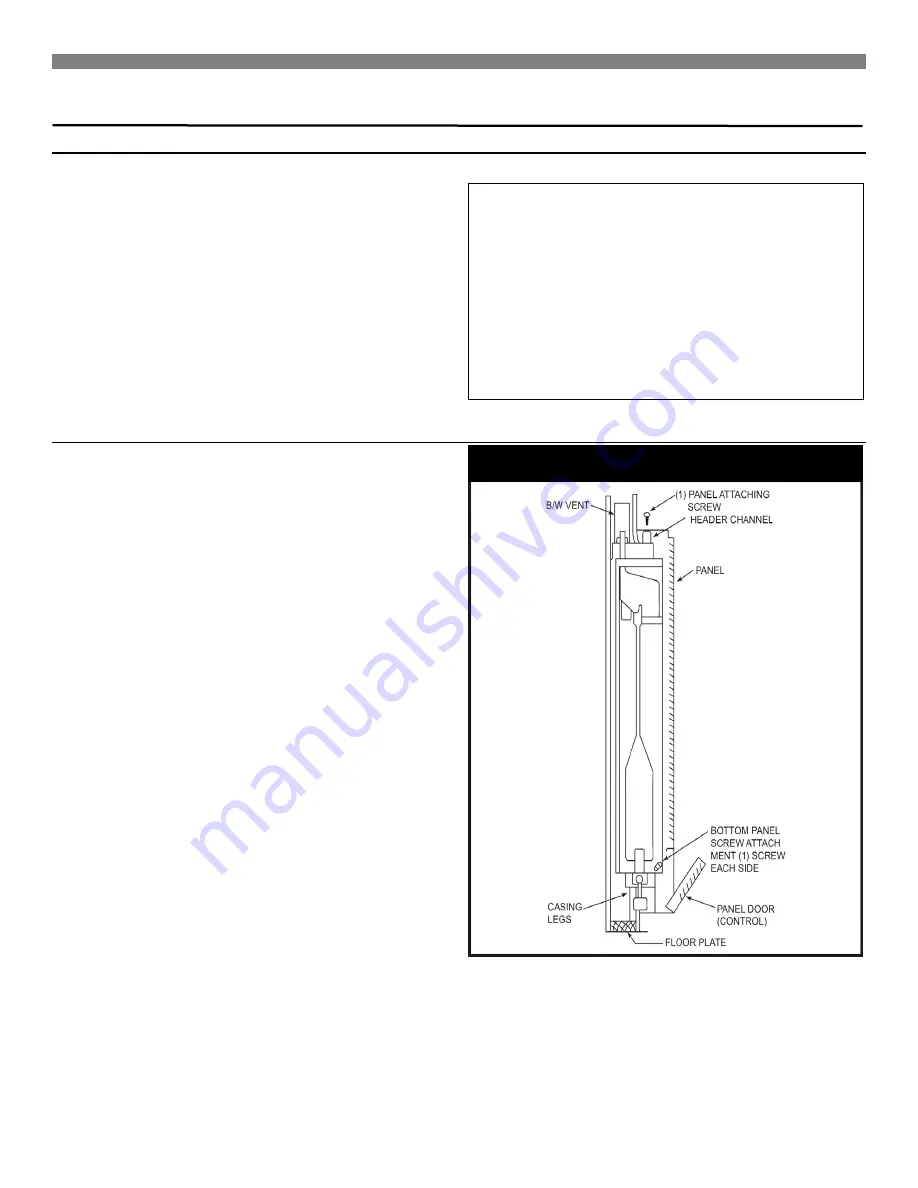
Front Panel Installation
Place the front panel top over the channel on the header plate,
as shown in Figure 16. Press the panel tight against wall, and
secure it to the header channel with the screw provided in final
assembly package. Open the control door at bottom of panel
and fasten the panel at each side through slots in flanges with
screws provided.
Attach handle to the front panel door with the screw provided.
Install the second face panel in same manner for 500 Series
models.
FIGURE 16 – Panel Placement


