Page 8
Rev. 5/2021
www.willoughby-ind.com
Installation & Operation Manual
Aquafount
®
180° Washfountain
WAF-3603-PSL-FT
Willoughby Industries, Inc.
TOLL FREE (800) 428-4065
Ɣ/2&$/
(317) 875-0830
Ɣ)$;
(317) 875-0837
Step 2: Mounting Basin
3DUWVVXSSOLHG
• Solid surface basin
• Valve head kit
• Pedestal assembly
Installation Instructions (cont.)
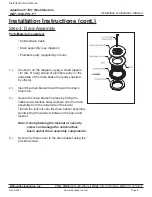
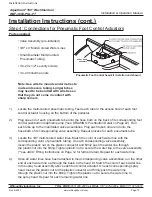
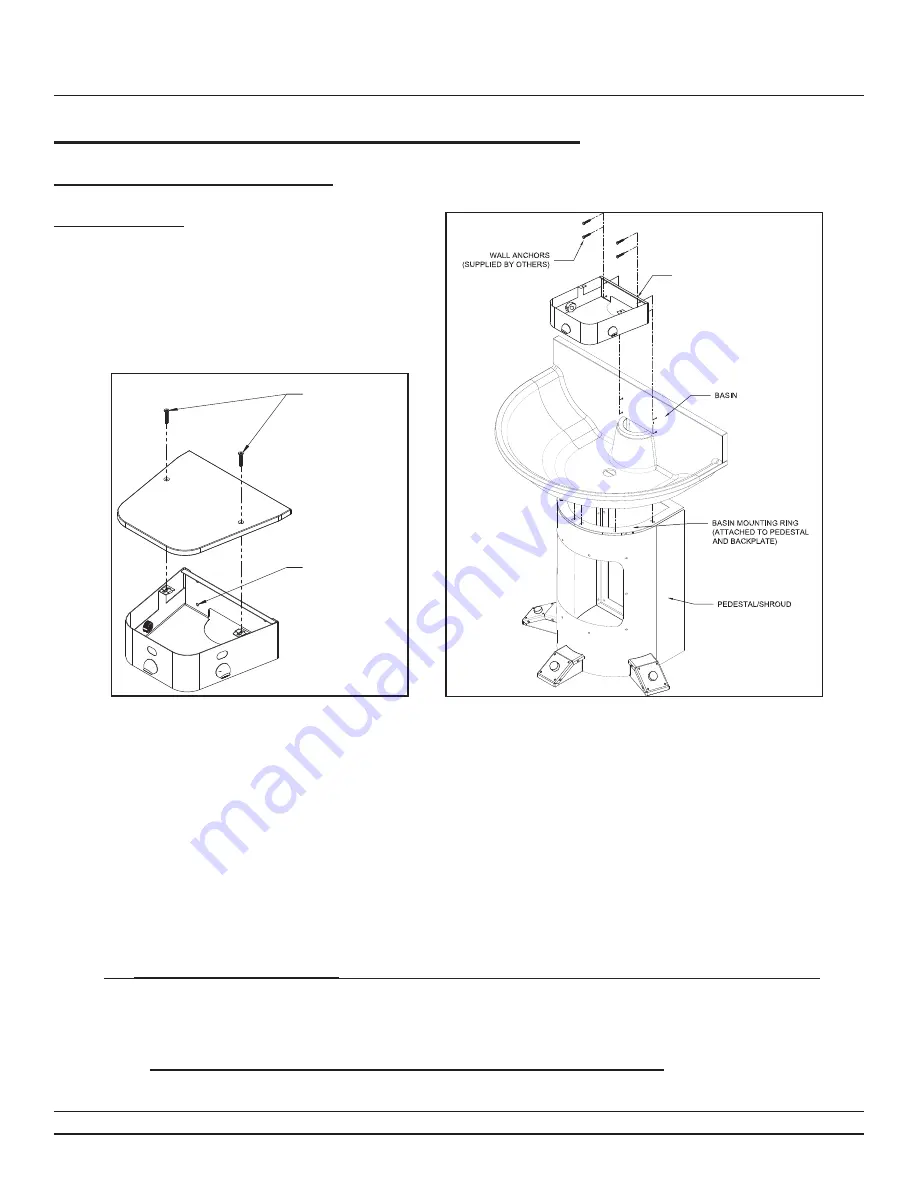
1.) Remove top cover from the valve head kit by loosening the security screws as shown in the
above-left diagram. Set the top cover, screws, and nuts aside.
2.) With the help of an assistant, place basin on top ledge of the pedestal assembly.
3.)
&DUHIXOO\PDUNPRXQWLQJKROHVRQZDOOWKURXJKWKHEDVLQWKHQUHPRYHWKHEDVLQDQGGULOOWKH
mounting holes.
4.) Replace the basin and valve head kit as shown in the above-right diagram.
5.)
)DVWHQZDOODQFKRUVVXSSOLHGE\RWKHUVWKURXJKWKHEDVLQDQGYDOYHKHDGNLWKROHVVHFXUHO\
but
'212729(57,*+7(1
; this can damage the solid surface basin and valve head kit.
6.) Secure the basin to the pedestal assembly by fastening the included screws up through the
pedestal basin mounting ring into the threaded inserts on the bottom of the basin.
Note: BE SURE to use the screws included with the washfountain. Using longer screws
than those provided can damage the solid surface basin.
Mounting the basin and valve head kit to
the backplate and wall.
VALVE HEAD KIT
6+,33,1*%2/76
6(&85,7<6&5(:6
Removing the top cover.
VALVE HEAD KIT
Installation Instructions


