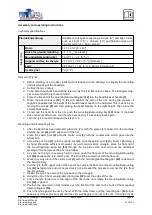
moved by a few centimetres until you can let go of the tyre and can use both hands on the
mounting/demounting bar.
12. Continue around the rim until the tyre is mounted over the edge of the bead. Repeat this pro-
cedure on the second side wall, to mount the tyre entirely.
Important!
As soon as the side wall starts to sit whilst mounting the tyre, it needs to stretch more and
thus is harder to mount. To avoid this, push the tyre down so that it cannot sit on the top edge of the
rim.
Note:
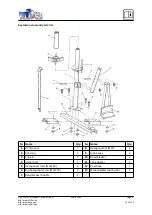
The bead, which is located on the upper side of the mounting/demounting bar
(13),
holds the
bar hooked into the edge of the rim. The tyre bead is on the upper side (flat piece of the mounting end
of the bar) and against the bent lug pin
(3)
when you mount the tyre to the rim.
Important notice:
The reprint or reproduction, even of excerpts, and any commercial use, even in part of this instructions
manual require the written permission of WilTec Wildanger Technik GmbH.
© by WilTec Wildanger Technik GmbH
Item 61309
Page 6
http://www.WilTec.de
http://www.aoyue.eu
02 2021
-1


