background image

WinBook C Series

User’s Manual

Icons like this can be found
throughout the entire manual as
a sidebar item pertaining to a
question or concept being
explained on that page.

System Restore

One of the powerful utilities
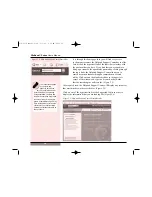
within the Help and Support Center is the System Restore utility. With this
utility, you can recover from fatal errors that are the direct result of failed
hardware or software installations. Your operating system automatically
sets restore points whenever you install a new piece of software or add a
new hardware device. If you find yourself in a situation in which your
computer is malfunctioning after you have recently installed something,
running System Restore from the Help and Support Center will allow you
to revert back to a point before the installation occurred, thus protecting
your valuable data and the integrity of your system.

Why Use the Help and Support Center?

• Most likely the answer to your question can already be answered 

within the Help and Support Center.

• The Help and Support Center gives you the user, the power to solve

your own problem or answer your own question without having to 
rely on the traditional methods of support. (i.e. technical support phone
call, surfing the internet for answers)

34

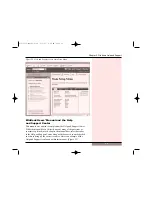
Figure 2.5: Help and Support Center Icon

Search Help & Support
Center using keywords:

WinBook BIOS

WinBook Technical
Support is still an 

alternative resource 

for your questions. Refer to

the Quickstart Guide document
that came with your WinBook for
the toll free telephone support 
number.

C-Series manual 0728  8/6/03  9:04 AM  Page 34

Summary of Contents for C Series

Page 1: ...and Support 29 Using the Help and Support Center 31 WinBook Users Manual and the Help and Support Center 33 System Restore 34 Why Use the Help and Support Center 34 Chapter 3 Mobile Computing 35 Battery Operation Charging Changing 36 Power Management WinBook Notebook Low Power Measures Standby and Hibernate Modes 39 Safety Operation 41 Travel Travel Tips 43 Chapter 4 Upgrading Your System 47 Memor...

Page 2: ...ent does cause harmful interference to radio or television reception which can be determined by turning the equipment off and on the user is encouraged to try to correct the interference by one or more of the following measures Reorient or relocate receiving antenna Increase the separation between equipment and receiver Connect the equipment into an outlet on a circuit different from that to which...

Page 3: ... using your system Whether or not you are an experienced user you should consult the Help and Support Center if you encounter any problems with your WinBook notebook You will find answers there to many common problems or errors Before proceeding you should be aware of some of the conventions of usage in this manual Specific keyboard keys to be typed are indicated in square brackets Tab Combination...

Page 4: ... as tips and problem reso lutions This symbol will help you to directly find the information you are looking for by supplying the keywords that should be searched for within the Help and Support Center For specific information on how to use the Help and Support Center refer to the Windows Help and Support chapter in this manual The exclamation symbol identifies information which is important for y...

Page 5: ...proper cleaning solutions or sprays only to the cloth not to the computer or its components If there is ever a need to disconnect internal components other than those mentioned in the instructions that came with your system please have this done by a qualified service technician You should never attempt to physically repair a CD ROM CD R RW or DVD drive or diskette drive yourself Do not attempt to...

Page 6: ...ts Use duplication or disclosure by the U S Government is subject to restrictions as set forth in subparagraph c 1 ii of the Rights in Technical Data and Computer Software clause at DFARS 252 227 7013 Acknowledgements WinBook is a registered trademark of WinBook Computer Corporation MS DOS Internet Explorer Windows XP is a registered trademark of Microsoft Corporation Active Desktop is a registere...

Page 7: ...Chapter 1 Getting Started 7 Chapter 1 Getting Started C Series manual 0728 8 6 03 9 03 AM Page 7 ...

Page 8: ...ous use of a keyboard may cause repetitive stress injuries or discomfort including carpal tunnel syndrome tendonitis and tenosynovitis You should seek medical advice if you feel any aching numbing or tingling in your arms wrists or hands Suggestions for maximizing comfort in using a keyboard include Take frequent breaks from typing Maintain a straight wrist position Avoid resting on your wrists wh...

Page 9: ...s ordered Note The WinBook notebook uses proprietary accessories that are designed specifically for your WinBook computer such as a port replicator and you should only use those items that have been approved for your computer Contact WinBook for information about obtaining approved accessories and upgrades If you use items that are not approved for use with this computer you might cause the comput...

Page 10: ...ications when the unit is booted into Windows The factory default application for easy start button 1 is the Internet Browser Pressing this button will launch Microsoft Internet Explorer The default application for easy start button 2 is the Email client Pressing this button will launch Microsoft Outlook Express Easy start buttons 3 4 and 5 are undefined Figure 1 1 Front View of the Closed WinBook...

Page 11: ...al microphone will disable the built in microphone It is recommended that you purchase an external microphone for applications such as speech recognition that require precise input quality The Audio Line Out Jack allows you to direct audio output to a stereo headphone powered external speakers or an earphone set You will need to use a 1 8 phono plug for this connection If your speakers or earphone...

Page 12: ...e include many storage devices such as external hard drives and optical drives as well as digital cameras and other electronic devices The IR infrared Port allows you to connect to another system or device using IR technology You must place the port within one or two feet of the other IR port for proper communication 12 Although you can con nect up to 127 devices through the USB port not all USB d...

Page 13: ...ut your WinBook notebook and keeps the interior within proper operating temperatures Do not block this vent when the WinBook notebook is in use Do not operate your WinBook notebook inside a tight fitting cover or case that blocks the cooling vent The Kensington Lock Slot allows you to connect a special computer lock to secure your system You can purchase a lock at most computer retailers This lock...

Page 14: ...plied by WinBook The External VGA Port allows you to connect any standard computer monitor to your system You can display output simultaneously on both the LCD and the external monitor or toggle between the two screens Refer to the Help and Support Center within windows for directions on how to adjust your display settings The S Video Port allows you to connect your WinBook to a television display...

Page 15: ...s of the notebook The Cooling Fan Vents allows airflow into and throughout your notebook and help to keep the interior within proper operating temperatures Do not block these vents when the WinBook is in use Do not operate your note book inside a tight fitting cover or case that blocks the cooling vents The Hard Disk Drive is removable and can be upgraded to allow for greater storage capacity Chap...

Page 16: ...evice Indicators show the current status of the computer s devices CD DVD A blue light indicates that the optical drive is in use Hard Disk A blue light indicates that the hard disk drive is being read from or written to WinBook C Series User s Manual The sharpness of the screen will vary with your viewing angle Try moving the display panel slightly forwards or back to find the optimal contrast 16...

Page 17: ...o right AC Power Lights green when the computer is plugged into a functioning electrical outlet Flashes green when the computer is in Standby mode while plugged into an electrical outlet Battery Power Lights green when the computer is operating on battery power Flashes green when the computer is in Standby mode while operat ing on battery power Battery Charge Lights orange while the battery is cha...

Page 18: ...ns located just below the touchpad provide left and right mouse buttons for your touchpad See the section below on pointing devices for more information 18 Figure 1 7 Device Indicator Panel Battery Charge Battery Power AC Power CD DVD Hard Disk Num Lock Caps Lock Scroll Lock Wireless LAN Card Reader Microphone C Series manual 0728 8 6 03 9 03 AM Page 18 ...

Page 19: ... The Keyboard Figure 1 8 Your main interface with your computer will be your keyboard If you are unfamiliar with the standard PC keyboard some of its keys are explained in this section The keyboard has all the standard computer typing keys and some control keys If you are not familiar with the computer control keys the major ones are discussed below The Alt and Ctrl keys like the Shift key alter t...

Page 20: ...rt and delete characters Your computer also has an embedded numeric keypad This numeric keypad is printed in blue on the keyboard If the Num Lock key is engaged the pad will allow you to type numbers as you would on a 10 keypad If the NumLock is not engaged the keys perform their normal alphanumeric function Your keyboard also has three Windows keys 2 Start keys which bear the Windows logo and all...

Page 21: ...d to the left of the Ctrl key in conjunction with the key for the specific control function or by holding the Fn key while pressing the key for the specific control function KEY FUNCTION S Fn F3 Decrease audio level Fn F4 Increase audio level Fn F5 Toggle the display output between the built in LCD screen and external monitors Fn F6 Decreases LCD brightness level Fn F7 Increases LCD brightness lev...

Page 22: ...You can use the buttons below the touchpad as left and right mouse buttons You can also tap lightly on the touchpad which the system will recognize as a left mouse click You can click and drag an item with the touchpad by pointing at the item tapping to select it and then while holding your finger on the pad sliding your finger in the direction of the movement desired No matter which pointing devi...

Page 23: ...ce a slight loss of clarity when using a resolution below the default resolution for your LCD display Notice that when you put your computer into DOS mode which uses the VGA resolution of 640 x 480 as a default the display will be stretched to fit the full screen When you are displaying the video on the built in screen you cannot choose a higher resolution than the standard resolution However you ...

Page 24: ... your hard drive for that purpose An optical drive uses data CDs that are capable of holding hundreds of megabytes of data DVD disks can hold several gigabytes of information The high speed access rate of your optical drive enables it to search data and retrieve the specific data that you want very quickly Their high capacity and fast speed makes CD s very useful for programs such as encyclopedias...

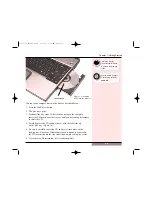
Page 25: ...the disc tray Figure 1 9 5 Be sure to carefully center the CD and press it into place on the loading tray Since your WinBook notebook is meant to be portable the CD is secured onto the tray rather than simply resting in a recess 6 Close the tray Be certain that it is closed completely 25 Chapter 1 Getting Started Figure 1 9 Loading a CD into the drawer Label side up Dirt in the CD tray can affect ...

Page 26: ...n be retrieved Slide the tray back into place until you feel it click This method is designed to be used occasionally for an emergency retrieval of a disk and should not be used as a regular method of removing disks Your drive will last longer if you remove the disk using the normal unloading method Writable Optical Drive If your unit came with a writable optical drive you will have the ability to...

Page 27: ...dy own software that you will be installing on your new WinBook notebook system or if you buy software at a later date you will need to know how to install that software on the WinBook notebook system Follow the instructions provided by the software manufacturer Most current software on CD ROM will start automatically once the CD is inserted and recognized by your WinBook notebook 27 Windows softw...

Page 28: ...28 C Series manual 0728 8 6 03 9 04 AM Page 28 ...

Page 29: ...Chapter 2 Windows Help and Support 29 Chapter 2 Windows Help and Support C Series manual 0728 8 6 03 9 04 AM Page 29 ...

Page 30: ...g its capabilities in the following ways Through the Remote Assistance feature a 3rd party application technical support representative could connect to your computer with your permission then see your files control your mouse and keyboard and chat online with you to discuss your problem Through Windows Update your computer can always be up to date with the latest patches and drivers from Microsof...

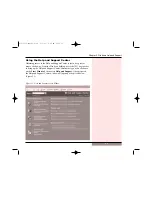
Page 31: ...e F1 key in order to bring up the Help and Support Center Alternatively you can click once on the Start Menu and then select Help and Support Once activated the Help and Support Center window will open up as depicted below Figure 2 1 31 Chapter 2 Windows Help and Support Figure 2 1 Help and Support Center Window C Series manual 0728 8 6 03 9 04 AM Page 31 ...

Page 32: ...gure 2 2 After a quick scan the Help and Support Center will display any resources that match the keywords searched for Figure 2 3 Click on one of the hypertext links of the Suggested Topics in order to display the information that you are looking for Figure 2 4 WinBook C Series User s Manual 32 Figure 2 2 Help and Support Center Search Box Figure 2 3 Help and Support Center Search Results The res...

Page 33: ...epts explained in each chapter the manual does refer the reader to the Help and Support Center along with the exact keywords needed in order to bring up the correct resource Here is an example of the Help and Support icon found within this manual Figure 2 5 33 Chapter 2 Windows Help and Support Figure 2 4 Help and Support Center Main Setup Menu C Series manual 0728 8 6 03 9 04 AM Page 33 ...

Page 34: ...e from the Help and Support Center will allow you to revert back to a point before the installation occurred thus protecting your valuable data and the integrity of your system Why Use the Help and Support Center Most likely the answer to your question can already be answered within the Help and Support Center The Help and Support Center gives you the user the power to solve your own problem or an...

Page 35: ...Chapter 3 Mobile Computing 35 Chapter 3 Mobile Computing C Series manual 0728 8 6 03 9 04 AM Page 35 ...

Page 36: ... It takes about 3 hours to fully recharge the primary battery when the system is powered down or in hibernate mode longer if you are using the system about 4 hours or more If the system temper ature exceeds a safe level while the battery is charging the system will stop the charging process in order to protect the battery Once the battery temperature falls back within the safe range the battery ch...

Page 37: ...book This second battery can be installed in the battery bay Figure 3 1 1 Shut down the unit or place it in the hibernate mode Disconnect the AC Adapter Close the LCD panel and turn the unit upside down The front of the unit should be toward you 2 Slide both release latches towards the outer edges of the unit Note The right release latch is a fixed position latch This latch will remain in place wh...

Page 38: ...ay channel Gently slide the battery towards the center of the unit until an audible click indicates that the latches have been secured 5 Reconnect the AC Adapter 38 Figure 3 2 Changing the Battery Above Slide the release latches to the edge of the notebook Top right Lift the battery out Right Remove the battery C Series manual 0728 8 6 03 9 04 AM Page 38 ...

Page 39: ...eful in conserving battery life ACPI also allows certain applications to exert control over power management Taking advantage of power management features can have a significant effect on the battery use you can get on a single charge A fully charged battery should provide you over two hours of system use but aggressive power management can extend that time There are some measures that you can tak...

Page 40: ...ery power remain the beeps will accelerate When you receive the low power warnings you should shut down your system hibernate your system or connect to a power source If you respond immediately after receiving the warnings you should have sufficient power to shut down completely including saving large files Do not attempt to restart your system until you have connected to the AC adapter or changed...

Page 41: ...you have enabled such an option Safety Operation The WinBook notebook does not have a handle or a rough surface for a sure grip so use a carrying case when traveling At times you may want to put both the case and the WinBook notebook within a larger briefcase to conceal the system and reduce the risk of theft Do not use this product in an unstable location Serious damage could result if the system...

Page 42: ... the battery life If a battery module is left in the sun and gets quite hot it is apt to fail to charge This is due to a safety switch in the battery module that is aimed at preventing over heating due to over charging Once the battery cools down you will be able to charge it In extremely cold weather you may find that it takes longer for the battery to charge or that it does not fully charge Slot...

Page 43: ...e lighter socket are available For information contact Sales at the number listed on the Quickstart Guide sheet that came with your system Contact technical support if a The power cord appears damaged or frayed b Liquid has been spilled on the product c The product does not operate normally d The product has been dropped or the cabinet impeached e The product shows a distinct change in performance...

Page 44: ...phones are now being upgraded to accept modem fax connection from portable computers Hand your WinBook notebook to an airport attendant rather than setting it on the conveyor for security checks This will help reduce the possibility of theft Note X rays will not damage your system Password protect your system with at least one level of password to help preserve your data Consider purchasing a lock...

Page 45: ...ootable floppy or CD A spare floppy or two for easy file exchange if you are using the optional USB Floppy Disk Drive Manuals for any critical software printed or CD including Windows Remember to Charge your battery Change your power management settings to more aggressive settings if appropriate Transfer the working files you will need Change your security settings passwords and Floppy Disk Contro...

Page 46: ...46 C Series manual 0728 8 6 03 9 04 AM Page 46 ...

Page 47: ...Chapter 4 Upgrading Your System 47 Chapter 4 Upgrading Your System C Series manual 0728 8 6 03 9 04 AM Page 47 ...

Page 48: ...y slots The chart below shows you some of the possible memory configurations for your WinBook notebook Module 1 Module 2 Total 128MB 128MB 256MB 256MB 256MB 512MB 512MB 512MB 1024MB Your WinBook notebook requires SO DIMM modules You can con tact the Sales department at the number provided on your Quickstart Guide brochure to find the right SO DIMM modules for your system 48 Figure 4 1 Bottom of th...

Page 49: ...gle the card slightly upwards and out from its edge connector slot Figure 4 2 Store the card in the anti static bag that contains your new module s 8 To install a new memory card hold the card with its edge con nector toward the edge connec tor slot of the compartment In order to help you orient the card the edge connector has been made with two unequal length sections You will only be able to ins...

Page 50: ...Line up the battery for insertion into the battery bay channel Gently slide the battery towards the center of the unit until an audible click indicates that the latches have been secured 14 Turn the unit right side up Connect your power cord if desired and restart the computer Your WinBook notebook should automatically register the new memory If the memory size indicated during the POST Power On S...

Page 51: ...an help the users to maintain security and configuration options To maintain security in an environment where drives are swapped you should consider enabling the password option in the Setup program WARNING Whenever you handle memory components hard drive SO DIMM modules from your system you should be careful of excess static It is advisable to wear a grounding strap if you have one available If y...

Page 52: ...ce Figure 4 4 5 Remove the single screw that attaches the rail kit to the drive bay Once the screw is removed slide the rail kit to the left side of the notebook to disengage the drive pins from the notebook header Gently lift the rail kit up and out of the drive bay 6 The drive is attached to the rail kit by 4 screws Remove the screws and set them in a safe place Slide the drive out of the rail k...

Page 53: ...e screw hole in the case 10 Secure the rail kit with the single screw 11 Replace the hard drive cover by laying it flat on the compartment opening and sliding it towards the center of the unit until the screw holes are aligned with the cover holes Insert and tighten the 2 compartment cover screws 12 Finished Chapter 4 Upgrading Your System 53 Figure 4 4 Replacing the Hard Disk Drive Installing a n...

Page 54: ...C adapter 2 Disconnect all peripherals and carefully turn the unit over 3 Engage the battery release latches and carefully slide the battery out of the bay 4 The Mini PCI slot is within the expansion compartment which is located in the middle of the unit Figure 4 5 5 Remove the single screw from the expansion compartment cover and set it in a safe place 54 Figure 4 5 Bottom of the WinBook note boo...

Page 55: ...s of the connector secure the card in place 10 Attach the wireless antenna lead to the connector labled main on the Mini PCI card Replace the cover on the compartment The hole in the expansion compartment cover should align with the screw hole in the system case 11 Replace and tighten the single screw 12 Line up the battery for insertion into the battery bay channel Gently slide the battery toward...

Page 56: ...resides on chips can be upgraded to provide enhancements These upgrades can be downloaded from the WinBook Web Page www winbookcorp com or obtained on diskette Technical Support can provide you with help in erasing the current firmware and replacing it with the updated version Use the Technical Support phone number provided on your Quickstart Guide to get assistance in upgrading your firmware C Se...

Page 57: ...Index 57 Index C Series manual 0728 8 6 03 9 05 AM Page 57 ...

Page 58: ...yboard 3 5 8 16 19 21 30 Lock Slot 13 Memory 11 48 51 56 58 Microphone 10 11 17 18 24 External Microphone 11 24 Modem 13 42 44 45 Monitor 8 14 19 23 External Monitor 14 23 Mouse 17 18 21 22 30 31 See Pointing Devices 22 Passwords 45 Boot 19 Pointing Devices 18 22 Port Replicator 8 9 RAM 15 16 40 41 48 49 Safety 41 42 Speakers 11 16 24 External Speakers 11 24 Standby 17 39 41 Temperature 36 42 Touc...

Reviews: