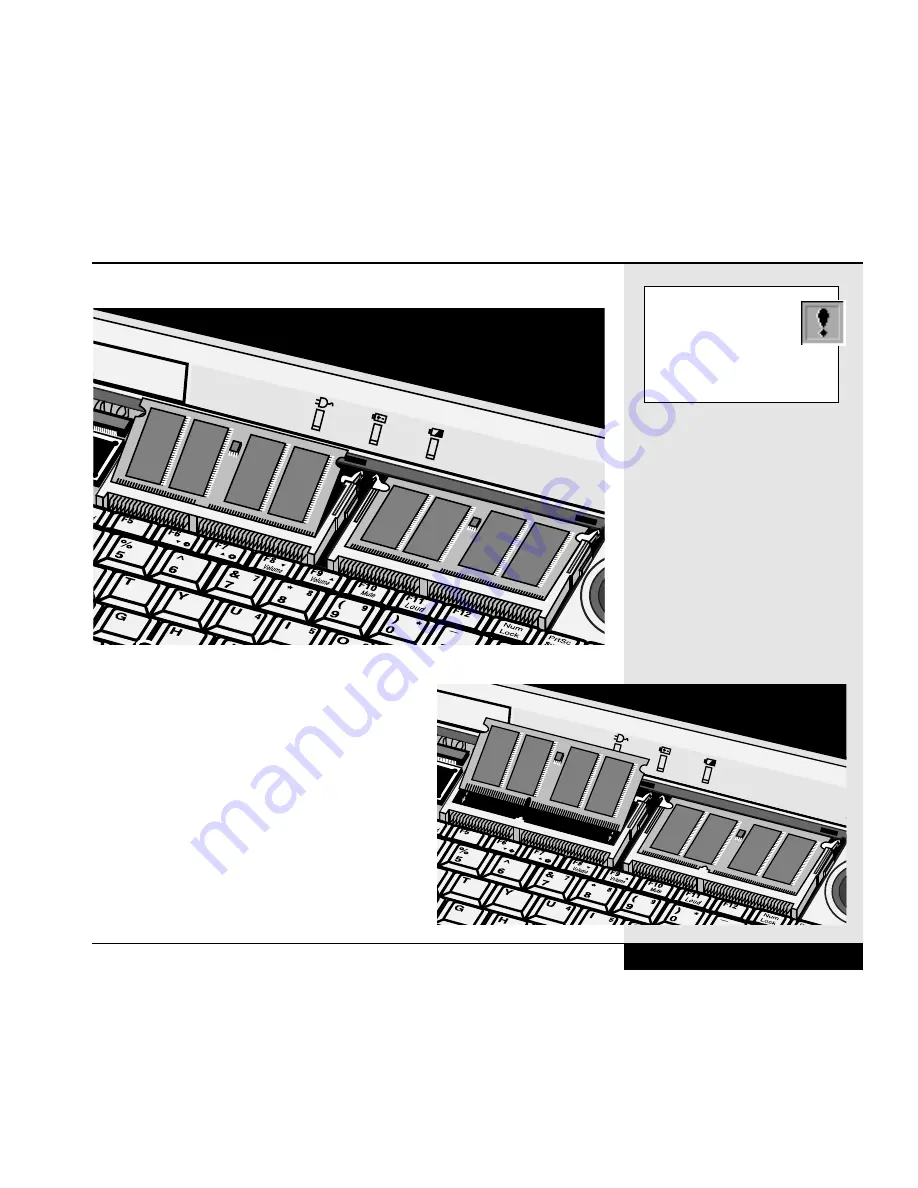
slide it from its edge connector slot. Store
the card in the anti-static bag that contains
your new card(s). (Figure 7.4)
8. To install the new memory card, hold the
card with its gold edge connector toward the
edge connector slot of the compartment. In
order to help you orient the card, the edge
connector has been made with two unequal-
length sections. The longer section is closer
to the right side of the machine (as you face
the bottom of the unit). (Figure 7.5)
7.5
Chapter 7: Upgrading
7.5
Figure 7.4: Removing the Old Memory Card
Figure 7.5: Inserting the New Memory Card
Be careful when inserting
or removing a SO-DIMM
module. Forcing a SO-
DIMM module in or out of a
socket can damage the socket
and/or the SO-DIMM module.
Summary of Contents for XL2
Page 1: ...User s Manual for notebook computers ...
Page 6: ...Table of Contents 6 Table of Contents ...
Page 11: ...Preface v ...
Page 13: ...Chapter One Getting Started Chapter 1 Getting Started 1 1 ...
Page 40: ...Chapter Two Basic Computing Chapter 2 Basic Computing 2 1 ...
Page 60: ...Chapter Three Mobile Computing Chapter 3 Mobile Computing 3 1 ...
Page 80: ...Chapter Four Desktop Operation Chapter 4 Desktop Operation 4 1 ...
Page 98: ...Chapter 4 Desktop Operation 4 19 ...
Page 99: ...Chapter Five PC Cards PCMCIA Chapter 5 PC Cards PCMCIA 5 1 ...
Page 113: ...Chapter Six Video Settings Chapter 6 Video Settings 6 1 ...
Page 123: ...Chapter Seven Upgrading Chapter 7 Upgrading 7 1 ...
Page 135: ...7 13 Chapter 7 Upgrading ...
Page 160: ...Chapter Nine Troubleshooting Chapter 9 Troubleshooting 9 1 ...
Page 187: ...Glossary Glossary G 1 ...
Page 204: ...Index Index I 1 ...
Page 211: ...WinBook Corporation 2701 Charter Street Hilliard Ohio 43228 ...


