background image


PSA /go 

13 


In the section ‘

BCR parameters’

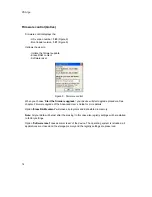
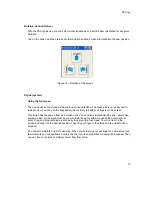
 BCR Control allows the user to test modification of the parame-

ters of BCR module. You can read the settings with 

‘Read’

 button select a parameter and set the 

value for this parameter and then write changes to BCR module memory using the 

‘Write’

 button 

(see Figure 8). 

You can easily disable/enable reading of some codes. To set the base (factory) settings use 

‘Reset’

 button – your changes will be lost. 

Note:

 Changes of BCR parameters are temporary. After closing BCR Control the changes are lost. 


Figure 8 - BCR parameters 

Summary of Contents for PSA /go

Page 1: ...PSA go User s Guide ...

Page 2: ... GmbH 2007 The reproduction transmission or use of this document or its contents is not permitted without express authority Offenders will be liable for damages All rights including rights created by patent grant or registration of a utility model or design are reserved Delivery subject to availability technical modifications possible ...

Page 3: ...cation in the system tray 6 Using keyboard 7 Virtual keyboard 7 Persistent Storages 9 Persistent Storage Memory 9 miniSD Card 9 Autorun Feature 9 Software Equipment 10 Control Panel Utilities 10 Action Keys Gotive 11 Action Keys default settings 12 BCR Control Gotive 12 Firmware control Gotive 14 LCD Control Gotive 15 Power 16 Main Battery 16 Schemes 17 Display Advanced Backlight 18 Rotation Contr...

Page 4: ...goods no longer have to be removed from the shopping cart and placed on the conveyor belt Also self scanning offers the possibility to apply customer specific prices to the products Thus the PSA go increases customer satisfaction and customer loyalty due to personal pricing Through the unique all in one integration of a powerful handheld computer wireless networking WLAN and automatic data capture...

Page 5: ...duct Design and Development The PSA go system is manufactured without use of FCKW and CKW and is manufactured predominantly of components and materials that are recyclable The processed plastic materials are for the most part re cyclable The precious metals can also be recovered For purposes of reuse it is helpful not to place any additional stickers on the device Wincor Nixdorf disposes of old ma...

Page 6: ...fore entering in the suspend mode To put the device to suspend mode press the suspend button Or press the Start menu Sus pend The device also goes to suspend state after predefined time of inactivity This time can be configured in the Control Panel for information on its configuring see the section Software equip ment Power Properties To wake up the PSA go device from suspend press the suspend but...

Page 7: ... First boot after restoring power Reset button pressed Running Erase RAM from Firm ware Control Action Upgrade of OS image Running Reset from Firmware Control RAM File system Erased Preserved Operational memory Erased Erased Memory Persistent Storage Preserved Preserved ...

Page 8: ...g until use and do not jumble it Conditions to avoid Heat above 60 C or incinerate Deform mutilate crush pierce and disassemble Short circuit Prolonged exposure to humid conditions Temperature range Continuous Occasional in storage 20 20 C 30 45 C during discharge 20 60 C 20 70 C during charge 0 45 C 0 50 C Charging policy of PSA go device How to efficiently charge the battery Insert PSA go device...

Page 9: ...n in the system tray In order for the user to see the battery status easily the following icons are displayed in system tray See the next table for their meaning Icon Meaning Description None Battery normal Normal status of battery device can be used Battery low Battery allows the device to be used but it should be recharged at first possibility Battery critical Battery has charge enough only to p...

Page 10: ...ion Virtual keyboard Virtual keyboard You can show or hide virtual keyboard by tapping icon in the tray bar on the desktop of the de vice A menu with the following items is displayed see next picture Standard Keyboard Hide Input Panel Choose the desired action with keyboard Figure 1 Virtual keyboard menu Note Default action for Action Key 1 is the show and hide keyboard action ...

Page 11: ...PSA go 8 Standard keyboard This one is default by the operating system It can be used in all screen rotations Stylus is necessary for use Figure 2 Standard virtual keyboard ...

Page 12: ...D card slot is accessible only via the battery compartment so inserting and remov ing the miniSD card erases the RAM of the device Autorun Feature The PSA go device has Autorun Feature After restoring power or hard reset the operating sys tem searches for the file autorun exe on all persistent storages When such a file is found it is exe cuted The autorun file stored in Persistent Storage has a hi...

Page 13: ...t Control Panel Figure 3 Run Control Panel Figure 4 Control Panel Note All the applications and utilities marked with Gotive are made and supplied by Gotive These applications and utilities are fully supported by Gotive Support All the other utilities without the mark or marked with system are provided by Windows CE system or by other solution providers ...

Page 14: ...n Keys on PSA go device As action you can choose from Running an application of your choice or Simulate pressing a keyboard key like Shift Ctrl or No action If you choose Run application for a button you have to select also the application executable file Consequently whenever you push the button the desired application will be started In Simulate keyboard simply choose a key or combination of key...

Page 15: ...r Code Reader Control allows testing barcode scanner functionality Figure 7 BCR Control Tapping of Scan button starts the bar code scanning You can simply retrieve bar code or check BCR functionality If you tap on Aim button BCR module starts aiming It means that instead of a scanning ray BCR module emits an aiming ray You can easily aim on bar code and than tap Scan button to retrieve the code No...

Page 16: ... a parameter and set the value for this parameter and then write changes to BCR module memory using the Write button see Figure 8 You can easily disable enable reading of some codes To set the base factory settings use Reset button your changes will be lost Note Changes of BCR parameters are temporary After closing BCR Control the changes are lost Figure 8 BCR parameters ...
Page 17: ... device will start upgrade procedure See chapter Firmware upgrade of the Advanced User s Guide for more details Option Erase RAM content will erase all programs and data stored in memory Note All your data will be lost after the erasing In this case also registry settings will be restarted to factory settings Option Software reset causes warm reset of the device The operating system is reloaded al...

Page 18: ...PSA go 15 LCD Control Gotive LCD Control allows a user to set backlight of the PSA go Figure 10 Set Backlight and Contrast ...

Page 19: ... important Main Battery current power status overview of main battery Schemes Settings for PSA go Power schemes Main Battery This tab shows the Main Battery status battery capacity in percents voltage charge current nega tive number means discharging and battery temperature Figure 11 Battery tab in Power Properties ...

Page 20: ...tive device goes to User Idle System Idle Suspend state Figure 12 Schemes tab in Power Properties The suspend state is most important for the user The other 2 states may be used by the applica tion or by the system The device enters the suspend state after the sum of the times In case of power settings shown in Figure 12 the device goes to suspend after 9 minutes of inactivity ...

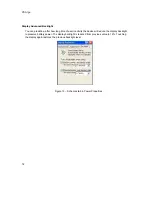
Page 21: ... long time of user inactivity the device will reduce the display backlight to preserve battery power The display backlight is reduced from previous value to 12 Touching the display again restores the previous backlight level Figure 13 Schemes tab in Power Properties ...

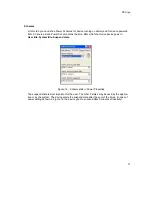
Page 22: ... with your fingers on the screen This action has the same effect as a mouse click You can also simulate double click simply dou ble tap an item on the screen just as you would do the same with a mouse of the personal com puter Drag and drop technique is also easy to apply with a touch pad Touch an item on the screen and drag it to the desired position Then lift your finger or the stylus and the ob...

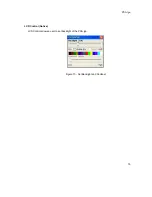
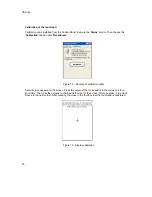
Page 23: ...e Figure 15 Running of calibration utility A small cross appears on the screen Press the center of the cross and hold the stylus on it for a short time The cross then moves to the lower left corner of the screen After you press it the cross moves to the next corner After pressing the cross in the fourth corner the touch pad is calibrated Figure 16 Display calibration ...

Page 24: ...he temperatures lower than the specified op erating temperature range However this phenomenon does not mean a defect of the LCD module It will disappear in the standard operating temperature range 3 If the display area is hardly pushed during an operation some display patterns will be abnor mally displayed 4 Pointed position of touch panel may shift owing to a change in resistance of touch panel d...

Page 25: ...Wincor Nixdorf International GmbH D 33094 Paderborn Order No of this document 01750132282A ...

Reviews: