background image

FOR YOUR SAFETY

The unit can be operated by the Control Panel or the Remote Control. 

1. POWER

Press to turn the unit ON or OFF.

2. SPEED

Press to select Low, Medium or High fan speeds.

3. OSCILLATE

Press to turn the oscillation function ON or OFF.

4. TIMER

Press to set the timer to automatically shut off the fan after 1/2 hour.  Each 
additional press of the button will add one half hour to the timer setting up to a 
maximum of 8 hours.

*NOTE: All Functions correspond to the Indicator Lights on the LED
Display.

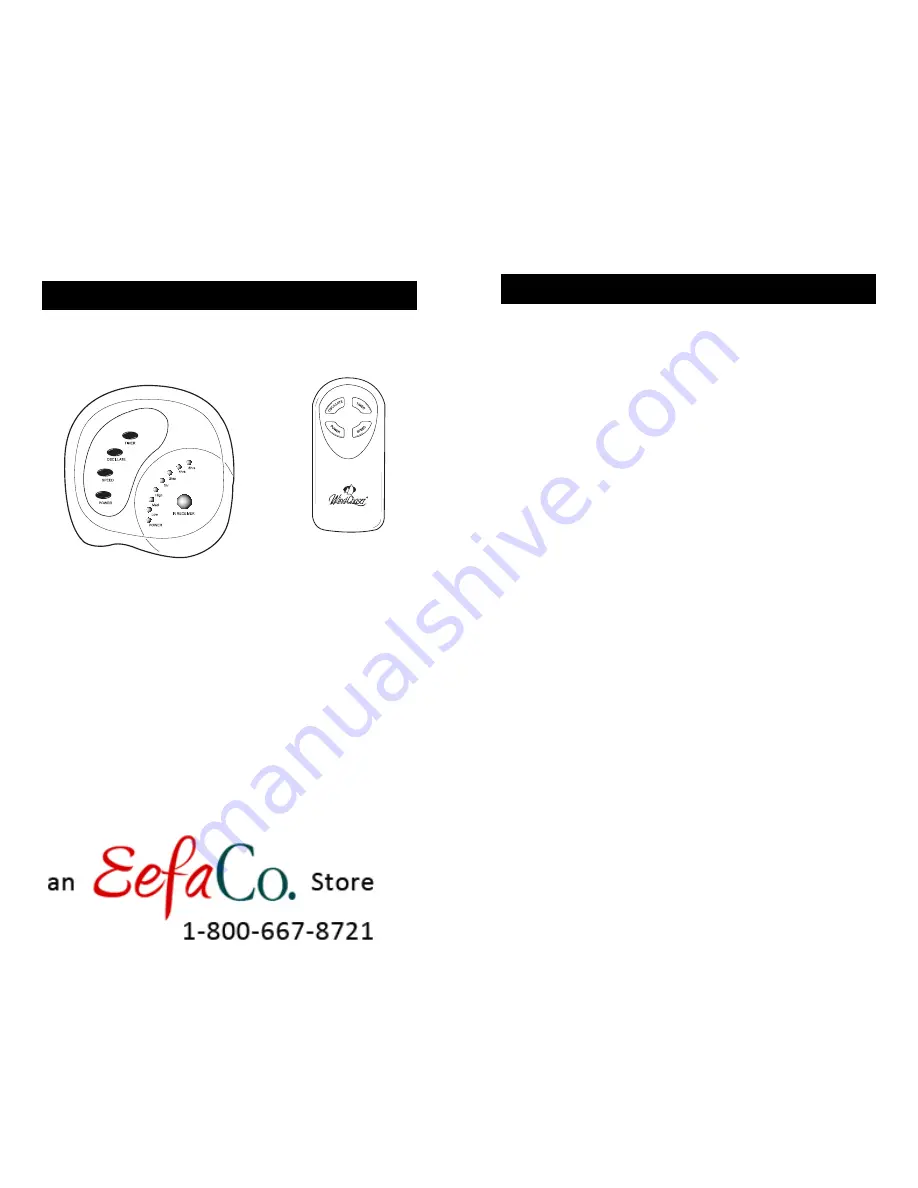
OPERATING INSTRUCTIONS

Control Panel

Remote Control

IMPORTANT INSTRUCTIONS

Read and save these important safety instructions before using this fan.  When
using electrical appliances, basic safety precautions should always be followed
including the following:

1) Use this fan only as described in this manual. Other uses not recommended 

may  cause fire or electric shock.

2) This product is intended for household use ONLY and not for commercial, 

industrial or outdoor use.

3) To protect against electrical shock, do not place fan in window, immerse unit, 

plug or cord in water, or spray with liquids.

4) Close supervision is necessary when any appliance is used near 

children.

5) Unplug the fan from the outlet when not in use, when moving fan from one

location to another and before cleaning.

6) Do not operate the fan in the presence of explosive and/or flammable fumes.

7) Do not place the fan or any parts near an open flame, cooking or other 

heating appliance.

8) Do not operate the fan with a damaged cord , plug, after a malfunction or if

dropped or damaged in any manner.

9) Avoid contact with moving fan parts.

10) To disconnect, grip the plug and pull it from the wall outlet. Never yank the

cord.

11) The use of attachments is not recommended and may cause hazards.

12) Always use on a dry level surface.

13) Do not operate if the fan housing is removed or damaged.

WARNING: To reduce the risk of fire or electrical shock, DO NOT USE
THIS FAN WITH ANY SOLID STATE SPEED CONTROL DEVICE. 

SAVE THESE INSTRUCTIONS

Summary of Contents for WGCF1RP

Page 1: ...INSTRUCTION MANUAL MODEL WGCF1RP PLEASE READ BEFORE USE AND SAVE with Remote Control F Fa an n Innovative Products For Living Oscillating Column ...

Page 2: ... liable for incidental or consequential damages of any nature Any implied warranty of merchantability or fitness for a particular purpose on this product is limited in duration to the duration of this warranty Some states do not allow the exclusion or limitation of incidental or consequential damages or limitations on how long an implied warranty lasts so the above limitations or exclusions may no...

Page 3: ...he unit 3 Do not immerse the unit in water and never allow water to drip inside 4 Do not use gasoline paint thinner or other chemicals to clean the unit 5 Remove the batteries from the remote control if the fan is not going to be used for an extended period of time 6 Store unit in it s original box and store in a cool dry place NOTE If you experience a problem please return the unit to the place o...

Page 4: ...ded for household use ONLY and not for commercial industrial or outdoor use 3 To protect against electrical shock do not place fan in window immerse unit plug or cord in water or spray with liquids 4 Close supervision is necessary when any appliance is used near children 5 Unplug the fan from the outlet when not in use when moving fan from one location to another and before cleaning 6 Do not opera...

Page 5: ...ower ON OFF Button 5 Fan Speed Indicator Lights 6 Timer Indicator Lights 7 Remote Sensor 8 Power Indicator Light 9 Fan Body 10 Rear Grill 11 Front Grill 12 Remote Control 13 Front Pedestal 14 Rear Pedestal 15 Front Base 16 Rear Base 17 Motor Support 18 Power Cord 19 Cord Clamp 19 18 ...

Page 6: ... secure with the screws supplied 4 Loosen the cord clamp under the base assembly Place the power cord under the cord clamp and secure it with the clamp and screws ASSEMBLY INSTRUCTIONS PREPARATION 1 Remove the cover from the back of the remote control 2 Insert two AAA dry cell batteries batteries not included 3 Do not use rechargeable batteries because they differ from standard dry cell batteries ...

Reviews: