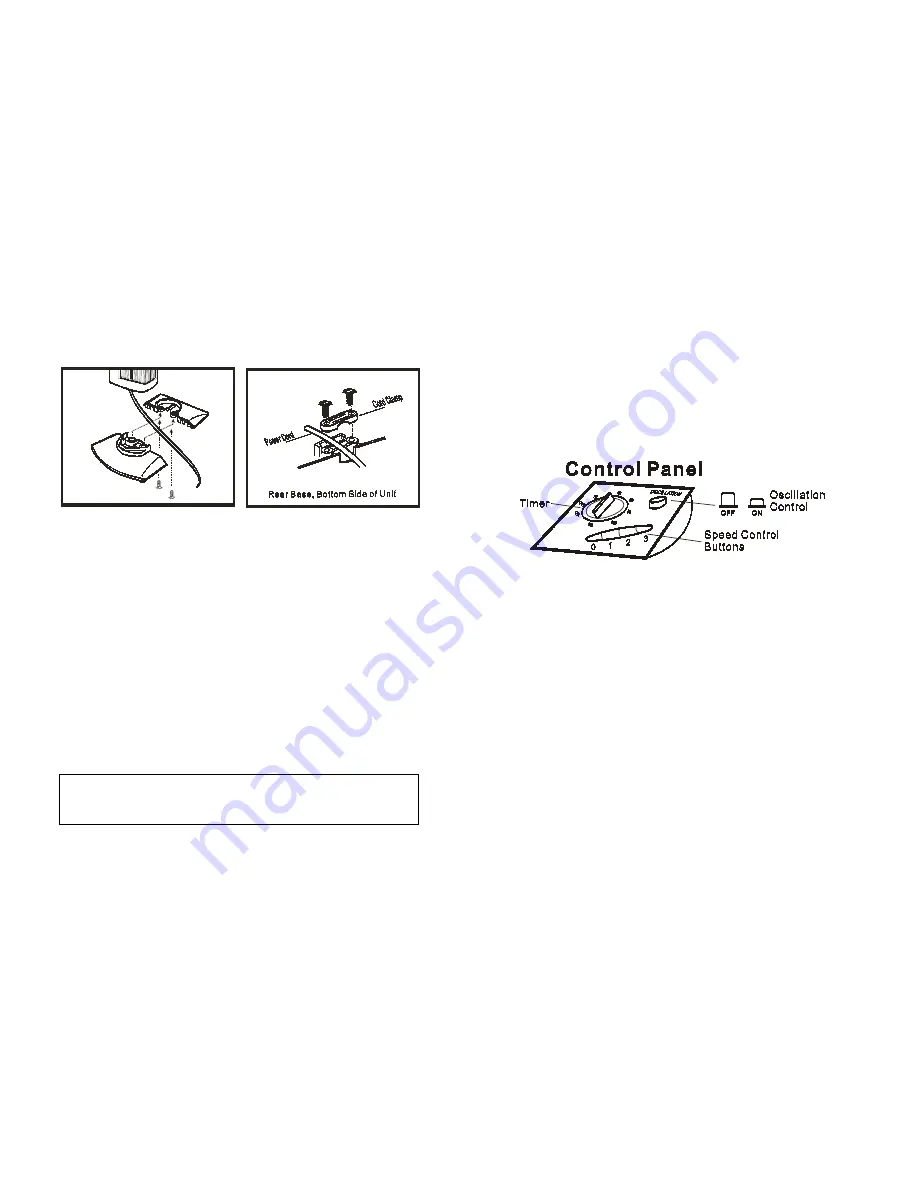
ASSEMBLY INSTRUCTIONS
Assemble the fan before plugging it in.
1.
Pass the power cord through the center notch of the rear
base.
2.
Connect the rear base to the front base by sliding it
downwards.
3.
Install the WindColumn into the base assembly, and
secure with the two supplied screws.
4.
Loosen the cord clamp under the base assembly. Place
the power cord under the cord clamp and secure it with
the clamp and screws.
IMPORTANT INFORMATION
THIS FAN IS NOT TO BE USED IN THE BATHROOM. Place
the fan on the ground close to an electrical outlet. Be sure the
location is level so that the fan is stable.
Place the fan out of the reach of children. Do not insert
anything into the grill. If moving the fan to a different location,
switch it off and unplug it from the socket.
CAUTION: The fan should not be used without
a base, nor used lying on its side.
3
OPERATING INSTRUCTIONS
1.
Set your fan on a level and dry surface.
2. Plug the power cord into a standard 120volt AC wall
outlet.
3.
OPERATION: To operate the fan, turn the timer dial to
“ON” and push one of the speed control buttons. The
speed control buttons correspond to the fan speed as
follows:
0 = OFF, 1=LOW, 2=MED, 3=HIGH
Please note that if you want to use the fan without the
timer, the timer switch must be turned to “ON” in order for
the fan to operate.
4.
TIMER: The fan has a timer that can be set for a
maximum of 120 minutes. The fan will automatically
shut off after the selected time period has elapsed. To
set the timer, turn the timer switch clockwise to your
desired run time.
5.
OSCILLATION: The WindColumn can be used with or
without the oscillation function. Push the button down to
activate the oscillation feature and push the button again
to deactivate the oscillation function.


