


SKU 93225
For technical questions please call 1-800-444-3353.
Page 3
Unpacking
When unpacking your Lamppost Clock, check to make sure that all the parts listed in the parts list
located on page five are included. If any parts are missing or broken, please call
HARBOR FREIGHT TOOLS at 1-800-444-3353.
Assembly
Your Lamppost Clock will require complete assembly. It is important that you read the entire manual
to become familiar with the product BEFORE you assemble and use the Clock. Before assembling
the Clock, be sure that you have all parts described in the Parts List located on page five of this
manual. Refer to the Parts and Assembly diagram for each of the following steps.
Because of the weight of the Lamppost Clock, it is recommended that assembly be done by
two adults and that all lifting and moving of the Clock be done by two people.
1.
Thread the Stand (3) onto the Base (2). Set the Bottom Post (4) down onto the Stand (3)
and thread into place.
2.
Set Collar (5) onto the Bottom Post (4). Set the Upper Post (6) down through the Collar (5)
and thread it into the Bottom Post (4).
3.
There is a small Hex Nut which fits into the hole in the Collar (5). Insert the Hex Nut and use
the Hex Wrench (9) to tighten it into place. This will secure the Collar (5) to both the Bottom
Post (4) and Upper Post (6).
4.
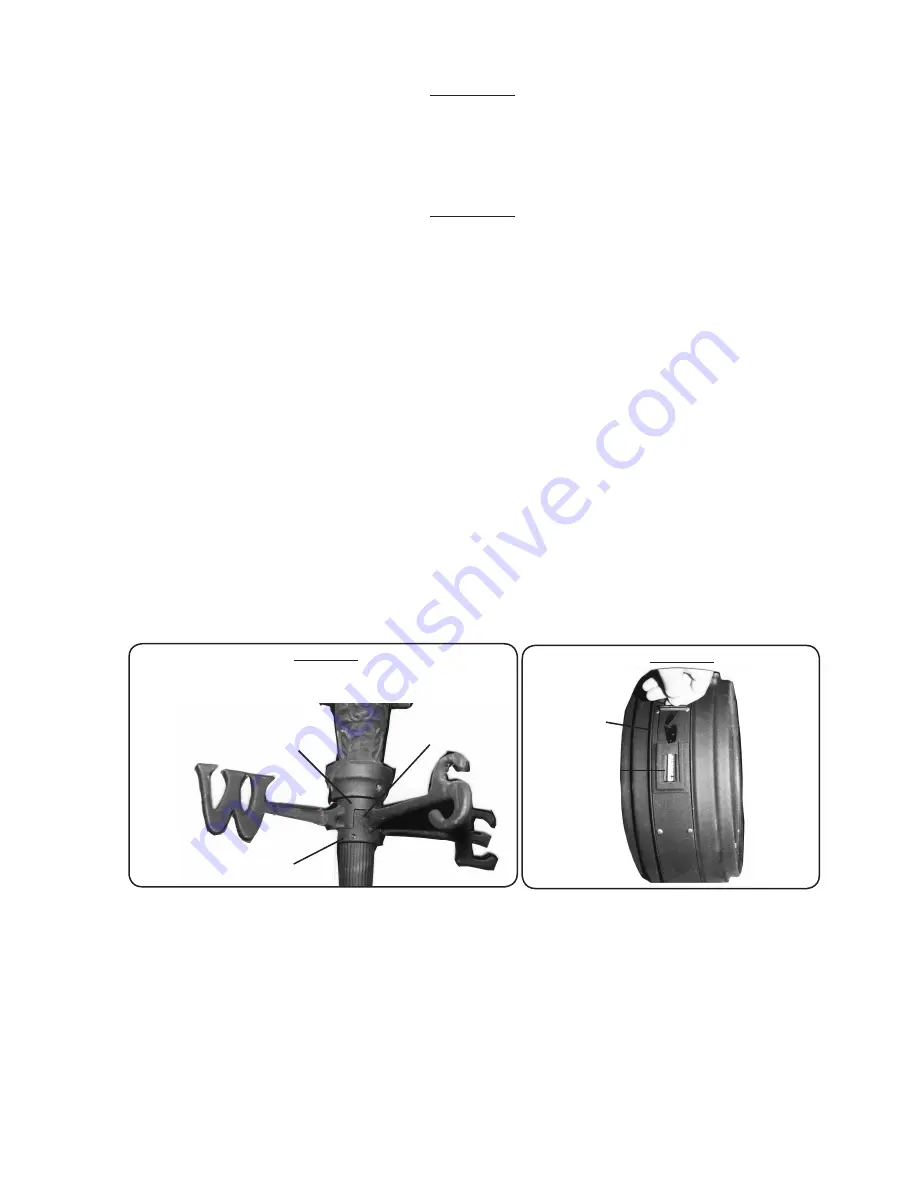
Set the North-South Collar (7) down onto the Upper Post (6) as in Figure 1. Using the
Hex Wrench (9), insert the Hex Nut and thread it into place on the North-South Collar.
North-South
Collar (7)
East-West Collar (8)
Figure 1
Hex Nut
5.
Set the East-West Collar (8) down onto the North-South Collar so that the two fit together
- see Figure 1.
6.
Set Clock (10) down onto the Upper Post (6). The Clock (10) will sit on the Upper Post (6)
via a large collar with three hex nuts. Use the Hex Wrench (9) to thread all three hex nuts
into the large collar on the Clock (10).
Make certain that all three hex nuts are fully tightened
into place to secure the Clock (10) into place.
7.
If directional accuracy is desired, use a compass to orient the Lamppost Clock before setting
the Clock into its location. Using a compass will ensure that all directions, north, south, east
and west point to their true position.
battery cover
battery
compartment
+
-
Figure 2


