MACHINE OPERATION
GLIDE 86037550 01/09/07
3-15
!
CAUTION
!
WARNING
TO BEGIN SCRUBBING
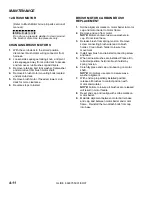
When operating the
machine around people,
pay close attention for unexpected movement.
Use extra caution around children.
1.
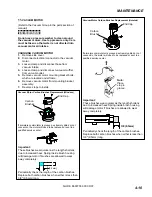
Place right foot on brake pedal or check to make
sure parking brake has been set.
2.
With directional pedal in neutral turn key switch
to “ON”.
3.
Release brake.
4.
Press the directional pedal to travel in the
desired direction and steer to the start of the
scrub pattern.
5.
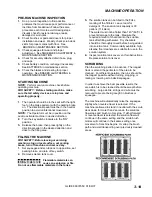
Press the one-touch switch (#1) on the control
panel. The brush motors will start, the scrub
deck will lower to the light scrub position, the
solution will begin to flow, the squeegee will
lower to the floor and the vacuum motors will
start.
6.
Adjust the speed of the machine, solution flow
and scrub brush pressure as necessary.
NOTE: Once solution flow rate is set it is not
necessary to shut off solution when stopping
scrubbing. Solution flow is automatically shut off
when brush motors stop. When brush motors
are activated, flow automatically resumes.
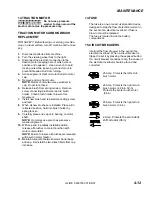
Flammable liquids and/or
reactive metals can cause
explosions or fire! Do not pick up.
TO STOP SCRUBBING
1.
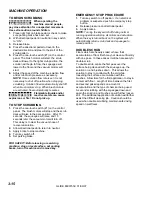
Press the one-touch switch (#1) on the control
panel. The brush motors will stop and the scrub
deck will raise to the park position. After 15
seconds, the squeegee will raise, and 15
seconds later the vacuum motor will turn off.
This delay is to clear the vacuum hose of
recovered solution.
2.
Allow directional pedal to return to neutral.
3.
Apply brake to stop machine.
4.
Turn key switch off.
5.
Set parking brake.
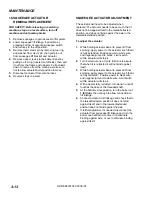
FOR SAFETY: Before leaving or servicing
machine; stop on level surface, set parking
brake, turn off machine and remove key.
EMERGENCY STOP PROCEDURE
1.
Turn key switch to off position. If an electrical
problem is suspected push in emergency stop
button.
2.
Release pressure on directional pedal.
3.
Apply brakes.
NOTE: Turning the key switch off during normal
running operation will stop all motors and actuators.
When the key is turned back on the system will
automatically return scrub deck and squeegee to
raised position.
DOUBLE SCRUB
Floors which are heavily soiled or have thick
accumulation of floor finish may not clean sufficiently
with one pass. In these cases it will be necessary to
double scrub.
To double scrub, make the first pass over the
surface being cleaned with the squeegee up, the
solution on, and brushes down. This allows the
solution to stay in contract with the soil while
loosening the surface accumulation with the
brushes. Allow time for the first application to stay in
contact with floor. Length of time between the first
and second pass depends on amount of
accumulation and the type of chemical being used.
A second scrubbing with the squeegee down and
again the solution and brushes on will further loosen
soil. The additional application of solution will further
assist the difficult cleaning job. Caution should be
used when double scrubbing, maintain safe driving
speed on wet floors.
Summary of Contents for 10052480
Page 48: ...CIRCUIT BREAKER GROUP GLIDE 86037550 01 09 07 5 5 1 2 3 4 ...
Page 52: ...DECAL GROUP GLIDE 86037550 01 09 07 5 9 4 2 3 6 1 5A 5B 7 8 9 ...
Page 54: ...FRONT BUMPER FLOOR GROUP GLIDE 86037550 01 09 07 5 11 1 4 5 6 3 2 3 7 ...
Page 58: ...SCRUB BRUSH PAD DRIVER GLIDE 86037550 01 0907 5 15 1 6 9 4 8 5 7 2B 2A 2C 3 5 2D 7 5 6 9 4 8 ...
Page 88: ...STEERING UPPER GLIDE 86037550 01 09 07 5 45 1 2 3 4 5 6A 6B 8 9 10 7 13 12 16 18 11 14 15 17 ...
Page 96: ...VACUUM GROUP GLIDE 86037550 01 09 07 5 53 3 10 1 2 4 5 7 8 6 9 8 11 12 13 ...
Page 100: ...WHEEL MOTOR SERVICE PARTS GLIDE 86037550 06 25 12 5 57 ...
Page 110: ...WIRING DRIVE MOTOR GLIDE 86037550 07 05 12 5 67 1 2 ...
Page 116: ...BACK UP ALARM OPTION GLIDE 86037550 01 09 07 5 73 1 5 3 4 2 ...
Page 118: ...DUAL VACUUM MOTOR OPTION GLIDE 86037550 01 09 07 5 75 7 6 5 4 8 9 1 3 10 11 1 2 12 1 ...
Page 120: ...WARNING LIGHT OPTION GLIDE 86037550 01 09 07 5 77 1 2 3 4 5 ...
Page 122: ...GLIDE 86037550 01 09 07 5 79 ...
Page 123: ...GLIDE 86037550 01 09 07 5 80 ...
Page 124: ...GLIDE 86037550 01 09 07 5 81 ...


