background image

52

86333220 CS20

Maintenance

Preparation for Loading/Unloading Trailer

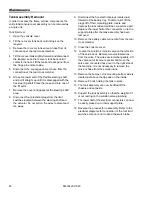
Before loading or unloading machine from trailer, remove squeegee and scrub brush (pad) to eliminate interference 
with ramp.

Scrub head must be in the up position before loading.

When transporting the machine on a trailer or in a truck, in addition to using tie-downs, be sure to block the tires to 
prevent the machine from rolling.

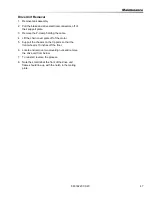
Machine Tie-Downs

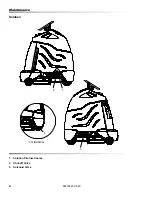
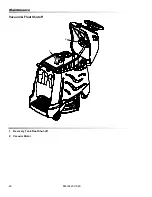
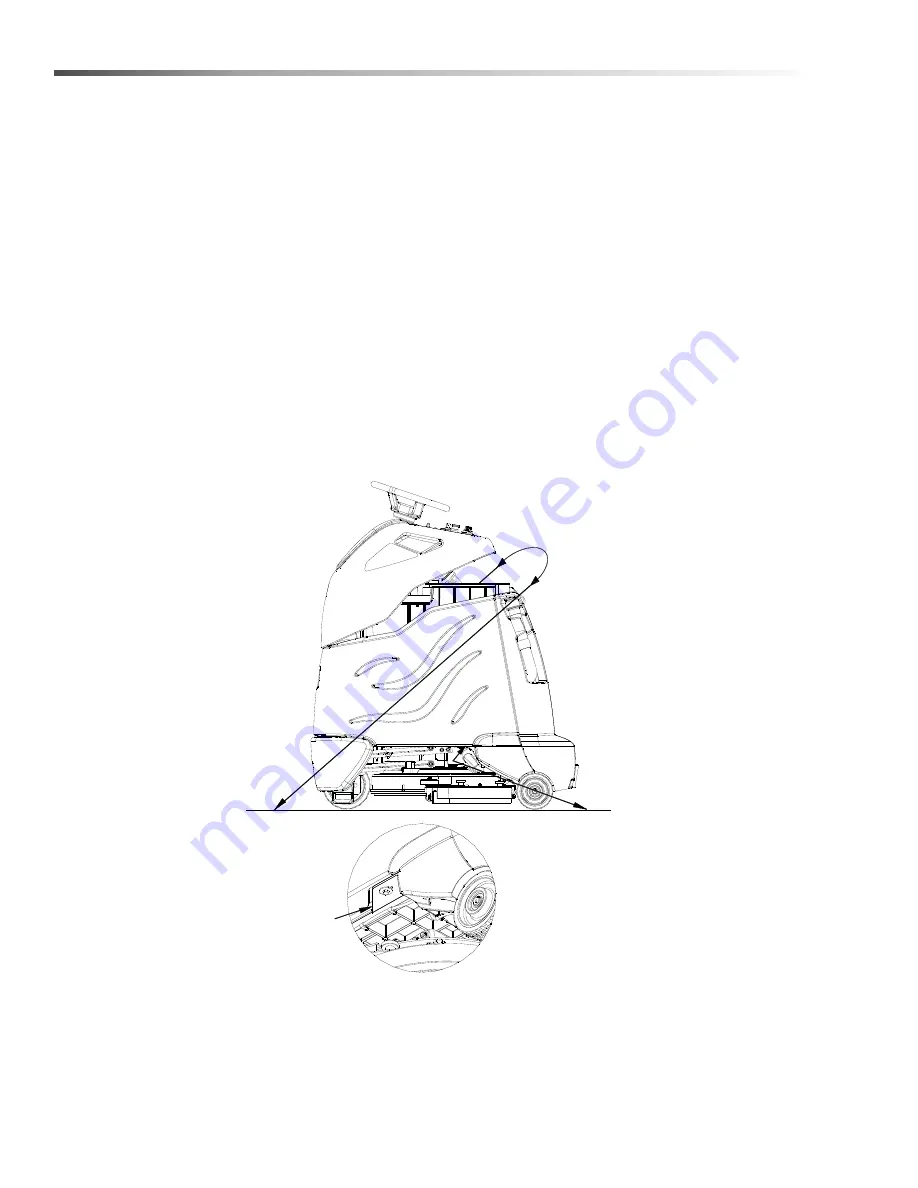
There are two tie points located in front of the rear wheels on the frame, and a Tie-down wrap point on the recovery 
tank. Tie-down devices must be of the proper type and strength. The combined strength of all tie-downs must be 
strong enough to lift two times the weight of the machine. Tie-downs must be positioned to prevent the machine 
from moving forward, backward, or either side to side. Use all four corners of the machine with the tie-downs 
running out opposite directions. Tie-downs must be attached to the transporting vehicle securely.

CONNECT

AT

FRAME

VIEW FROM

BOTTOM

Recommended Tie-Down Points

Summary of Contents for chariot iScrub 20 CS20

Page 1: ...he machine MODELS Operating instructions ENG CS20 10061250 CSC20 10061330 CSX20 10061370 CSXC20 10061380 CS22SP 10061300 CSC22SP 10061340 86333220 CF 04 24 15 iScrub 20 Prior to Serial Number 14 See S...

Page 2: ...brush or pad and then vacuums the soiled water back into the recovery tank Machine Data Log Overview Warranty Registration Thank you for purchasing a Windsor product Warranty registration is quick and...

Page 3: ...e Motor 50 Drive Motor Carbon Brush Replacement 50 Drive Chain Tension 50 Inclines 51 Machine Tie Downs 52 Machine Tie Downs Deluxe 53 Troubleshooting 54 Battery Discharge Indicator Troubleshooting 56...

Page 4: ...orking condition They are listed in this general order Batteries Scrub Brush Squeegee Service Schedule Machine Troubleshooting The PARTS LIST section contains assembled parts illustrations and corresp...

Page 5: ...spitals factories shops and offices for more than normal housekeeping purposes Maintenance and repairs must be done by qualified personnel If foam or liquid comes out of machine switch off immediately...

Page 6: ...triel ou pour les bureaux les cha nes de magasin que pour un usage domestique normal L entretien et les r parations de la machine doivent tre effectu es par un personnel qualifi Si de la mousse ou du...

Page 7: ...ation carefully Know when these conditions can exist Locate all safety devices on the machine Please take the necessary steps to train the machine operating personnel FOR SAFETY DO NOT OPERATE MACHINE...

Page 8: ...tous les dispositifs de s curit sur la machine Il est conseill de prendre les mesures n ces saires pour former le personnel op rateur POUR VOTRE S CURIT NE PAS MANOEUVRER LA MACHINE Lorsqu on n est p...

Page 9: ...PLACEMENT DE L TIQUETTE DE S CURIT REMARQUE Ces dessins indiquent l emplacement des tiquettes de s curit sur la machine Si tout moment les tiquettes deviennent illisibles contactez votre repr sentant...

Page 10: ...rol Gravity 1 3 GPM average Solution capacity 10 gal 38 L Recovery capacity 10 gal 38 L Scrub brush diameter Disk 20 inch 508 mm Scrub brush length Cylindrical 22 inch 559 mm Scrub brush pressure Disk...

Page 11: ...ec des possibilit s physiques sensori elles ou mentales r duites ou le manque d exp rience et de connaissance moins qu ils aient t donn s la surveillance ou l instruction au sujet de l utilisation de...

Page 12: ...consists of two cylindrical brushes motor side squeegees and lift actuator The two counter rotating brushes scrub the floor driven by a single motor The brush deck floats with constant brush pressure...

Page 13: ...ontrol Console 4 Pedal Platform 5 Solution Tank 6 Recovery Tank 7 Recovery Sight Dome 8 Recovery Drain Hose 9 Scrub Deck Skirt 10 Solution Cover 11 Solution Drain Hose Solution Level Indicator 12 Sque...

Page 14: ...14 86333220 CS20 Operations Drive Controls 1 2 3 4 5 6 7 8 9 10...

Page 15: ...t the machine rotate the switch clockwise 3 DIRECTIONAL CONTROL DRIVE RESET SWITCH This safety feature is designed to ensure safe engagement of propel drive Each time the machine power is turned on or...

Page 16: ...ressure on the pedal 5 HORN BUTTON The horn is activated by pressing the horn button 6 STEERING WHEEL The steering wheel turns the front wheel causing the machine to change direction 7 SPEED CONTROL C...

Page 17: ...d drive remain functional The vacuum only selection position B can be used to vacuum up any remaining water Return the unit to the charging station and charge the batteries NOTE Continuing usage may d...

Page 18: ...wn position The water will flow Water will automatically shut off in neutral and restarts when scrubbing is resumed The vacuum will draw the water into the recovery tank A2 Deep cleaning This mode is...

Page 19: ...vacuum will come on C Double Scrub cleaning This mode is used for putting down solution and scrubbing without picking it back up The squeegee is set manually by connecting the two double scrub suppor...

Page 20: ...20 86333220 CS20 Operations Scrub Controls Squeegee 1 Squeegee Latch 2 Squeegee Hose and Tube 3 Squeegee Wheels 3 4 Double Scrub Support Cable 5 Double Scrub Cable Hook 1 2 3 5 4 DISK...

Page 21: ...eels support the squeegee at the correct height and angle so that no adjustment is required 4 Double Scrub Support Cable The double scrub support cables retain the deck in the double scrub position 5...

Page 22: ...fill port cover down Fill the solution tank with clean water leaving enough room for the required amount of cleaning solution The solution tank capacity filled to fill inlet is 10 gallons 38 liters T...

Page 23: ...vement of machine begins Overlap the brush path and avoid transporting over previously cleaned areas To Begin Scrubbing When operating the machine around people pay close attention for unexpected move...

Page 24: ...with one pass In these cases it will be necessary to double scrub Connect the Double Scrub Cables to the squeegee Rotate the knob to the double scrub position To support the squeegee off the floor fo...

Page 25: ...ccur 3 Clean debris from sight dome and cover surface 4 Clean off the float shut off screen and inspect for free movement of float 5 Replace the drain cap and secure drain hose 6 If machine is to be s...

Page 26: ...k Clean and inspect float shutoff Clean out solution tank Clean and inspect solution filter strainer Run vacuum motor to dry Clean brush or pad and check wear Clean squeegee blades and check wear Clea...

Page 27: ...86333220 CS20 27 Maintenance Batteries 1 Cover Retainer Latch 2 Rear Cover 3 Battery Connector Machine 4 Batteries 5 Battery Tray 1 3 4 5 2...

Page 28: ...e a charge level below 25 specific gravity below 1 155 Keep all metallic objects off the top of the batteries as they may cause a short circuit Replace worn or damaged cables and terminals Check the e...

Page 29: ...tements de protection lorsque vous travaillez avec des batteries Charge batteries in a well ventilated area Chargez les batteries dans un endroit bien ventil Battery Maintenance 1 When cleaning the ba...

Page 30: ...eadings are taken when the battery electrolyte is any temperature other than 80 F 27 C the reading must be temperature corrected To find the corrected specific gravity reading when the temperature of...

Page 31: ...ically shut off when the batteries are fully charged 1 Stop the machine in a clean well ventilated area next to the charger 2 Turn OFF machine FOR SAFETY Before leaving or servicing machine stop on le...

Page 32: ...ving or servicing the machine stop on level surface turn off machine and remove key 1 Open the console cover 2 Tilt the rear cover recovery tank back The rear cover recovery tank can also be removed f...

Page 33: ...ode Red and green LED s flash 1 Disconnect battery charger from outlet 2 Connect wire from EZlamp to charger battery cable 3 Connect AC cord to outlet All LED s should be on NOTE If Red and green LED...

Page 34: ...should not require regular replacement under normal use The rear blade wipes the floor to a near dry condition It is important the rear blade be in good condition to properly do its job As with the fr...

Page 35: ...hannels in the blade into the squeegee assembly while maintaining vacuum to provide lift The front blade has two 2 wear surfaces and can be rotated for extended life The front blade should not require...

Page 36: ...aintenance Scrub Deck Disk 1 Scrub Deck Side 2 Scrub Brush Motor 3 Scrub Deck Lift Actuator Scrub Deck Cylindrical 1 Scrub Deck Side Squeegee 2 Scrub Brush Motor 3 Scrub Deck Lift Actuator 2 3 1 3 DIS...

Page 37: ...polishing to achieve a high gloss appearance or surface washing on highly polished or burnished floors Red Pads Buffing are used for light duty scrubbing When used with a mild detergent they will pro...

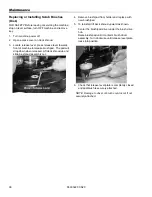
Page 38: ...op down when released Lift deck shroud up and slide brush pad assembly out 4 Remove brush pad from holder and replace with new brush pad 5 To reinstall lift deck shroud upward as shown Center the brus...

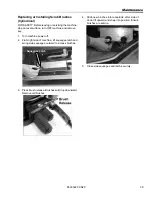
Page 39: ...rn machine power off 2 From right side of machine lift squeegee latch and swing side squeegee outward to access brushes 3 Press brush release Brushes will drop downward Remove old brushes 4 Slide new...

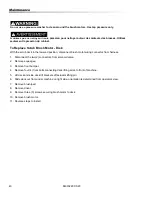
Page 40: ...isconnect brush motor wiring connector from harness 1 Disconnect the two 2 connectors from solenoid valve 2 Remove squeegee 3 Remove front bumper 4 Remove four 4 front bolts connecting deck lifting ar...

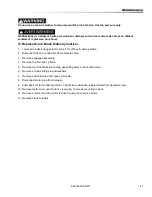
Page 41: ...nnect the two connectors from solenoid valve 3 Remove squeegee assembly 4 Remove front bumper 2 bolts 5 Remove four front bolts connecting deck lifting arms to front of machine 6 Remove actuator lifti...

Page 42: ...deck under pad driver so that actuator pins can be removed 2 Remove bumper screws 2 3 Remove front battery 4 Pull steering shaft 5 Disconnect actuator from wiring harness 6 From the underside of the...

Page 43: ...it breaker is tripped reset it by pressing the exposed button If a circuit breaker continues to trip the cause of the electrical overload should be found and corrected 1 5 Amp protects the brush deck...

Page 44: ...44 86333220 CS20 Maintenance Solution 1 Solution Strainer Coarse 2 Shut off Valve 3 Solenoid Valve 1 3 2 CYLINDRICAL 3...

Page 45: ...sition Horizontal is half flow Down is maximum flow Up is no Flow If clogged in the maximum position unscrew fittings inspect and clean if needed From Serial Number 6 Located below the solution tank o...

Page 46: ...s located just forward of the battery tray To disconnect lift the plugs off of their mounting plate locate and depress the lock tab and pull the connectors apart Replace the lower half of the connecto...

Page 47: ...olding the cable 4 Lift the chain cover plate off of the motor 5 Support the chassis on the tip pads so that the front wheel is 10 inches off the floor 6 Locate and remove two mounting nuts and remove...

Page 48: ...48 86333220 CS20 Maintenance Vacuum Float Shutoff 1 Recovery Tank Float Shut off 2 Vacuum Motor 1 2...

Page 49: ...disconnect power To Repair or Replace Vacuum Motor 1 Remove four 4 screws from top of control panel 2 Tip control panel back from console to expose vacuum motor wires 3 Disconnect electrical connecto...

Page 50: ...ush 8 Replace the gasket and cover set the drive wheel straight ahead set the steering wheel straight ahead and gently align the steering shaft coupling and slide onto the lower shaft 9 Slowly close t...

Page 51: ...the machine rolls easily Disengage on a level surface Rotate lever firmly in direction of arrow Inclines When navigating an incline the machine may come to a stop Turn the machine off Wait 5 minutes...

Page 52: ...Downs There are two tie points located in front of the rear wheels on the frame and a Tie down wrap point on the recovery tank Tie down devices must be of the proper type and strength The combined st...

Page 53: ...and strength The combined strength of all tie downs must be strong enough to lift two times the weight of the machine Tie downs must be positioned to prevent the machine from moving forward backward...

Page 54: ...ntroller to motor Faulty throttle circuit or potentiometer Check wires and connections from and potentiometer resistance Drive Lever disengaged Engage drive Machine does not change speeds Faulty speed...

Page 55: ...iner Solution system plumbing obstructed Clear obstruction from plumbing Solution solenoid valve obstructed or stuck Solution solenoid valve obstructed or stuck Solution metering valve is closed Open...

Page 56: ...attery connection Contact your service agent 4 The battery charge level has fallen below the battery Lockout Level and the controller is inhibiting scrub motor function Charge the battery 5 Not used 6...

Page 57: ...86333220 CS20 Parts...

Page 58: ...58 86333220 CS20 Bumper 1 2 5 6 3 4 3 7...

Page 59: ...FROM NOTES 1 86318180 1 BUMPER TRIM GRAY 2 86276980 2 SCREW 5 16 18 X 2 HHCS SS 3 86010670 6 WASHER 5 16 FLAT SS 4 86276070 4 SCR 5 16 18 X 3 4 CARRIAGE SS 5 86270830 4 NUT 5 16 18 HEX NYLOCK SS 6 86...

Page 60: ...60 86333220 CS20 Bumper Deluxe Cylindrical 1 2 5 6 3 4 3 7 5 3 4 8...

Page 61: ...OTES 1 86342940 1 BUMPER TRIM CSX20 2 86276980 2 SCREW 5 16 18 X 2 HHCS SS 3 86010670 10 WASHER 5 16 FLAT SS 4 86276070 8 SCR 5 16 18 X 3 4 CARRIAGE SS 5 86270830 8 NUT 5 16 18 HEX NYLOCK SS 6 8632395...

Page 62: ...62 86333220 CS20 Console 1 2 3 A 4 5 6 7 9 8 10 11 12 13 14 15 16 17 18 19 12 20 21 22 23 3 B 24 25...

Page 63: ...0 1 GASKET DOME 10 86326340 1 PIN CLEVIS 5 16 X 4 0 PLTD 11 86228990 2 BEARING FLNGD 314ID X 502OD 12 86264940 6 CABLE TIE 11 38 UL CSA 13 86326320 1 BRACKET HINGE UPPER 14 86327680 1 SWITCH INTERLOCK...

Page 64: ...64 86333220 CS20 Control Panel 1 1 15 16 18 A TORQUE 45 55 IN LBS A A 18 16 15 20 19 2 3 4 5 6 7 9 10 11 12 14 13 17 8...

Page 65: ...TCH 10 POSN 8 86005710 2 NUT 1 4 20 HEX W STAR 9 86313900 3 RELAY 5A 24V 4PDT 10 86275260 4 SCR 4 40 X 1 2 PPHMS 11 86274710 2 SCR 6 32 X 1 0 PPHMS 12 86255910 1 STANDOFF 1 4 20 X 1 0 HEX INS 13 86255...

Page 66: ...66 86333220 CS20 Control Panel 2 17 9 16 3B 15 14 13 12 11 10 9 8 7 6 5 4 2 1 3A...

Page 67: ...ER 25A 250VAC 32VDC CYLINDRICAL 4 86326350 1 KIT CS20 ROTARY SWITCH 5 86316160 1 BREAKER 18A 250VAC 32VDC 6 86315470 1 METER HOUR LCD 7 86314150 1 KNOB SELECTOR 8 86313950 1 SWITCH SPDT 3 POSN MOM ARR...

Page 68: ...68 86333220 CS20 Decals Disk 6 5 1 2 3 4...

Page 69: ...Y DESCRIPTION SERIAL NO FROM NOTES 1 86328490 1 LABEL RIGHT iSCRUB 20 2 86328500 1 LABEL LEFT iSCRUB 20 3 86004970 1 LABEL WINDSOR LOGO DOMED 4 86328550 1 LABEL SOLUTION LEVEL 5 86326360 1 LABEL CONTR...

Page 70: ...70 86333220 CS20 Decals Deluxe Cylindrical 2 1 3A 3A 4 3B 3B...

Page 71: ...REF PART NO QTY DESCRIPTION SERIAL NO FROM NOTES 1 86342020 1 LABEL WINDOSR DOMED LOGO 2 86326360 1 LABEL CONTROL PANEL 3A 86342000 2 LABEL SIDE ISCRUB DLX DISK 3B 86346630 2 LABEL ISCRUB 22X SP CYLI...

Page 72: ...wer 11 16 B B C 32 31 D TORQUE 60 IN LBS AFTER B 4 8 14 15 30 33 23 21 1 2 3 6 9 13 22 10 17 20 19 12 7 6 10 17 5 12 19 17 30 A TORQUE 15 18 FT LBS B TORQUE 120 IN LBS C TORQUE 15 FT LBS A B B D A 26...

Page 73: ...CLEVIS 5 16 X 1 00 PLTD 15 86276070 4 SCR 5 16 18 X 3 4 CARRIAGE SS 16 86358820 3 SCREW M6 1 0 X 16 HCS 10 9Z 17 86136640 3 SCR M8 X 20 HHMS 18 86358810 2 SCREW M6 1 0 X 30 HCS 10 9Z 19 86270830 4 NU...

Page 74: ...74 86333220 CS20 Drive Chain 1 2 5 6 7 8 12 13 14 15 16 18 19 20 22 23 24 25 28 29 30 31 33 4 25 A TORQUE 78 IN LBS A A 34 3 9 10 11 17 26 27 32 A 4 21 36 35 37 38...

Page 75: ...FT STEERING SPROCKET 18 86319560 1 CHAIN ISO O8B 12 7MM PITCH 19 86014440 1 BEARING DRIVE 20 86224270 1 SLEEVE CHAIN TENSIONER 21 86259430 1 WASHER 12 5 ID X 26 OD X 2T FLAT 22 86279510 1 WASHER 3 8 X...

Page 76: ...76 86333220 CS20 Drive Mounting 1 2 3 4 5 6 7 4 7...

Page 77: ...NOTES 1 86344620 1 BRACKET LINKAGE MOUNT 2 86319730 1 BRACKET LINKAGE MOUNT LEFT 3 86331630 1 BRACKET ROLLER GUIDE 4 86010670 12 WASHER 5 16 X 3 4 SS 5 86276690 8 SCR 5 16 18 X 1 75 CARR SS 6 8627607...

Page 78: ...78 86333220 CS20 Frame Rear Wheels 1 2 3 4 5 6 7 8 9...

Page 79: ...KET FRAME LEFT 2 86326250 1 BRACKET FRAME RIGHT 3 86340610 1 ASM FRAME CS20 INCLUDES ITEM 8 9 4 86326220 2 SPACER FLG 887ID X 1 055D X 345LG 5 86318030 1 AXLE 20MM X 562 MM 6 86369160 2 WHEEL 6 00 X 1...

Page 80: ...80 86333220 CS20 On Board Battery Charger Disk 6 8 1 2 15 3 4 5 6 7 9 10 11 13 14 7 6 10 12 8...

Page 81: ...7690 1 BRACKET CHARGER 5 86259400 2 WASHER THRUST 51 ID X 1 ODBRO 6 86010670 7 WASHER 5 16 X 3 4 SS 7 86276070 5 SCR 5 16 18 X 3 4 CARRIAGE SS 8 86359740 7 SCR 10 32 X 5 16 HWHTR 9 86006750 2 SCR 5 16...

Page 82: ...82 86333220 CS20 On Board Battery Charger Deluxe Cylindrical 3 7 14 7 6 10 8 12 8 1 2 15 4 5 6 9 10 11 13 6 17 16 18...

Page 83: ...UST 51 ID X 1 ODBRO 6 86010670 7 WASHER 5 16 X 3 4 SS 7 86276070 5 SCR 5 16 18 X 3 4 CARRIAGE SS 8 86359740 7 SCR 10 32 X 5 16 HWHTR 9 86006750 2 SCR 5 16 18 X 1 00 HHCS GR5 10 86270830 5 NUT 5 16 18...

Page 84: ...84 86333220 CS20 Pedal Platform 3 4 5 6 7 8 9 10 11 1 2 2 2 2...

Page 85: ...CR KA50X10 PT OHS WN1412 PLTD 3 86264930 1 CABLE TIE 3 5 UL CS 4 86326150 1 BRKT LINEAR POT 5 86326140 1 PIN DOWEL 25 X 2 75 STEEL 6 86318010 1 PEDAL HEEL 7 86318000 1 PEDAL ACCELERATOR 8 86317990 1 P...

Page 86: ...86 86333220 CS20 Pedal Platform Mounting...

Page 87: ...atform Mounting REF PART NO QTY DESCRIPTION SERIAL NO FROM NOTES 1 86327510 9 SCR KA50 X 16 WN1412 A2 SS 2 86198440 9 CLAMP 1 4 PLASTIC CABLE 3 86327910 4 SCR KA50X25 PT OHS WN1412 PLTD 4 86173330 4 W...

Page 88: ...88 86333220 CS20 Recovery Tank 23 22 24 25 A TORQUE 15 17 IN LBS A A 1 2 3 4 5 6 7 8 9 10 11 12 13 16 17 18 19 14 15 7 15 7 17 15 20 21...

Page 89: ...0 1 GASKET VACUUM INTAKE 10 86318220 1 FRAME VACUUM MOTOR 11 86318210 1 INTAKE VACUUM 12 86344710 1 PANEL BACK 13 86317920 1 TANK RECOVERY 14 86302360 1 DRAIN HOSE CMPS 15 86173330 10 WASHER M5 FLAT I...

Page 90: ...90 86333220 CS20 Scrub Brush Pad Driver 8 4 9 6 5 7 5 3 2C 2A 2B 7 5 8 4 9 6 1 10A 10F...

Page 91: ...R 12 X 1 PPHSMS SS 5 86276580 1 SCR 8 32 X 3 4 PTHMS 6 86276600 3 SCR 10 X 3 4 PTHSMS SS 7 86007910 1 SPRING EXT 31 D X 2 0 L X 03 W SS 8 86007280 1 SOCKET DRIVE BRUSH 9 86005940 1 PLATE BRUSH RELEASE...

Page 92: ...S20 Scrub Brush Deck Disk 6 35 36 37 38 39 40 41 42 43 A TORQUE 18 FT LBS A B TORQUE 20 FT LBS B 33 27 17 9 9 34 9 25 24 9 26 1 2 3 4 5 6 7 8 9 10 11 12 13 14 15 16 17 18 19 20 21 22 23 34 25 24 27 28...

Page 93: ...D 18 86277130 4 SCREW 5 16 18X1 00 CARRIAGE SS 19 86326600 1 BRKT DECK LIFT UPPER RIGHT 20 86326610 1 BRKT DECK LIFT LOWER RIGHT 21 86276070 4 SCR 5 16 18 X 3 4 CARRIAGE SS 22 86326580 1 BRKT DECK LIF...

Page 94: ...94 86333220 CS20 Scrub Brush Deck Mounting Disk 1 2 3 4 5 6...

Page 95: ...IPTION SERIAL NO FROM NOTES 1 86277030 4 SCR 5 16 18X1 25 CARRIAGE S 2 86270830 4 NUT 5 16 18 HEX NYLOCK SS 3 86010670 4 WASHER 5 16 FLAT SS 4 86259410 4 WASHER THRUST 51 ID X1ODX 063 5 86228990 4 BEA...

Page 96: ...96 86333220 CS20 Scrub Deck Drive Assembly Cylindrical 1 2 3 4 6 7 10 11 12 13 14 15 16 17 1 5 5 4...

Page 97: ...2 SHAFT GEAR RIGHT 5 OPEN 6 50353840 1 CARRIER MOTOR WORKED R 7 73060890 1 SCREW M6X12 8 8 R2R IN6RD 8 OPEN 9 OPEN 10 50353910 1 SHEET METAL COMPONENT COVERING CAP INVER 11 41002260 2 DRIVESHAFT COMP...

Page 98: ...98 86333220 CS20 Scrub Deck Cylindrical...

Page 99: ...UTOR 10 50353930 1 BRUSHES RETAINER 11 50353890 1 HOUSING BOTTOM PART R 55 12 50354000 1 SWEEP TANK COUNTER ROTATION R 55 13 51163370 1 SLEEVE BLOWER WHEEL 14 50334260 1 MOULDED PART COVERING CAP 15 5...

Page 100: ...100 86333220 CS20 Scrub Deck Linkage Cylindrical 1 2 3 4 5 6 8 9 10 11 7 1 2 3 5 6 12 13 14 15 15...

Page 101: ...LINKAGE BOTTOM 5 86348210 4 SPACER 381D X 63OD X 50 AL 6 86228990 4 BEARING FLNGD 314ID X 502OD 7 86346430 1 COVER CYL DECK 22 IN 8 73031130 13 SCREW 6X25 10 9 A2R IN6RD 9 86346320 1 FRAME LIFT ARM 1...

Page 102: ...102 86333220 CS20 Scrub Brush Deck Mounting Cylindrical 1 2 3 4 8 7 6 5 9 10 11...

Page 103: ...AME 3 86226760 2 SPACER 3 8 ODX 257IDX 38L NYL 4 86327910 2 SCR KA50X25 PT OHS WN1412 PLTD 5 86277030 4 SCR 5 16 18X1 25 CARRIAGE S 6 86270830 4 NUT 5 16 18 HEX NYLOCK SS 7 86010670 4 WASHER 5 16 FLAT...

Page 104: ...104 86333220 CS20 Scrub Deck Lift 1 2 3 4A 5 6 7 8 12 7 10 9 11 A TORQUE 50 IN OZ A 13 4B...

Page 105: ...ATOR DISK 4B 86346540 1 PLATE SWITCH ACTUATOR CYLINDRICAL 5 86320880 1 ACT 36VDC 3 0 STK 8 74 LNG 6 86328040 1 PIN CLEVIS 1 4 X 2 0 L 7 86008650 2 COTTER 1 4 RING 8 86336790 1 PIN CLEVIS 1 4 X 2 50 PL...

Page 106: ...106 86333220 CS20 Solution Tank 21 5 22 A A 1 2 6 7 8 9 10 11 12 13 14 15 17 14 18 19 20 23 3 26 24 25 27 28 4...

Page 107: ...4 SS 11 86362610 1 VALVE 36VDC SOLENOID 16 12 86346040 1 VALVE BALL 3 8MPT X 3 8BARB 90DEG 13 86007970 1 STRAINER 3 8 IN NPT 60 MESH 14 86275180 4 SCR 5 16 18 X 1 2 HHCS GR5 15 86006760 3 SCR 5 16 18...

Page 108: ...108 86333220 CS20 Solution Tank Deluxe 1 2 6 10 14 17 24 25 3 18 19 A 9 11 15 14 A 7A 8 12 13 5 20 21 22 23 7B 12 11 DISK DELUXE CYLINDRICAL 26 26...

Page 109: ...30ODX 09T PLT 10 86010670 2 WASHER 5 16 X 3 4 SS 11 86362610 1 VALVE 36VDC SOLENOID 16 12 86346040 1 VALVE BALL 3 8MPT X 3 8BARB 90DEG 13 86007970 1 STRAINER 3 8 IN NPT 60 MESH 14 86275180 4 SCR 5 16...

Page 110: ...110 86333220 CS20 Squeegee 1 4 5 6 7 8 9 10 11 12 13 14 15 16 17 18 20 21 22 23 26 27 28 29 30 32 33 34 19 34 3 2 31 24 25 24 30 35 ATTACHES TO FRAME 36 37...

Page 111: ...E SQUGE REAR URTHN 38A OPTION 16 86323910 1 VACUUM TUBE SQUEEGEE 17 86320730 1 COVER SQUEEGEE RH 18 86320720 1 COVER SQUEEGEE LH 19 86292500 4 WASHER 324ID X 567OD X 057 SS 20 86001350 2 BUSHING SPANN...

Page 112: ...112 86333220 CS20 Squeegee Cylindrical 23 13 26 25 1 2 22 4 5 6 7 8 9 10 21 12 20 12 13 14 19 15 16 17 3 9 9 10...

Page 113: ...86329560 4 SCR M8x1 25x25MM LG BSHCS SS 11 86277130 2 SCR 5 16 18X1 00 CARRIAGE SS 12 86271840 2 NUT 5 16 18 HEX NYLOCK THN SS 13 86173330 2 WASHER M5 FLAT ISO7093 SS 14 86172950 4 SCR M5X12 SHCS ISO4...

Page 114: ...114 86333220 CS20 Squeegee Linkage Cylindrical 1 2 3 4 5 6 7 8 9 10 11 12 13 14 16 15 17 18 19...

Page 115: ...7 86279070 2 WASHER M6 FLAT 8 86273850 1 SCR 1 4 20 X 2 00 HHCS SS 9 86271870 1 NUT 1 4 20 HEX NYLOCK THIN SS 10 86271240 2 NUT CAP PUSH 25 11 86010630 2 WASHER 1 4 X 5 8 FLAT SS 12 86005810 2 NUT 1...

Page 116: ...116 86333220 CS20 Steering 4 5B 1B 2 6B 7 1A 2 3 4 5A 6A...

Page 117: ...2 86271610 1 NUT 5 8 18 HEX NYLOCK THN 3 86279420 1 WASHER 75IDX1 25ODX 125THK NY 4 86228790 2 BEARING FLANGE 88ODX 75IDX 75 5A 86339320 1 SHAFT STEERING KIT CS20 5B 86339330 SHAFT STEERING ASM DELUX...

Page 118: ...118 86333220 CS20 Vacuum 1 2 3 4 5 6 7 8 See maintenance section for motor mounting details...

Page 119: ...010630 3 WASHER 1 4 ID X 5 8 OD SS 3 86264930 1 CABLE TIE 3 5 UL CSA 4 86327500 3 MOUNT VIBRATION 5 86012210 1 VAC MOTOR 36VDC 2ST TD 86135310 1 BRUSH SET 24 36V VAC WINDSOR 6 86217750 1 ELBOW VAC MUF...

Page 120: ...120 86333220 CS20 Wiring Battery 1A 2A 3 4 5 MAIN WIRING HARNESS 6 1B 2B...

Page 121: ...86329710 1 BATT CBL ASM W ANDERSON 2B 86334270 1 CBL BATT RING W ANDERSON NOT SHOWN 3 86228400 3 BATTERY 12V 130AH 86328630 3 BATTERY 12V 114A H AGM NOT SHOWN 4 86270920 2 SP NUT 6 32 HEX NYLOCK SS 5...

Page 122: ...TOR PLATFORM X7 X8 X9 X10 X11 X13 X12 1 15 RT 2 14 SW 1 21 RT 2 22 WS 1 25 RT 2 26 SW 1 3 WS 2 4 GE 1 23 WS 2 24 SW 1 19 BN 2 20 WS 3 18 OR 4 17 GN 5 16 BL 6 NC 1 1 BN 2 2 BL 3 13 RT 4 NC 5 10 SW 6 9...

Page 123: ...ARNESS CS20 MAINCHARGER 5 86333130 1 HARNESS CS20 MAIN TRACTION 6 86333140 1 HARNESS CS20 MAIN VACUUM 7 86333150 1 HARNESS CS20 MAIN BRUSH 8 86333160 1 HARNESS CS20 MAIN POWER 9A 86333180 1 JUMPER CHA...

Page 124: ...4 9 33 39 40 41 18 38 20 8 32 37 34 36 26 25 24 23 22 21 11 35 36 52 12 49 37 51 40 49 7 50 14 15 6 41 53 56 55 29 42 43 58 45 46 52 45 46 48 47 47 57 57 58 1 BN 11 SW 2 BL 3 WS 4 GE 5 RT 6 SW 7 GN 8...

Page 125: ...MOTOR K4 RELAYS VACUUM MOTOR K5 REALYS ACTUATOR K6 RELAYS MAIN M1 BRUSH NMOTOR M3 TRACTION MOTOR M4 LINEAR ACTUATOR MOTOR BRUSH SQUEEGEE S0 EMERGENCY SWITCH S1 KEYSWITCH S2 MICROSWITCH PLATFORM S3 BUT...

Page 126: ...F2 18A M M1 M M2 A K V5 A K V6 Y2 X10 26 X10 25 h P1 X13 23 X13 24 10mm rt 27 10mm rt 57 2 5mm rt 45 1 5mm rt 25 1 0mm sw 26 1 5mm ws 56 1 5mm sw 53 1mm sw 24 1 5mm ws 23 1 5mm rt 46 1 5mm rt 47 1 5m...

Page 127: ...H NMOTOR M3 TRACTION MOTOR M4 LINEAR ACTUATOR MOTOR BRUSH SQUEEGEE S0 EMERGENCY SWITCH S1 KEYSWITCH S2 MICROSWITCH PLATFORM S3 BUTTOM REVERSE FORWARD S4 HORN BUTTON S5 MICROSWITCH COVER S6 MIRCOSWITCH...

Page 128: ...1mm vi 25 1mm gn 24 X5 54 X5 59 X5 44 X5 51 X5 31 1mm ws 22 1 5mm rt 47 1 5mm ws 52 1 5mm ws 51 0 75mm ws 20 0 75mm bn 19 1mm ws 21 0 5mm sw 6 X5 19 X5 25 X4 35 X4 21 X4 23 X4 39 X4 26 X4 LED X5 10 1...

Page 129: ...H NMOTOR M3 TRACTION MOTOR M4 LINEAR ACTUATOR MOTOR BRUSH SQUEEGEE S0 EMERGENCY SWITCH S1 KEYSWITCH S2 MICROSWITCH PLATFORM S3 BUTTOM REVERSE FORWARD S4 HORN BUTTON S5 MICROSWITCH COVER S6 MIRCOSWITCH...

Page 130: ...FERENZ THROTTLE WIPER i DRIVE i 36 70 36VDC 70A 5Kohm 5 7 3 11 9 1 2 1 8 2 1 2 1 2 S0 B2 8 X3 11 X3 12 A K V8 A K V9 X3 8 X3 7 X6 12 X6 11 X12 X12 NO C S5 G M S1 M M3 x2 x1 PLATF R2 K A V7 Y1 X3 19 X3...

Page 131: ...H NMOTOR M3 TRACTION MOTOR M4 LINEAR ACTUATOR MOTOR BRUSH SQUEEGEE S0 EMERGENCY SWITCH S1 KEYSWITCH S2 MICROSWITCH PLATFORM S3 BUTTOM REVERSE FORWARD S4 HORN BUTTON S5 MICROSWITCH COVER S6 MIRCOSWITCH...

Page 132: ...54 1mm gr 32 1mm ws 34 DEUTSCH DEUTSCH A1 0V B2 8 M B2 8 A B2 2 G B2 2 GND B3 8 GND B5 1 0V REVERSE SWITCH STATUS INDICATOR INHIBIT 2 INHIBIT 1 SLOW FAST SWITCH FAST A1 A2 B C SLOW i DRIVE i 36 70 36...

Page 133: ...ACTUATOR K6 RELAYS MAIN M1 BRUSH NMOTOR M3 TRACTION MOTOR M4 LINEAR ACTUATOR MOTOR BRUSH SQUEEGEE S0 EMERGENCY SWITCH S1 KEYSWITCH S2 MICROSWITCH PLATFORM S3 BUTTOM REVERSE FORWARD S4 HORN BUTTON S5...

Page 134: ...K V up A K V down 1 2 S up 1 2 S down A K V1 R3 270Ohm 1 9 5 K5 B5 4 2 10 6 K5 B5 4 3 11 7 K5 B5 4 4 12 8 K5 B5 4 X3 1 NC C NO S9 NC C NO S10 1 9 5 B5 5 2 10 6 B5 6 3 11 7 B5 5 4 12 8 B5 6 13 14 K5 1...

Page 135: ...ACTUATOR K6 RELAYS MAIN M1 BRUSH NMOTOR M3 TRACTION MOTOR M4 LINEAR ACTUATOR MOTOR BRUSH SQUEEGEE S0 EMERGENCY SWITCH S1 KEYSWITCH S2 MICROSWITCH PLATFORM S3 BUTTOM REVERSE FORWARD S4 HORN BUTTON S5...

Page 136: ...A2 B C FAST FRONT BACK K4 K3 A1 S8 GND S1 S0 F1 F2 F3 H1 H2 S3 X3 H4 P1 1 30 30 87 87 S4 20 S3 85 85 86 86 K6 K2 K1 K5 X5 X4 1 5 2 3 4 6 7 8 9 10 11 12 14 13 1 5 2 3 4 6 7 8 1 5 2 3 4 6 7 8 9 10 11 12...

Page 137: ...ACTUATOR K6 RELAYS MAIN M1 BRUSH NMOTOR M3 TRACTION MOTOR M4 LINEAR ACTUATOR MOTOR BRUSH SQUEEGEE S0 EMERGENCY SWITCH S1 KEYSWITCH S2 MICROSWITCH PLATFORM S3 BUTTOM REVERSE FORWARD S4 HORN BUTTON S5...

Page 138: ...PIN 12 K2 PIN 13 K1 PIN 13 K2 PIN 14 K1 PIN 9 K2 PIN 11 K2 PIN 14 K2 RELAY JUMPERS PIN 10 41 YEL PIN 11 40 ORG PIN 12 39 VIO PIN 13 33 BLK PIN 14 9 VIO 2 BLU 3 WHT 4 YEL 5 RED 6 BLK 7 GRN 8 ORG 9 VIO...

Page 139: ...0 CS20 139 Wiring Control Panel Prior to Serial No 5 REF PART NO QTY DESCRIPTION SERIAL NO FROM NOTES 1 86326190 1 HARNESS MAIN PANEL 2 86261210 2 DIODE ASM 76008 X 76008 3 86003410 2 DIODE ASM 76075...

Page 140: ...GRN 7 ORG 3 RED 1 BRN 6 VIO 5 BLK 2 BLU 1 BRN NO NC NO NC NO NC NO NC VACUUM SWITCH MID POSITION SWITCH BRUSH SWITCH BOTTOM POSITION SWITCH 10 DIAGRAM R LINEAR SWITCH 1 BRN 2 WHT 3 BLK SWITCH R 2 3 9...

Page 141: ...2 86333110 1 HARNESS CS20 MAIN POT AND BRAKE 3 86333120 1 HARNESS CS20 MAIN CHARGER 4 86333130 1 HARNESS CS20 MAIN TRACTION 5 86333140 1 HARNESS CS20 MAIN VACUUM 6 86333150 1 HARNESS CS20 MAIN BRUSH 7...

Page 142: ...1 K1 AUX1 SOLBRAKE R1 M 1 132 1 132 POT GND Ubatt 1 135 2 244 20 GE 32 GR 33 SW 37 RS 36 GR 35 GR 11 RS 41 GE 34 WS 9 VI 39 VI DIR LED 14 PIN TILLER X8 X4 X13 X5 X7 X10 X12 K2 KSI X6 ESTOP TC TRACTION...

Page 143: ...6 2 239 1 143 Ubatt GND 47 RT 52 WS 51 WS 16 BL 17 WS 17 WS 14 SW 23 OR 21 GE 6 SW 55 SW 31 BL 45 RT 46 RT ACT DIR LED ESTOP PLATFORM FWR REV K2 K1 K2 HORN KSI FWRSW BRK REV K2 K1 BRUSH VAC LED1 LED2...

Page 144: ...32 3 331 3 2 4 1 5 6 1 1 1 1 6 5 1 4 2 3 1 1 6 5 1 4 2 3 1 137 3 317 3 342 3 317 3 342 3 342 3 342 1 1 31 BL 13 RT 3 WS 4 GE 33 SW 32 GR 34 WS 28 BL 30 RS 29 SW PIN4 ACT Y1 S1 KA1 KA1 KA1 KA1 S2 KA1 K...

Page 145: ...6327840 GASKET VAC MOUNT 27 86327830 GASKET 188X 31X41 0 86317980 GASKET DOME 86326070 BLADE SQUEEGEE REAR DURO 40 86326060 BLADE SQUEEGEE FRONT DURO 40 86219690 KNOB 1 5 OD X 5 16 18 86348190 NUT 5 1...

Page 146: ...001494 10061300000570 10061330001600 10061340000005 10061370000071 10061380000058 10 10061330001912 10061420000120 11 10061250002046 10061300000018 10061330002230 10061340000031 10061370000288 1006138...

Page 147: ...for up to three 3 years from the date of purchase through authorized service provider No travel coverage for cord electric models See table below for each general product model warranty coverage Uprig...

Page 148: ...the original warranty period 90 Day Warranty Extension Available Upon receipt of the Machine Registration K rcher North America will extend by 90 days from the date of purchase by the original end use...

Reviews: