
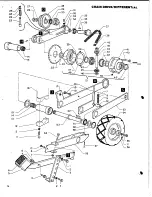

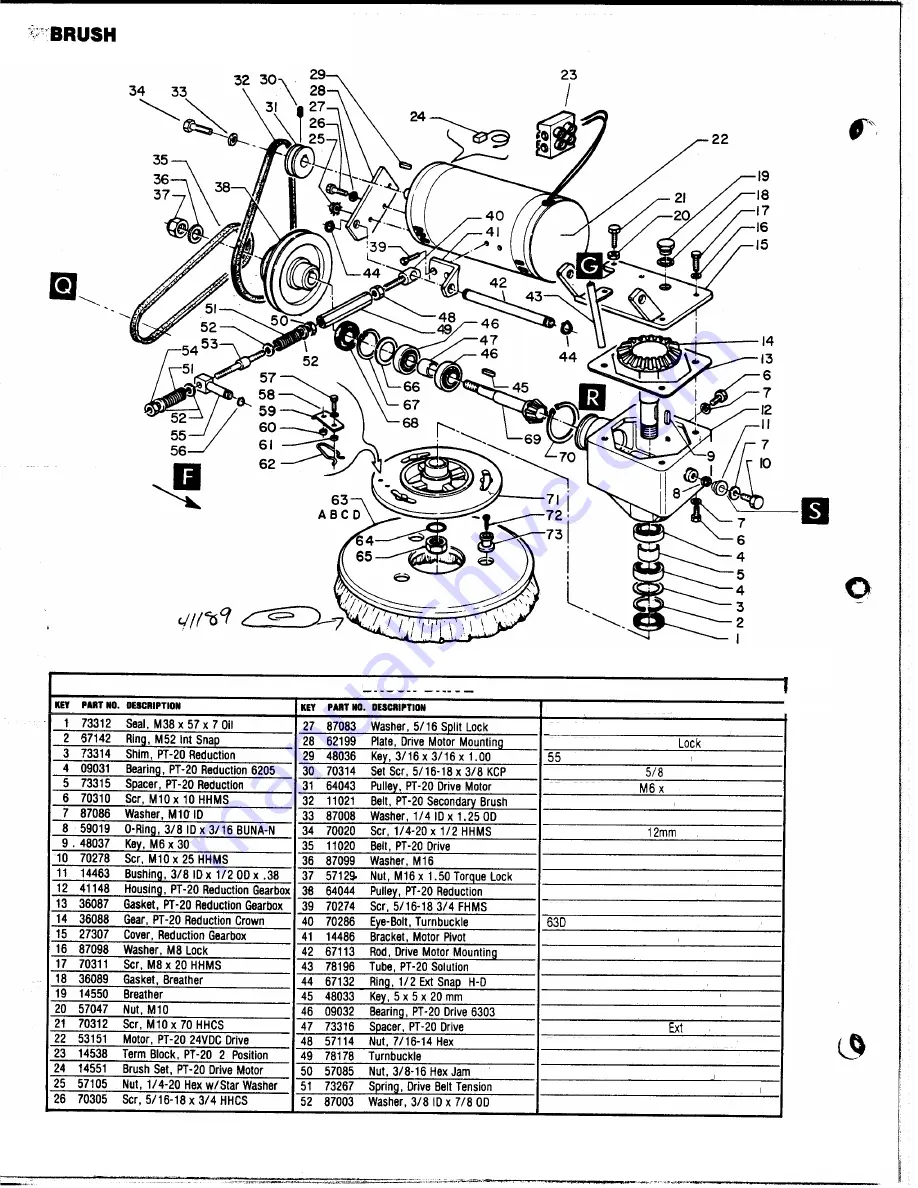
DRIVE
I
.
74
-
Reduction
Gearbox Assembly
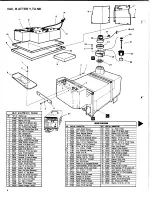
BRUSH DRIVE
16
KEY
PART
NO.
DESCRIPTION
t
53 671 12
Rod, Turnbuckle Sliding
66105
Pin, Turnbuckle
56 67104
Ring,
Ext Snap H-D
57 70260 Scr,
16
58 87056 Washer, M6
59 20068
Clamp, PT-20 Brush
60 73317
Shim,
Dia.
61 73318 Shim, 15mm Dia.
62 73319
Spring, PT-20 Brush Lock
63A 02095
Brush, PT-20 Nylon
638 02096
Brush, PT-20 Polypro
63C 02097
Brush, PT-20 Extra Aggressive
02098
Pad Driver, PT-20
,
64 59020 0-Ring, 4125
65 57133 Nut, M24 x 2 Lock
66 73320
Shim, M47 x 0.3
67 67144
Ring, M47 Int Snap
68 73313 Seal, M30
x
47 x
7 Oil
69 36090 Gear, Reduction Pinion
70 67143
Ring, M60
Snap
71 62202
Plate, PT-20 Brush Holder
72 70304
Scr, 1/4-20 x 1.25
FHWS
73 51076
Lug, Brush Mounting
74 36076
Gearbox Asm, PT-20 Reduction
54 57022
Nut, 3/8-16
Summary of Contents for PowerTec20
Page 1: ......
Page 9: ...1 7 AI 1 6 9...
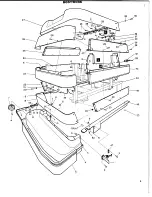
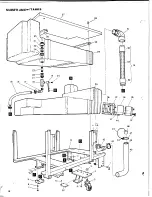
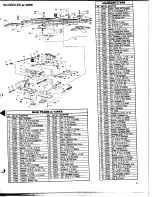
Page 10: ...MAINFRAMEWITANKS 38 I 34 37 36 35 39 41 i o 1 3 14 1 46...
Page 11: ...SQUEEGEE w ARM 59 69 21 1 I __ 11...
Page 13: ...48 4 9 50...
Page 14: ...14 2 1 IAL 39...


