


29
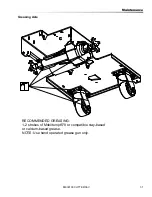
Maintenance
Vacuum Motor
(Refer to the Vacuum Group in the parts section of
manual)
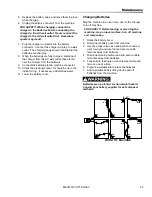
Do not use a pressure washer to clean around the
vacuum motors. Use tap pressure only. Care must
be taken so that water is not directed into vacuum
motor air intakes.
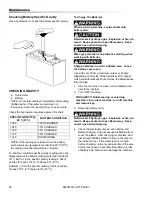
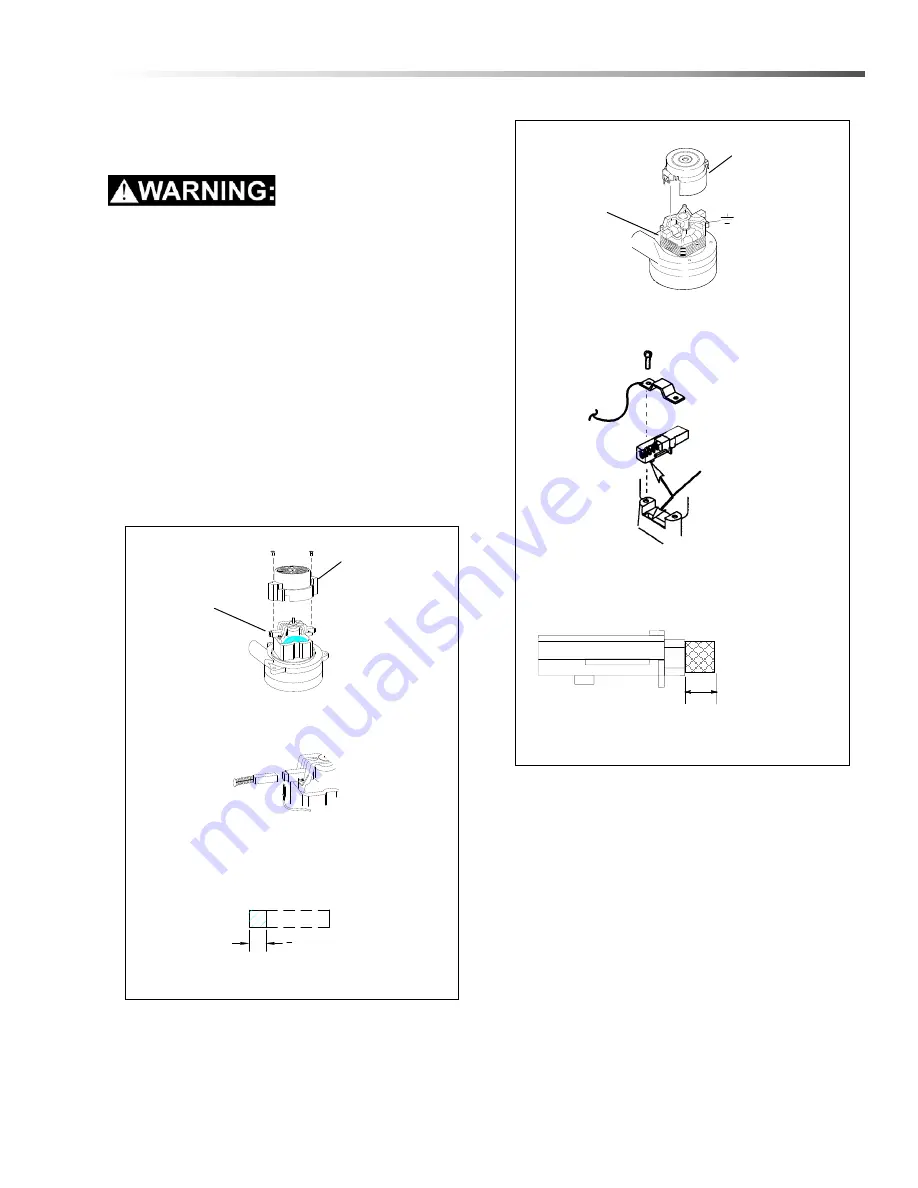
CHANGING VACUUM MOTOR
1.
Disconnect batteries from machine.
2.
Remove front cover.
3.
Disconnect electrical connector to the vacuum
motor.
4.
Loosen clamp and disconnect hose from vacuum
intake.
5.
Remove vacuum motor mounting bracket bolts.
6.
Remove vacuum motor from mounting bracket.
7.
Reverse steps to install.
86039100 CUTTER 36V
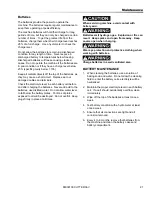
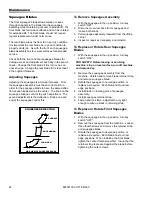
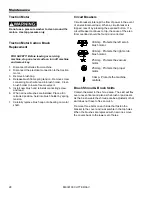
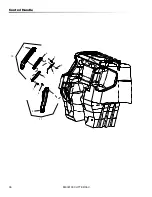
Vacuum Motor Carbon Brushes Replacement (Windsor)
End Cap
Carbon
Brushes
If armature commutator is grooved, extremely pitted or not
concentric, the motor will need to be replaced or sent to a
qualified service center.
Important:
These brushes wear quicker as the length shortens
due to increased heat. Spring inside brush housing
will damage motor if brushes are allowed to wear
away completely.
Periodically check the length of the carbon brushes.
Replace both carbon brushes when either is less than
3/8" (9.5mm) long.
3
8
[9.5mm]
Important:
These brushes wear quicker as the length shortens
due to increased heat. Spring inside brush housing
will damage motor if brushes are allowed to wear
away completely.
Periodically check the length of the carbon brushes.
Replace both carbon brushes when either is less than
3/8" (9.5mm) long.
3/8 (9.5mm)
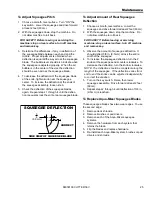
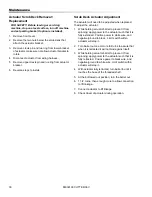
Vacuum Motor Carbon Brushes Replacement (Ametek)
End Cap
Carbon
Brushes
If armature commutator is grooved, extremely pitted or not
concentric, the motor will need to be replaced or sent to a
qualified service center.
Note:
Place
stop in
groove.
Summary of Contents for Saber Cutter 10052400
Page 12: ...12 Operations Controls 86039100 CUTTER 36V 14 10 4 1 13 5 2 9 3 6 8 15 7 16 11 12 12 ...
Page 34: ...34 Notes 86039100 CUTTER 36V ...
Page 35: ...35 PARTS Parts 86039100 CUTTER 36V ...
Page 36: ...36 9 1 2 3 4 6 8 7 5 10 11 86039100 CUTTER 36V Control Handle ...
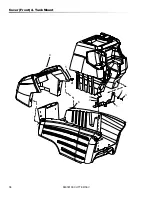
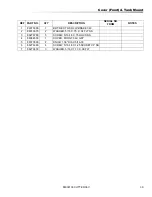
Page 38: ...38 5 6 3 7 1 2 3 4 86039100 CUTTER 36V Cover Front Tank Mount ...
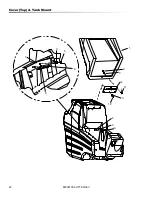
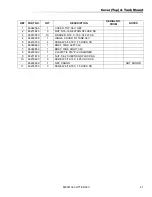
Page 40: ...40 8 7 11 3 4 3 2 9 5 3 6 5 3 1 10 86039100 CUTTER 36V Cover Top Tank Mount ...
Page 42: ...42 1 2 3 5 6 8 4 86039100 CUTTER 36V Decal ...
Page 46: ...46 Lift Handle 2 3 4 5 8 9 2 7 6 1 86039100 CUTTER 36V ...
Page 48: ...48 Lift Handle Linkage 2 12 7 4 5 6 8 11 3 10 9 13 15 1 5 14 86039100 CUTTER 36V ...
Page 56: ...56 Scrub Deck Motors 5 4 3 10 9 8 7 6 2 1 86039100 CUTTER 36V ...
Page 62: ...62 Scrub Deck Lift Linkage 1 2 3 4 5 6 7 3 2 7 5 3 7 7 6 4 86039100 CUTTER 36V ...
Page 64: ...64 Scrub Deck Lift 7 15 17 4 13 5 13 2 14 14 8 3 6 10 9 11 1 1 13 16 86039100 CUTTER 36V ...
Page 66: ...66 Solution 13 11 9 10 HOSE FROM FILTER ASM 8 7 4 3 1 12 6 5 2 86039100 CUTTER 36V ...
Page 68: ...68 Solution 9 1 5 3 TO SOLUTION TANK 2 5 11 12 10 13 4 6 2 7 8 86039100 CUTTER 36V ...
Page 74: ...74 Vacuum 8 7 10 9 3 6 5 1 2 3 1 2 4 4 5 14 12 11 86039100 CUTTER 36V ...
Page 78: ...78 Wiring Battery 1 2 3 4 5 9 6 7 8 1 11 10 12 86039100 CUTTER 36V ...
Page 86: ...86 Notes 86039100 CUTTER 36V ...
Page 87: ...87 OPTIONS Options 86039100 CUTTER 36V ...
Page 90: ...90 86039100 CUTTER 36V Emergency Stop 1 ...
Page 95: ...95 86039100 CUTTER 36V ...


