E
E
Shelf
Steel shelf support
Shelf slot
Figure 2b
S W E D I S H W I N E R A C K
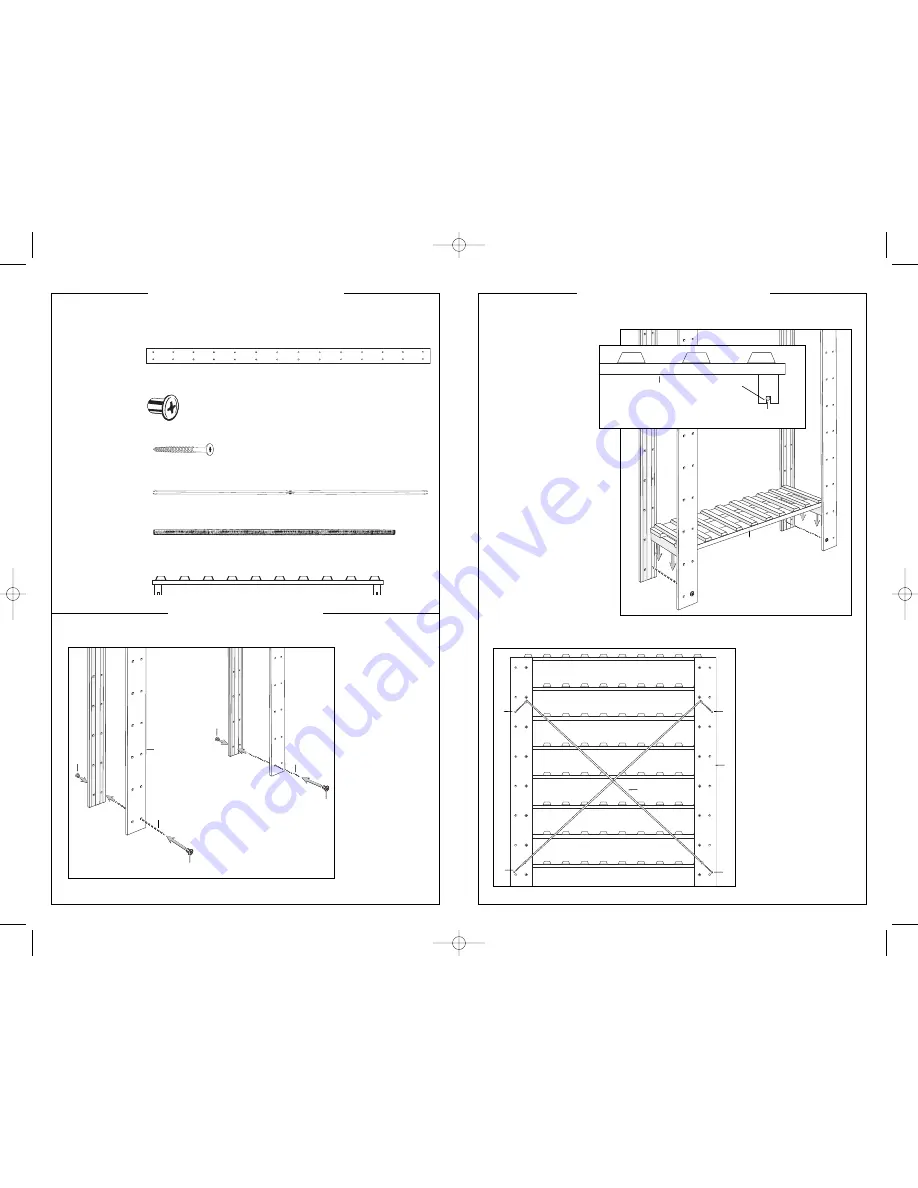
PA RT S I N V E N TO RY
S W E D I S H W I N E R A C K
E A SY A S S E M B LY
A.
4 Uprights
B.
56 Grommets
1
. Starting with
the bottom
shelves (
F
), insert
steel shelf
supports (
E
)
through inner
holes in uprights
(
A
) with smooth
side facing
outward. Using a
Phillips screw
driver, loosely
attach a grommet
(
B
) to each end
of the support
rod. (Figure 1)
A
E
B
B
B
E
Figure 1
B
E A SY A S S E M B LY
C.
4 Back Support
Screws
E.
28 Steel
Shelf Supports
D.
Back Support
F.
14 Shelves
B
A
E
F
C
D
Figure 2a
3.
Using a Phillips
screw driver, fasten
the back support
(
D
) with the four
provided screws (
C
),
to the rear uprights.
Screw holes
are located just
below the 2nd
grommet down and
the bottom two
screw holes
between the 7th
and 8th grommet
down (Figure 3).
Figure 3
2.
Place bottom shelf
(
F
) onto the steel
support rods (Figure
2b)—sliding the rod
securely into the
shelf’s designated
slot (Figure 2a).
Tighten grommets
after placing bottom
shelf to securely hold
the structure together
for placement of the
other shelves.
Repeat
Step 2
with
the other 13 shelves.
Tighten grommets
after remaining
shelves
are in place.
F
A
C
C
D
C
C
14Tr Swedish Rack.qxp 5/19/09 3:03 PM Page 3


