


18
Step 1
Find wall stud locations. If both wine cellar side and finished basement side of walls have drywall
already installed it is important to locate the wall studs in the area chosen to mount the Through-the-
Wall system. Use of any high quality stud finder is recommended for locating the center and edges of
the wall studs on the wine cellar wall. Once located, the stud edges should be clearly marked prior to
following Step 2 below.
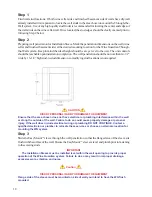
Step 2
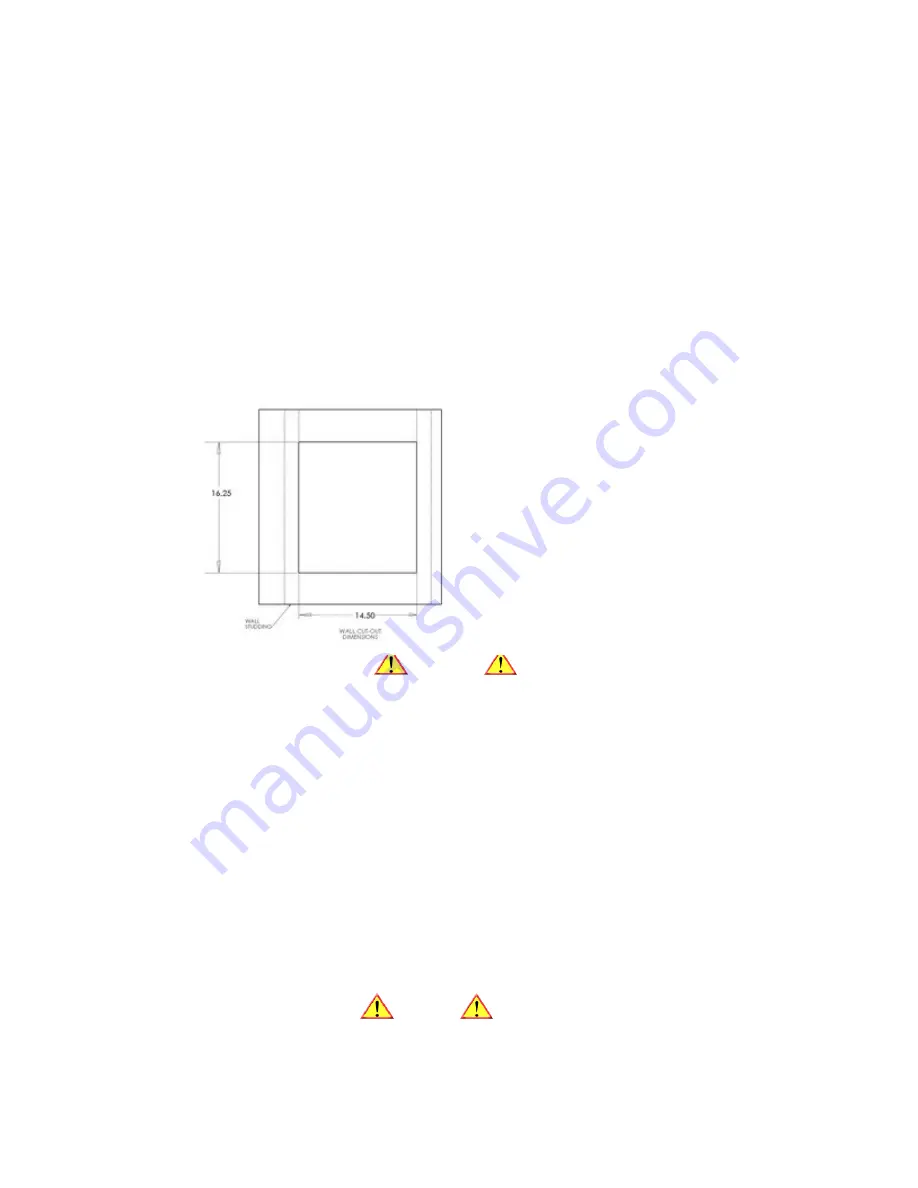
Preparing wall penetration for Installation Sleeve. Mark the penetration dimensions on the wall (wine
cellar and finished basement side) at the desired mounting location for the Wine Guardian Through-
the-Wall system. Keep in mind the ideal height should be at eye level to the user. The unit controls
should be reachable upon installation completion. The wall penetration should be no nore than 14-1/2”
wide by 16-1/4” high stud-to-stud dimension so modifying stud locations is not required.
Caution
RISK OF PERSONAL INJURY OR DAMAGE TO EQUIPMENT
Flange side of the sleeve must be mounted on side of wall you intend to have the WG flush
mounted.
CAUTION
RISK OF PERSONAL INJURY OR DAMAGE TO EQUIPMENT
Ensure that the area chosen does not have electrical or plumbing interference within the wall
or along the outside of the wall. Failure to do so could cause property damage or perosnal
injury. If the wall does include electrical wiring or plumbing DO NOT CONTINUE. Contact a
qualified electrician or plumber to relocate these services or choose an alternate location for
mounting the WG system.
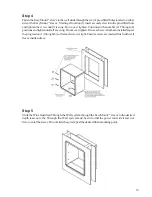
Step 3
Slide the EasyMount
TM
sleeve through the wall penetration so that the flanged area of the sleeve sits
flush with the surface of the wall. Ensure the EasyMount
TM
sleeve is level and plumb prior to fastening
to the existing studs.
IMPORTANT
The Installation Sleeve must be installed level within the wall opening to provide proper
operation of the Wine Guardian system. Failure to do so may result in improper drainage,
excessive ware, vibration and noise.
Summary of Contents for Through-the-Wall
Page 12: ...10 Overview and back view ...


