background image

Assembly GUIDE

*Please verify that you have the correct number of parts before proceeding.  

Depending on the model you purchased, your bundle should contain the following:

Package Contents

tools for assembly

 Page 1

or visit


wineracksamerica.com

Questions? 


888.373.6057


4 Column Display Row Corner

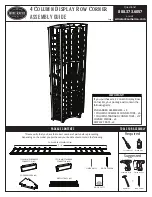
END LADDER ASSEMBLIES (x8)

77 1/8"

Cordless Drill

Finish Nailer

Hammer

Nail Setter

+

Screwdriver

Required

Wood Glue

Suggested

1 COLUMN SCREWLESS

CONNECTOR (x12)

1 COLUMN STANDARD

CONNECTOR (x24)

WOOD SCREWS

FINISH NAILS

WOOD PUTTY

CORNER WEDGE (x6)

DISPLAY TRAYS (x4)

IMPORTANT!

If you purchased a 2 Column Display Row
Corner Kit, your package will contain the 
following parts:

END LADDER ASSEMBLIES - x4
1 COLUMN SCREWLESS CONNECTORS - x6
1 COLUMN STANDARD CONNECTORS - x12
CORNER WEDGE - x6
DISPLAY TRAYS - x2

Summary of Contents for 4 Column Display RowCorner Kit

Page 1: ...ner END LADDER ASSEMBLIES x8 77 1 8 Cordless Drill Finish Nailer Hammer Nail Setter Screwdriver Required Wood Glue Suggested 1 COLUMN SCREWLESS CONNECTOR x12 1 COLUMN STANDARD CONNECTOR x24 WOOD SCREWS FINISH NAILS WOOD PUTTY CORNER WEDGE x6 DISPLAY TRAYS x4 IMPORTANT If you purchased a 2 Column Display Row Corner Kit your package will contain the following parts END LADDER ASSEMBLIES x4 1 COLUMN ...

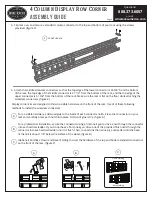
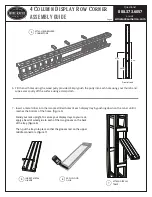
Page 2: ...column connector to the top and bottom of your rack using the screws provided Make sure the connectors are flush with the top and bottom of your rack figure 1 Minimize the risk of splitting your ladders by drilling a 1 16 pilot hole before driving the wood screws For best results drive the screw most of the way in with your drill then finish tightening by hand 3 Attach the middle standard connecto...

Page 3: ...e a nail through the connector into each vertical ladder If you do not have a finish nail gun drive one of the provided finish nails through the connector into each vertical ladder until it is flush Then countersink the nail using a nail setter until the head of the nail is about 1 16 below the surface of the wood figure B Optional Purchase Crown and Base molding to cover the hardware of the top a...

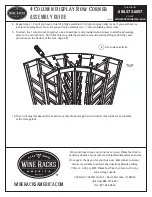
Page 4: ...Front of rack 26 5 8 51 3 4 37 1 4 7 Insert a metal U bar into the two pre drilled holes of each display tray by pushing down on the U bar until it reaches the bottom of the holes figure 5 Stand your rack upright To secure your display trays to your rack apply a bead of wood glue to each of the two grooves on the back of the tray figure 6 Then put the tray into place so that the grooves rest on th...

Page 5: ...end any photos of your racks to photos wineracksamerica com 10 That s it Enjoy this beautiful rack with your favorite beverage Pair with other rack styles for an ultimate cellar storage look 8 Repeat steps 1 7 until you have a total of 4 fully assembled 1 Column Display Cellar racks If you purchased a 2 Column Display Row Corner kit you will only assembly two 1 Column Display Cellar racks TOP 9 To...

Reviews: