Assembly GUIDE
or visit
wineracksamerica.com
Questions?
888.373.6057
Top Horizontal Display
Page 3
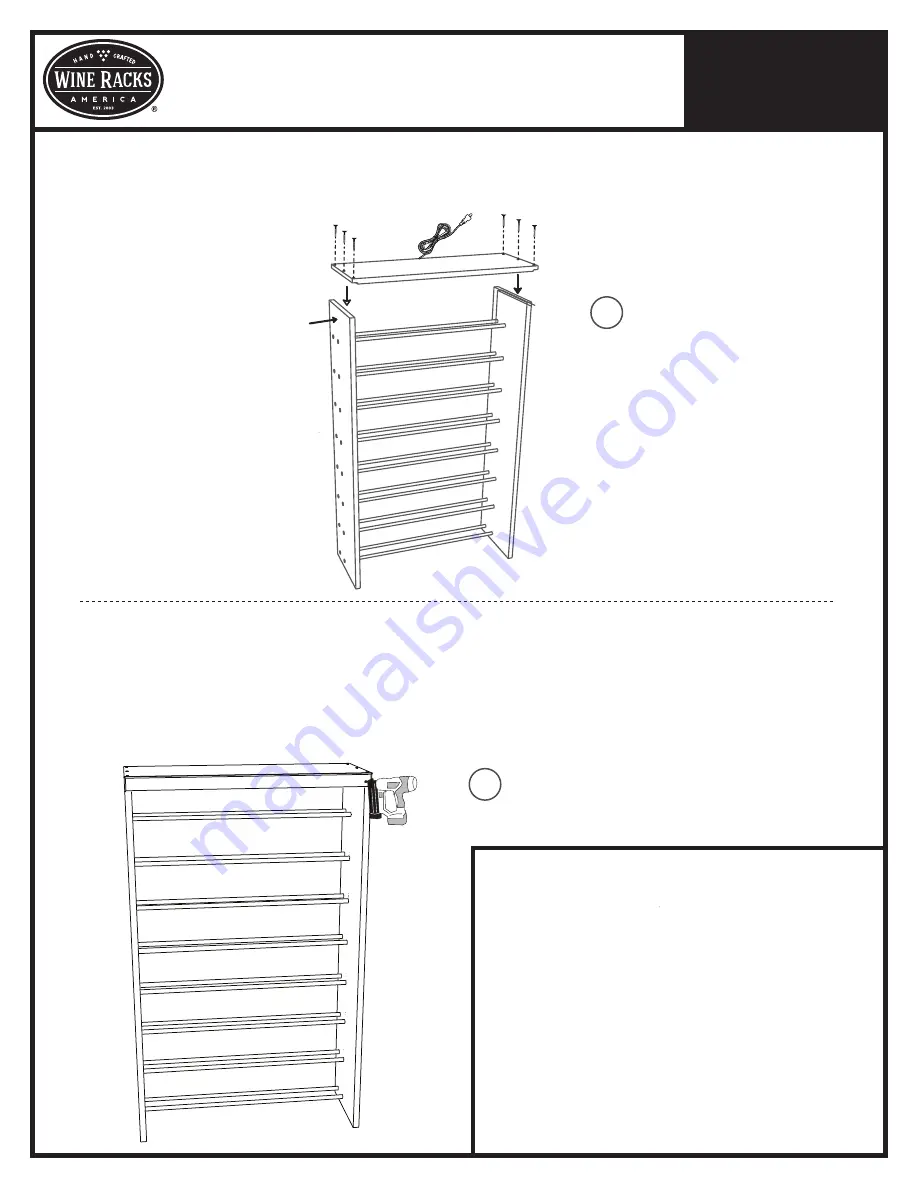
4. Attach the top panel to the side panels using the wood screws provided. The end with the larger gap is the top of
the rack. Keep the side panels and top panel held tightly together when securing. Be sure that the puck light cord
comes out towards the back of the rack. (figure 3)
5. Attach the front trim piece so that the top of the trim is flush with the top of the rack.
We recommend that you use a finish nailer to drive a nail through the trim piece into each side frame piece.
If you do not have a finish nailer, drive one of the provided finish nails into each side frame piece using a hammer
until it is flush with the surface trim piece and countersink using a nail setter. Use wood glue for added support.
Fill the nail holes using the wood putty provided. Push a small amount of putty into each hole and wipe excess putty
off the surface using a damp cloth.
(figure 4)
3
ATTACH
TOP PANEL
TOP
4
ATTACH
TRIM PIECE
360 North 700 West Suite F • North Salt Lake, UT 84054
(toll free) 888-373-6057
(fax) 801-936-0534
Once again, thank you for your business. Remember, customer
service is available to answer any questions Monday-Friday
7:00 am - 5:00 pm MST. Please feel free to contact us for any
wine storage needs.
We would love to see your wine racks in use! Please feel free to
send any photos of your rack to photos@wineracksamerica.com
WINERACKSAMERICA.COM


