background image


• 

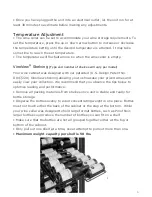
Once you have plugged the unit into an electrical outlet, let the unit run for at 

least 30 minutes to acclimate before making any adjustments. 


Temperature Adjustment  

• 

The wine cellar can be set to accommodate your wine storage requirements. To 

set the temperature, press the up or down arrow button to increase or decrease 
the temperature setting until the desired temperature is attained. It may take 
some time to reach the set temperature. 

 The temperature will fluctuate more so when the wine cellar is empty.


VinoView

®

 Shelving 

(Type and number of shelves will vary per model) 

Your wine cabinet was designed with our patented (U.S. Design Patent No. 
D847,220) VinoView shelving allowing you to showcase your prized wines and 
easily view your collection. We recommend that you observe the tips below to 
optimize loading and performance:


• Remove 

all packing materials from shelves once unit is stable and ready for 

bottle storage.  


• Disperse the bottles evenly to avoid concentrating weight in one place. Bottles 

must not touch either the back of the cabinet or the step at the bottom.  While 
your wine cellar was designed to hold large format bottles, such as Pinot Noir, 
larger bottles could reduce the number of bottles you can fit on a shelf.


• Make sure that the bottles are not all grouped together either at the top or 

bottom of the cabinet.   

• 

Only pull out one shelf at a time, never attempt to pull out more than one.  


• 

Maximum weight capacity per shelf is 50 lbs.   


Summary of Contents for VinoView 269 0X 88 0Y

Page 1: ...ne Cellar User Manual Features and Size May Vary Models 269 0X 88 0Y X 2 Stainless Steel Trim or 3 Black Trim Glass Y 3 Right Hinge or 4 Left Hinge PLEASE READ THIS MANUAL CAREFULLY BEFORE INSTALLING...

Page 2: ...used See grounding instructions in the installation section 6 Never unplug your wine cellar by pulling on the power cord Always grasp the plug firmly and pull straight out from the outlet 7 Unplug yo...

Page 3: ...so that children may not easily climb inside Thank you for using our Wine Enthusiast product This easy to use manual will guide you in getting the best use of your wine cellar Please remember to reco...

Page 4: ...Installation as a built in wine cellar 7 Installing the Handle 7 Operating Your Wine Cellar 8 Before You Start 9 Setting the Temperature Control 9 Lock or Unlock the Control Panel 9 Interior Light 9...

Page 5: ...s baseboard heaters cooking appliances etc Any floor unevenness should be corrected with the leveling legs located on the front and rear bottom corners of the wine cellar This appliance is designed fo...

Page 6: ...U S Design Patent No D847 220 VinoView shelving allowing you to showcase your prized wines and easily view your collection We recommend that you observe the tips below to optimize loading and performa...

Page 7: ...ns show the minimum space required for your wine cellar to perform as designed Installing the Handle 1 Pull back the door seal behind handle location 2 Insert screws into pre drilled screw holes 3 Att...

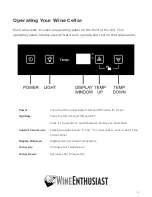
Page 8: ...ck Pressing Simultaneously and for 3 Seconds to Lock or Unlock the Control Panel Display Window Displays Set and Actual Temperature Temp Up Increases Set Temperature Temp Down Decreases Set Temperatur...

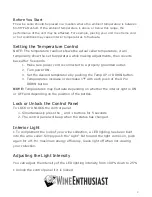
Page 9: ...e by pushing the Temp UP or DOWN button 4 Temperatures increase or decrease 1 F with each push of the UP or DOWN button NOTE Temperatures may fluctuate depending on whether the interior light is ON or...

Page 10: ...Door Lock This unit comes with key lock The keys are located inside the plastic bag along with the user manual To unlock the door insert the key into the lock and turn counter clockwise To lock the d...

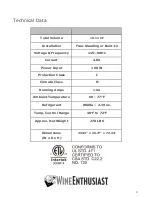
Page 11: ...ilt In Voltage Frequency 115 60Hz Current 2 0A Power Input 160 W Protection Class I Climate Class N Running Amps 1 6A Ambient Temperature 60 77 F Refrigerant R600a 2 19 oz Temp Control Range 40 F to 7...

Page 12: ...with a soft cloth Do not use harsh chemicals abrasives ammonia chlorine bleach concentrated detergents solvents or metal scouring pads Some of these chemicals may dissolve damage and or discolor your...

Page 13: ...e the wine cellar vertically Do not move with the unit lying down as possible damage to the sealed system could occur Note After moving wait for 24 hours before plugging in the wine cellar Troubleshoo...

Page 14: ...ve been opened frequently or for an extended period of time Clean condenser coils Check gasket for proper seal Check to see if doors are completely closed Moisture build up on interior or exterior of...

Page 15: ...suse abuse mishandling neglect unauthorized repair failure to properly maintain acts of God or any other cause beyond the reasonable control of the Wine Enthusiast whether similar or dissimilar to the...

Page 16: ...e by email at custserv WineEnthusiast net or by phone 800 648 6058 Limitation of Implied Warranties All implied warranties including warranties of merchantability and fitness for a particular purpose...

Reviews: