


START PROCEDURE CROKER RP50XD, RP100XD &
RP150XD RANGE MIXERS
1) Raise the mixing star assembly by way of the large hand wheel, rotate the wheel in a
clockwise direction to raise the star assembly
2) Ensure the mixing pan is in place on the pan rack (gear) and correctly seated down.
3) Turn the power on at the red isolator switch on the control panel
4) Ensure the red emergency stop plunger on the front of the control panel is not
depressed.
5) Press the green start button.
6) With both hands on the hand wheel, rotate the hand wheel anti-clockwise and lower
the mixing star slowly and gently down into the mixing pan. The motors driving the pan
and star should start automatically as the star enters the pan.
Note: do not allow the mixing star assembly to drop in an uncontrolled manner into
the mixing pan, lower it slowly with both hands on the hand wheel.
Summary of Contents for CUMFLOW RP50XD MK2
Page 4: ...OPERATING AND MAINTENANCE MANUAL SECTION 1 GENERAL INFORMATION RP50XD MK2...
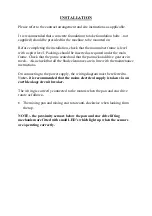
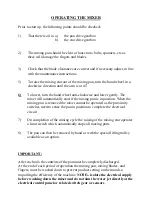
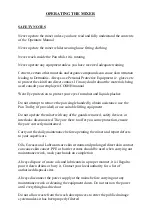
Page 12: ...OPERATING AND MAINTENANCE MANUAL SECTION 2 INSTALLATION AND OPERATING INSTRUCTIONS...
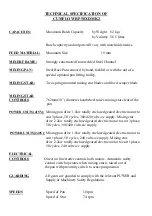
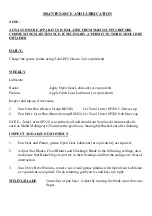
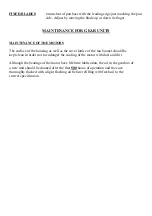
Page 20: ...OPERATING AND MAINTENANCE MANUAL SECTION 3 TECHNICAL SPECIFICATION AND MAINTENANCE...
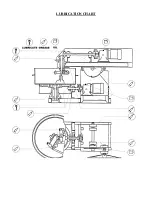
Page 27: ...LUBRICATION CHART...
Page 28: ...OPERATING AND MAINTENANCE MANUAL SECTION 4 MIXER SPARE PARTS...
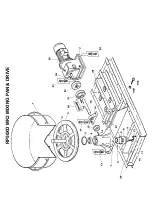
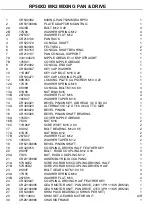
Page 29: ...RP50XD MK2 MIXING PAN DRIVE...
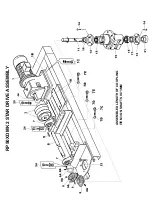
Page 32: ...RP50XD MK2 STAR DRIVE ASSEMBLY ASSEMBLED LENGTH OF COUPLING ITEM 3 ON SHAFTS IS 73MM...
Page 36: ...RP50XD MK2 MIXING STAR ASSEMBLY...
Page 38: ...RP50XD MK2 MIXING STAR LIFTING ARRANGEMENT...
Page 40: ...RP50XD MK2 COVERS GUARDS...
Page 43: ...PAGE INTENTIONALLY BLANK...
Page 47: ...RP50XD MK2 DECALS AND LOGOS CROKER CUMFLOW RP50XD 1 2 4 5 6 7 8 9 10 11 12 13...
Page 49: ...OPERATING AND MAINTENANCE MANUAL SECTION 5 ANCILLARY EQUIPMENT SPARE PARTS...
Page 50: ...RP50XD MK2 FOUR WHEEL PAN TROLLEY...
Page 53: ...OPERATING AND MAINTENANCE MANUAL SECTION 6 ELECTRICAL SYSTEM...
Page 55: ...Electrical Control Circuits dwg 11 03 02 10 55 09 Scaled to fit...
Page 56: ...V06302 dwg 11 12 02 07 03 44 Scaled to fit...
Page 57: ......
Page 58: ...Electrical Power Circuits dwg 11 03 02 10 58 17 Scaled to fit...
Page 59: ...V06303 dwg 11 12 02 07 04 45 Scaled to fit...
Page 60: ......
Page 61: ...General details of Control Panel dwg 11 03 02 11 01 09 Scaled to fit...
Page 62: ...V06301 dwg 11 12 02 07 02 37 Scaled to fit...
Page 63: ......
Page 64: ...Material Parts List dwg 11 03 02 11 03 32 Scaled to fit...
Page 65: ...V063PL1 dwg 11 12 02 07 01 06 Scaled to fit...
Page 66: ......
Page 67: ...OPERATING AND MAINTENANCE MANUAL SECTION 7 MISCELLANEOUS...


