background image

5500-2

User Manual


x

Please read and follow all safety rules and instructions in 

this manual before operating. 


x

The product warranty is printed on the back of this guide, 

so please keep it in a safe place for future use. 


x

This product is manufactured for use only in USA/CA

Model

Use & Care 
Guide

Summary of Contents for 5500-2

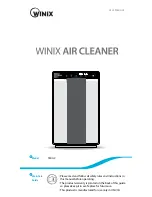
Page 1: ...safety rules and instructions in this manual before operating x x The product warranty is printed on the back of this guide so please keep it in a safe place for future use x x This product is manufac...

Page 2: ...ion Initial Operation 9 Modes of Operation 10 Features and Settings 11 Care and Maintenance Filter Care 13 Cleaning Care 17 Remote Remote Control Guide 18 Troubleshooting Frequently Asked Questions 19...

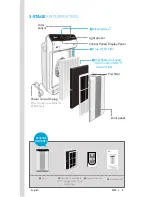
Page 3: ...filter Power cord with plug This product is suitable for 120V only Odor sensor Washable Advanced Odor Control AOCTM Carbon Filter Pre filter PlasmaWave Control Panel Display Panel 3 STAGE AIR PURIFICA...

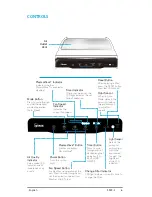
Page 4: ...gh and set the desired mode of operation Auto Sleep Power Button Turns the unit on or off Fan Speed Button Enables Manual operation of the unit Press to cycle through and set the desired fan speed Low...

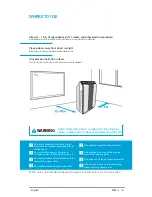
Page 5: ...ace around heating elements Do not place in an area with excessive amounts of noxious gases Do not have unit facing into wind or draft Do not place in excessively humid areas where unit may become wet...

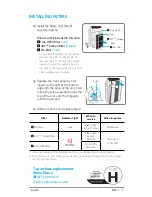
Page 6: ...e sure the unit is turned off before installing filters Remove filters from protective plastic wrap Operating the unit without removing filters from plastic wrap may cause abnormal noise deformation o...

Page 7: ...the upper tabs into the slots at the top part of the unit until sides audibly click into place Replace the front panel by first inserting the latch at the bottom edge into the base of the unit then r...

Page 8: ...ed in water unplug it and contact customer service Cord can become damaged by forcefully bending pulling twisting bundling pinching or placing heavy objects on it Ensure filters are inserted before ru...

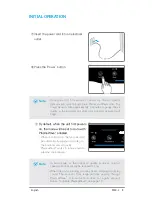
Page 9: ...t 30 seconds of power up the Air Quality Indicator will cycle through Blue Yellow and Red colors The Smart Sensors take approximately 4 minutes to gauge the air quality in the environment after which...

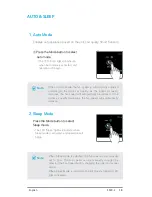
Page 10: ...improves the fan speed will automatically be reduced If the indoor air quality decreases the fan speed will automatically increase Note 2 Sleep Mode Press the Mode button to select Sleep mode The LED...

Page 11: ...1 Press the Fan Speed button to set the desired fan speed 4 Timer The timer can be set to let the unit run for a specified period of time MANUAL TIMER Press the Timer button to select the desired len...

Page 12: ...me for lengthy periods of time Note PLASMAWAVE AIR QUALITY INDICATOR 5 PlasmaWave By default PlasmaWave is enabled whenever the unit is powered on Press the Plasmawave button when the unit is on to en...

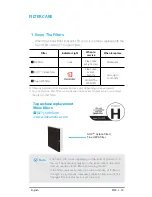
Page 13: ...hs 3 True HEPA filter Can NOT be WASHED To purchase replacement Winix filters 877 699 4649 www winixamerica com FILTER CARE 1 Know The Filters When the Check Filter indicator LED is on it is time to r...

Page 14: ...the top of the filter release and remove Pull out the AOCTM Carbon filter and True HEPA Filter Tabs Pre filter Latch FILTER CARE 2 Removing Filters Turn the unit power off before removing filters Remo...

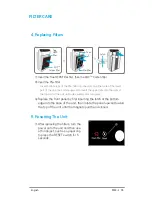
Page 15: ...s of the Pre filter into the slots on either side of the lower part of the unit then rotate upward to insert the upper tabs into the slots at the top part of the unit until sides audibly click into pl...

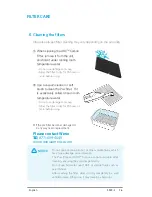
Page 16: ...completely in a well ventilated area Otherwise it may develop a bad odor NOTICE FILTER CARE When cleaning the AOCTM Carbon Filter remove it from the unit and hold it under running room temperature wa...

Page 17: ...the front panel and clean the interior with a vacuum cleaner For optimal performance clean every 1 2 months When cleaning the unit always unplug the power cord first and then wait until the unit has c...

Page 18: ...torage cradle Battery Replacement Squeeze tabs of battery cover while pulling on the remote Remove old battery Insert new battery with PLUS side up x x Always use CR2025 3V lithium battery Operates in...

Page 19: ...ing to it and ensure the plug is secured Is there a power outage Check to see if other lights and electrical equipment are working and try again It doesn t work in Auto Mode Has Auto Mode been selecte...

Page 20: ...s a strange smell Is it being used in a place with a lot of smoke dust or odors Clean the air intakes on either side and clean the pre filter Clean or change the AOCTM Carbon filter The fan strength i...

Page 21: ...ble protection against harmful interference in a residential installation This equipment generates uses and can radiate radio frequency energy and if not installed and used in accordance with the inst...

Page 22: ...ning the unit When removing the power plug grasp by holding the plug itself never hold by the cord x x Remove the power plug from the outlet when not in use x x Do not handle the power plug with wet h...

Page 23: ...incurred even during the warranty period 3 The warranty must be presented upon bringing the product for service 4 Store the warranty in a safe place as it cannot be reissued 5 This warranty is valid o...

Page 24: ...nature of the problem your contact information and your address Dedicated Call Center 877 699 4649 Website www winixamerica com 162502 Rev A Developedinpartnershipwith DrexelUniversity Philadelphia P...

Reviews: