17
Chapter 2: Installation
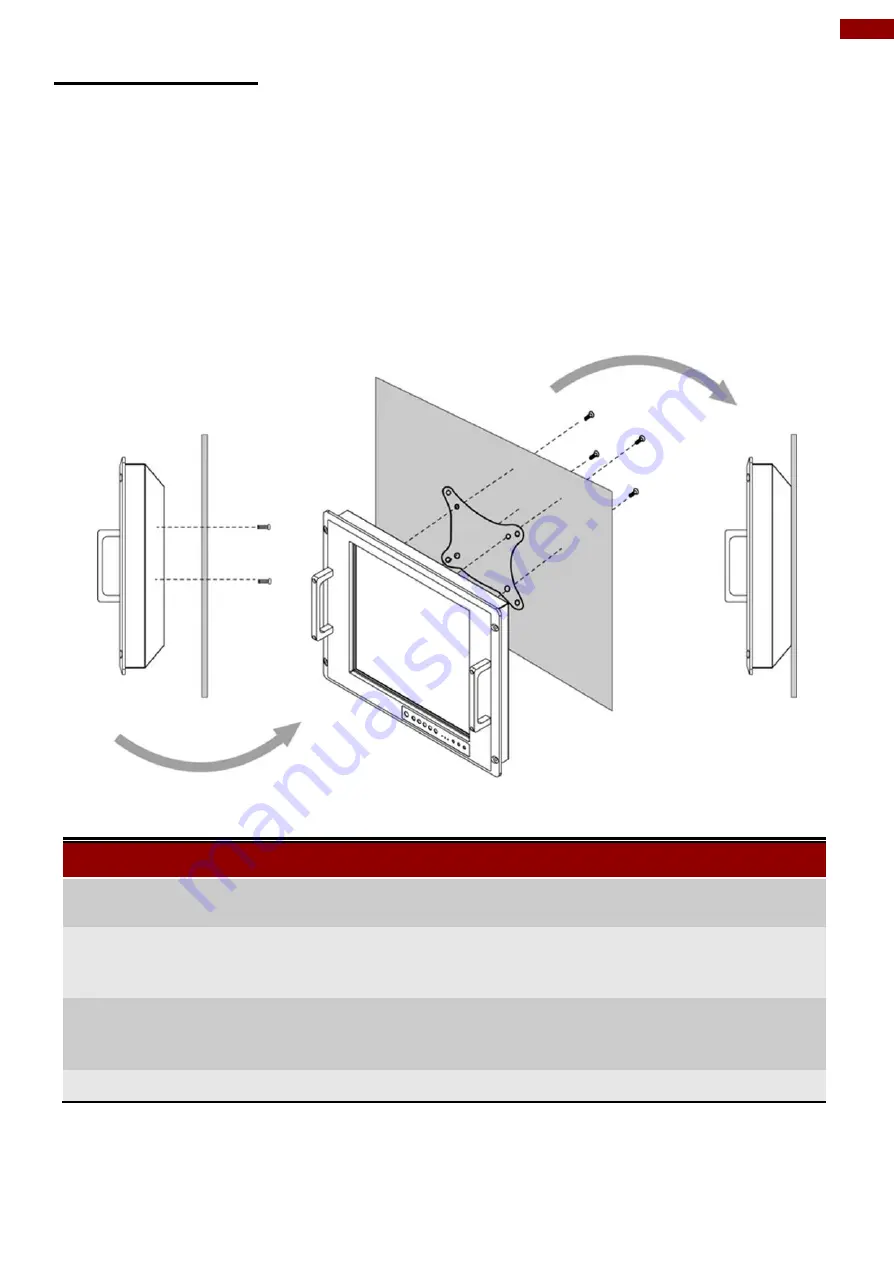
2.2.2 VESA Mount
The Military Panel PC supports VESA Mount installation. Notice that VESA Plate is not included in
Winmate’s standard accessories package.
Installation Instruction:
1. Turn off the panel PC and disconnect peripherals.
2. Screw VESA bracket to the fixture (ex. swing arm) with four M4 VESA screws.
3. Place the device on VESA bracket.
4. Follow instructions supplied with your mounting kit.
5. Connect cables, power on the panel PC.
VESA Mount Installation
*Notice that VESA stand and mounting kit are not provided by Winmate.
Size
VESA Plate
Screw Size
17”
100 x 100 mm
100 x 200 mm
M6 VESA, D=6 mm (4 pcs)
19”
100 x 100 mm
100 x 200 mm
100 x 300 mm
M6 VESA, D=6 mm (4 pcs)
20.1”
100 x 200 mm
200 x 200 mm
200 x 400 mm
M6 VESA, D=6 mm (4 pcs)
24”
Summary of Contents for R17IK3S-RKA1ML
Page 31: ...31 Chapter 3 BIOS Setup 3 2 2 4 Hardware Monitor...
Page 33: ...33 Chapter 3 BIOS Setup 3 2 2 6 PCI Express Configuration...
Page 35: ...35 Chapter 3 BIOS Setup 3 2 2 9 ME Firmware Configuration...
Page 36: ...36 17 19 20 24 Military Rack Mount Panel PC User Manual...
Page 47: ...47 Chapter 3 BIOS Setup 3 2 6 Exit...
Page 53: ...53 Chapter 4 Driver Installation 3 Select Accept to agree with the terms of license agreement...


