User Manual
Chapter 5
Mounting Solutions
10.1” S-Series HMI (Freescale)
45
Mounting Steps:
1.
Screw VESA Bracket to the fixture (ex. wall) with Philips four M4x5 flathead
screws.
2.
Place the device on VESA bracket.
NOTE:
Please notice that both hooks on bracket should lock the notches on the
back cover of the device
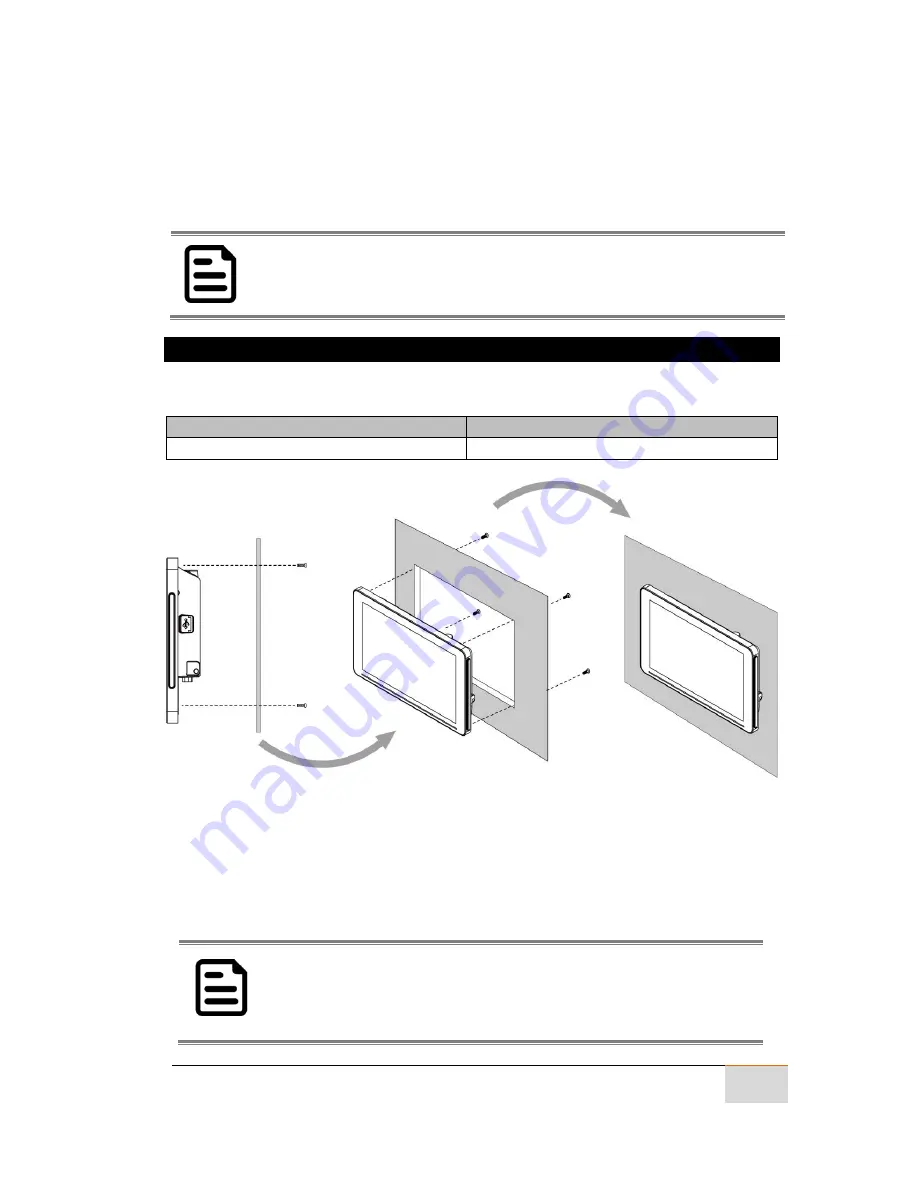
5.3.2 Flush Mount / Panel Mount
S-Series HMI supports Panel Mount that allows mounting the device into an aperture.
Wall cutout
Screw Hole Diameter
157.6 x 249 mm
M3 x 4 mm
Mounting Steps:
1.
Prepare a fixture for the specific dimensions of the device.
2.
Cut a hole on a sub frame or panel according to the cut-out dimensions.
3.
Install the device properly onto the cut-out area of the sub frame or panel with
the sides of the front bezel.
4.
Fix the device to fixture with eight Philips M3x4 screws.
NOTE:
Please make sure that the eight holes on gasket can fit in the
mounting holes on the device.


