background image

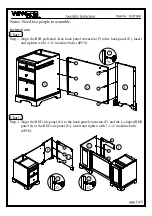
Notes: Need two people to assemble.

1

1

2

1

1

1

1

Instructions:
Chart 1

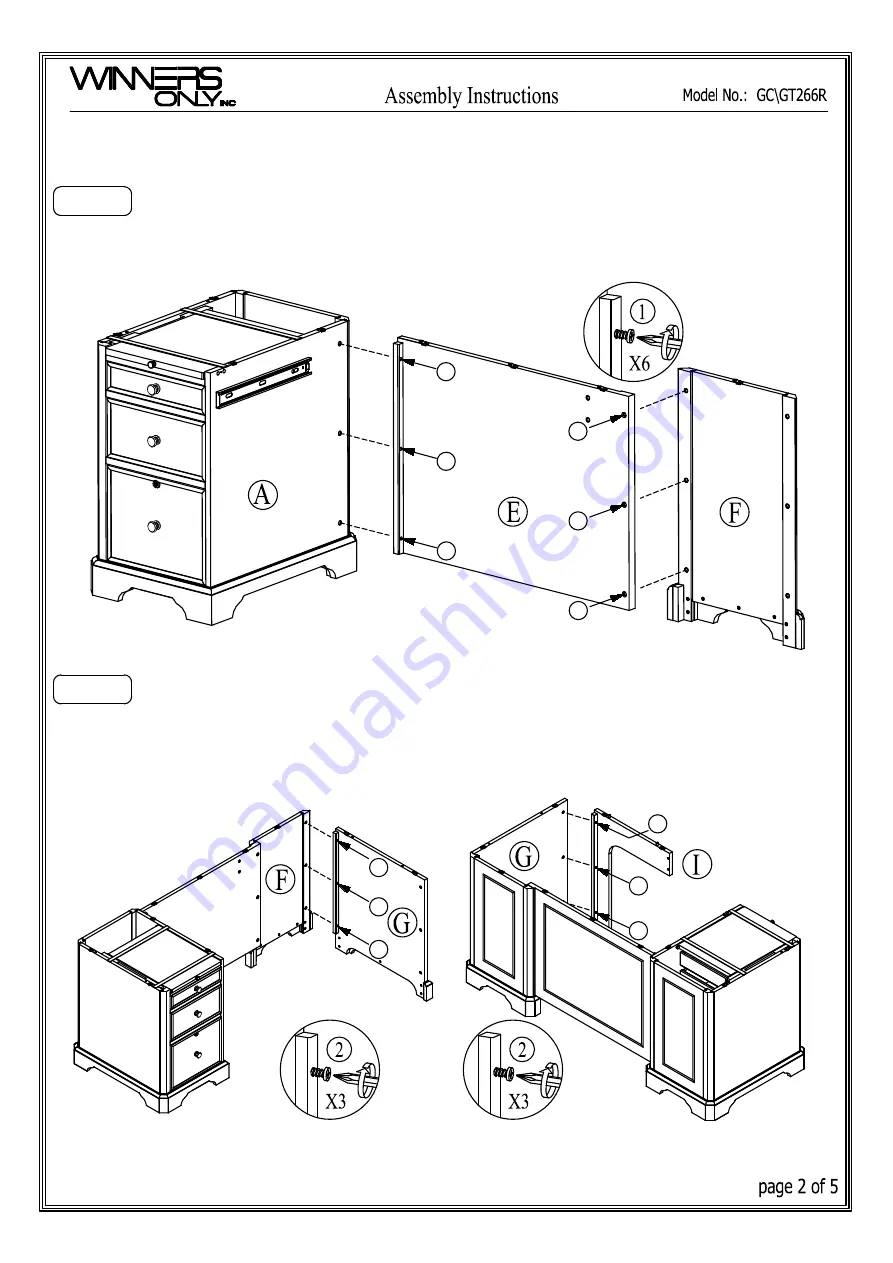
Step 1. Align the R1B pedestal (A) & back panel extension (F) to the back panel (E), insert

            and tighten with 1-1/4" machine bolts (6PCS).

Chart 2

Step 2. Align the RSF side panel (G) to the back panel extension (F) and the L-shaped RHS

            panel (I) to the RSF side panel (G), insert and tighten with 1-1/4" machine bolts
            (6PCS).

2

2

2

2

2

Summary of Contents for GC266R

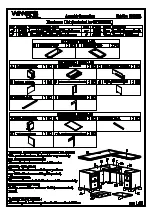
Page 1: ......

Page 2: ...1B pedestal A back panel extension F to the back panel E insert and tighten with 1 1 4 machine bolts 6PCS Chart 2 Step 2 Align the RSF side panel G to the back panel extension F and the L shaped RHS panel I to the RSF side panel G insert and tighten with 1 1 4 machine bolts 6PCS 2 2 2 2 2 ...

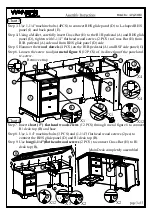
Page 3: ...D side Step 5 Hammer the wood dowels 4 PCS on the R1B pedestal A and RSF side panel G Step 6 Loosen the screw to adjust metal figure 8 12 PCS of its direction of the panel and re screw H D I G Chart 4 Step 7 Insert short 1 flat head wood screws 12 PCS through metal figure 8 to connect R1 desk top B and base Step 8 Use 1 1 4 machine bolts 3 PCS and 1 1 4 flat head wood screws 2pcs to connect the RH...

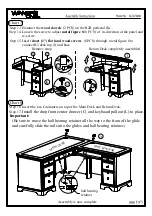
Page 4: ...lts 6PCS Step 11 Using a Mallet carefully insert Cross Bar M to the L shaped LHS panel O and R2B pedestal K tighten with 1 1 4 flat head wood screws 2 PCS 10 10 10 10 10 Chart 6 Step 12 Assemble the Return Desk to the Main Desk by using four 1 1 4 machine bolts 4PCS to attach connecting board 12 12 12 12 X4 RETURN DESK MAIN DESK 11 ...

Page 5: ... way to the front of the glide and carefully slide the rails into the glides and ball bearing retainer Assembly is now complete C L 13 14 14 13 15 15 Return Desk completely assembled Chart 7 Step 13 Hammer the wood dowels 2 PCS on the R2B pedestal K Step 14 Loosen the screw to adjust metal figure 8 8 PCS of its direction of the panel and re screw Step 15 Insert short 1 flat head wood screws 8 PCS ...

Reviews: