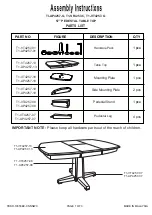
TI-AP4257-G, T1-SF4257-C, T1-VT4257-G
57” PEDESTAL TABLE TOP
TBSR-10355BC-CNNNWC
MADE IN MALAYSIA
PAGE 2 OF 3
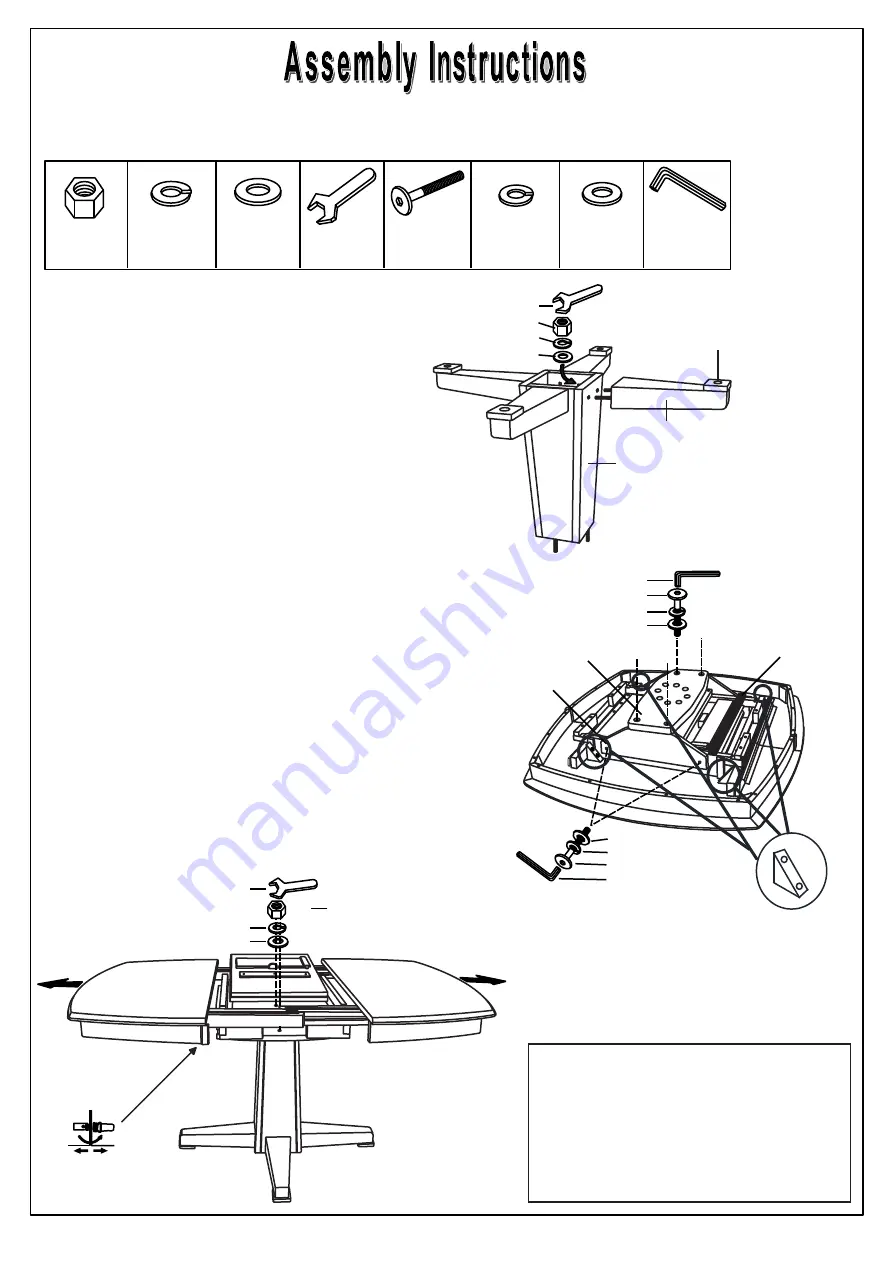
STEP 2
NOTE :
THE UNIT SHOULD BE ASSEMBLED BY 2 OR MORE PEOPLE.
ASSEMBLY
STEP 1
Hex Nut
Hex Nut
12 pcs
Lock Washer
Lock Washer (Large)
(Large)
12 pcs
Flat Washer
Flat Washer (Large)
Pedestal
Leg
Level Glide
(Large)
12 pcs
Lock Washer
(Small)
8 pcs
Flat Washer
(Small)
8 pcs
Wrench
Wrench
1 pce
Allen Key
1 pce
JCBC Bolt
Lock Washer (Large)
Flat Washer (Large)
Wrench
Hex Nut
8 pcs
HARDWARE PART :
Turn the pedestal upside down. Attach legs by inserting
hanger bolts through pre-drilled holes on pedestal.
Put a
Flat Washers (Large)
,
Lock Washers (Large)
and
Hex Nut
onto the hanger bolts then tighten with the
provided
Wrench
.
STEP 3
Position the table top upside down on a smooth, protective
surface such as carpet.
Remove and discard the temporary
Wood Strip
. Install the side panel and secure with
Flat Washers (Small), Lock Washers (Small)
and
JCBC Bolt.
Attach Mounting Plate as shown. Secure
with
Flat Washers (Small), Lock Washers (Small)
and
JCBC Bolt,
then tighten all
JCBC Bolts
with Allen Key
provided.
Unlock the hooks underneath the table and pull the table top wide
open equally from both ends. Align and attach the table top to the
pedestal. Insert a
Flat Washers (Large), Lock Washers (Large)
and
Hex Nuts
onto the hanger bolts. Tighten all
Hex Nuts
with the
provided Wrench.
CARE INSTRUCTION
~ Be sure to use the same type of polish consistenly.
Your furniture will appear cloudy or streaky if oil
based or wax based polishes are interchanged.
~ Spray your furniture surface evenly. Wipe in a
circular motion with a soft clean cloth.
IMPORTANT NOTE :
~ Please keep all hardware out of the reach of
children.
Remove Wood Strip
Mounting Plate
Side Panel
Lock Washer (Small)
Flat Washer (Small)
Allen Key
JCBC Bolt
Lock Washer (Small)
Flat Washer (Small)
Allen Key
JCBC Bolt
UnLock
Metal Catches
Must Remove
all 4 Cleats
R
E
M
O
V
E
R
E
M
O
V
E


