background image


Summary of Contents for PT 500

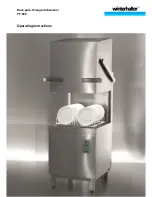
Page 1: ...Rack pass through dishwasher PT 500 Operating instructions ...

Page 2: ......

Page 3: ...preparing it for operation 8 7 3 Washing 9 7 4 Switching off 10 8 Servicing and maintenance 10 8 1 Daily cleaning 10 8 2 Weekly cleaning 12 8 3 Monthly cleaning 12 8 4 Maintenance by the Customer Service 12 9 Malfunctions 13 9 1 Poor cleaning result 14 10 Info Level 15 11 Error memory 15 12 PIN Menu 16 13 Installing the machine and tables 19 13 1 Installing the machine 19 13 2 Building tables 19 1...

Page 4: ...notes 2 1 Proper use The PT 500 dishwasher is a technical device for commercial use and is not intended for private use Use the dishwasher only for the washing of dishes such as plates cups cutlery and trays or for washing glasses of a gastronomic and related type 2 2 Improper use This device may be used by children from the age of 8 upwards as well as by those with re duced physical sensory or me...

Page 5: ... or your retailer if another fault has occurred If the mains cable of this device is damaged it must be replaced by the Winterhalter or its Cus tomer Service or another qualified person in order to prevent hazards The mains cable must be H07 RN F type or equivalent 2 5 General safety notes Read through the safety notes and operating instructions in this manual carefully Retain the operating instru...

Page 6: ...ash Drain and Rinse Whilst a washing programme is running the display is lit in blue 4 2 Overview Pos Description 1 Machine hood hood 2 Operating panel 3 Upper rotating wash field 4 Filter basket 5 Lower rotating wash field 6 Strainer 7 Pump inlet filter 8 Wash field bearing 9 Bushings for cables and hoses 10 Water supply hose Pos Description 11 Suction tube for rinse aid blue cap and blue suction...

Page 7: ...cautions and the dosage recommendations on the packaging Wear protective clothing protective gloves and protective goggles when handling chemicals Caution Use only products that are suitable for commercial dishwashers Such products are appro priately marked We recommend Winterhalter products These are especially adapted to Winterhalter dishwashers Do not put rinse aids in the storage container for...

Page 8: ...hine s tank capacity is ap prox 35 litres Place approx 100 g of detergent powder in the machine This corresponds to a dosing of approx 3 g l Then start the wash cycle immediately to mix the detergent powder with the water Post dosing At each wash cycle approx 2 5 litres of fresh water enter the dishwasher which must be mixed with deter gent powder Fill approx 40 g of detergent powder in the machin...

Page 9: ...tective goggles when handling chemicals Do not mix different detergents Remove the suction tube from the container and place it in a water filled container Rinse the dosing tube and the detergent dosing device with water To do this use the prime dosing de vice function several times 12 The frequency depends on the length of the dosing tubes Place the suction tube in the new detergent container Use...

Page 10: ...machine Caution Possible risk of damage due to suction of items from within the machine e g pieces of cutlery The pump inlet filter protects the circulating pump and the drain pump Operate the machine only with the pump inlet filter fitted Open the on site water stop cock Switch on the local mains disconnector For your own safety test the on site residual current circuit breaker FI Open the hood R...

Page 11: ...are not too close together Soak cutlery before you wash it Position knives and other sharp objects in the cutlery holder with the handle up in order to prevent inju ries Glasses Pour out drink residue not in the machine Remove scraps of paper Rinse off ash with water Place glasses rim down Space glasses so they do not rub against each other This will avoid scratches For tall glasses choose a baske...

Page 12: ...he end of the working day using the self cleaning programme 8 1 2 so that it is cleaned and emptied every day INFO If you use the On Off switch the tank stays filled but will no longer be kept at temperature If the tank temperature has dropped too much before the machine is switched on again the tank will be emptied automatically and filled again 8 Servicing and maintenance Warning Do not spray th...

Page 13: ...rusty foreign objects in the machine which can cause even rust free stainless steel material to start rusting Rust particles can come from non rust free cleaners damaged wire racks or non rust protected water lines The following materials must not be used for cleaning High pressure cleaner Detergents containing chlorine or acid Cleaning sponge or wire brush containing metal Abrasives or abrasive c...

Page 14: ... Close the water stop cock Clean the dirt filter in the dirt trap 8 4 Maintenance by the Customer Service We recommend that you have an authorised Winterhalter service engineer carry out the maintenance of the machine at least once a year so that vulnerable parts can be checked and replaced accordingly Original spare parts must be used for repairs and the replacement of worn parts Worn parts are f...

Page 15: ...etergent container Rinse aid is empty 1 Change the rinse aid container Lack of water Water stop cock closed Open the water stop cock Dirt filter in the dirt trap is blocked Remove and clean the dirt filter 8 3 Solenoid valve defective or blocked Contact an authorised service technician for the repair Integral water treat ment is exhausted Low salt Fill the salt reservoir with regen erating salt 6 ...

Page 16: ... The water is too hard Check the water treatment Clean thoroughly In case of starch residues Excessively high temperatures during manual pre cleaning hand shower The temperature of the manual pre wash should be a maximum of 30 C The dishes do not dry on their own No or low rinse aid dosing Set the dosing amount as per the manu facturer s specifications 12 Check the dosing lines for kinks break age...

Page 17: ...ror memory All errors with an error code are saved in the error memory The error that occurred last is displayed first Accessing the error memory Press the button The temperatures are displayed Press the button again The error memory will be displayed Display Explanation ERR xx Malfunction ERR xx OK Malfunction resolved ON Entry is generated by turning on the machine Navigating in the error memory...

Page 18: ...ft or reduce value 2 Confirm 3 Cursor right or increase value 4 Back Accessing the PIN Menu Press the button The temperatures are displayed Press the button again The error memory will be displayed Press the button again The PIN input mask is displayed Enter PIN 1575 To do this select the individual figures with the or button and confirm each figure with the button The following selection is shown...

Page 19: ...m with the button The next screen is displayed Continue with the or button The programme is displayed Select a programme with the or button Confirm with the button The current dosing is displayed number flashes Continue with the or button Confirm with the button The input is confirmed The newly set value is displayed number flashes Go back with the button This screen is refreshed Press the button ...

Page 20: ...n Confirm with the button The next screen is displayed Continue with the or button The programme is displayed Select a programme with the or button Confirm with the button The current dosing is displayed number flashes Continue with the or button Confirm with the button The input is confirmed The newly set value is displayed number flashes Go back with the button This screen is refreshed Press the...

Page 21: ...justable machine feet Installation variants INFO If the machine is installed in a corner the left hood handle must be removed For plugging holes a kit with part no 30002147 is available 13 2 Building tables Assemble tables When Winterhalter tables are used attach aluminium strut supports to the machine The aluminium strut supports are in the machine Secure the tables to the machine Connect the ear...

Page 22: ...ith an integral softener Minimum flow pressure 100 kPa 1 0 bar Maximum inlet pressure 600 kPa 6 0 bar Rate of flow at least 4 l min 14 2 Requirements for the on site water stop cock easily accessible not behind the machine 3 4 connector 14 3 Connecting the supply hose Caution The supply hose may not be shortened or damaged Old existing hoses may not be re used Do not bend the supply hose while lay...

Page 23: ...must be secured as a separately fused circuit with slow fuses or circuit breakers The protec tion depends on the total power consumption of the ma chine The total connected load is specified on the rating plate of the machine Build a residual current circuit breaker into the electrical supply line Machines delivered from the factory equipped with mains cable and safety plug single phase or CEE plu...

Page 24: ...Electrical connection 22 15 3 Connection diagram ...

Page 25: ...alter web site Dosiertechnik Dosing systems 16 1 Terminals Danger Danger to life Live components Get the dosing device installed and commissioned by a service engineer authorised by Winterhalter 1 Detergent dosing nipple 2 Transfer strip with red plug for the connection of an external dosing device 3 Rinse aid dosing device 4 Detergent dosing device special equipment 5 Rinse aid dosing nipple 6 Bu...

Page 26: ...ntrol when a voltage is present at the Fill Water and Rinse terminals Connecting an external detergent dosing device Example 1 Hose pump with time delay relay and fixed output Example 2 Hose pump with adjustable output Example 3 Hose pump with fixed output e g ESP 166 ESP 166C SP 166Z Connect to Wash terminal Set time delay relay on the dosing device Connect to Fill Water ter minal Set Set output ...

Page 27: ...ne out of service for a long period Follow the notes if the machine needs to be out of operation for a long duration holidays seasonal business Empty the machine using the self cleaning programme 8 1 2 Clean the machine 8 1 3 and 8 1 4 Leave the hood open Close the on site water stop cock Switch off the local mains disconnector If the machine is in a place that is not frost free Instruct an author...

Page 28: ...level Leq 63 dB A Measurement uncertainty K pA 4 dB Exhaust air Adhere to the VDI Guideline 2052 when designing the ventilation system 21 Disposal Contact your dealer so that the materials in the machine can be reused or disposed in accordance with local legislation Standard working height is 850 mm which can be optionally increased to 900 mm The vertical dimensions are increased by 50 mm by this ...

Page 29: ......

Page 30: ...d Telefon 49 0 75 42 4 02 0 Telefax 49 0 75 42 4 02 1 87 www winterhalter de info winterhalter de Winterhalter Gastronom GmbH Commercial Dishwashing Systems Winterhalterstraße 2 12 88074 Meckenbeuren Germany Telephone 49 0 75 42 4 02 0 Telefax 49 0 75 42 4 02 1 87 www winterhalter biz info winterhalter biz ...

Reviews: