18
2. Instruct the end user about the operation of the
heater:
a. Lock-out indication
b. Reset
3. Instruct end user about the necessary
maintenance.
4. Leave this manual with the end user.
7.2.1
First use – thermostat
To commission the air heater via the room thermostat, do
the following:
• Put the thermostat in the highest position. The start
sequence is always the same.
The air heater will burn for the minimal firing time (see
§6.3 for more information).
7.2.2
First use - display
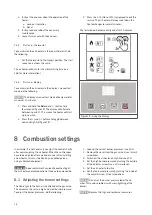
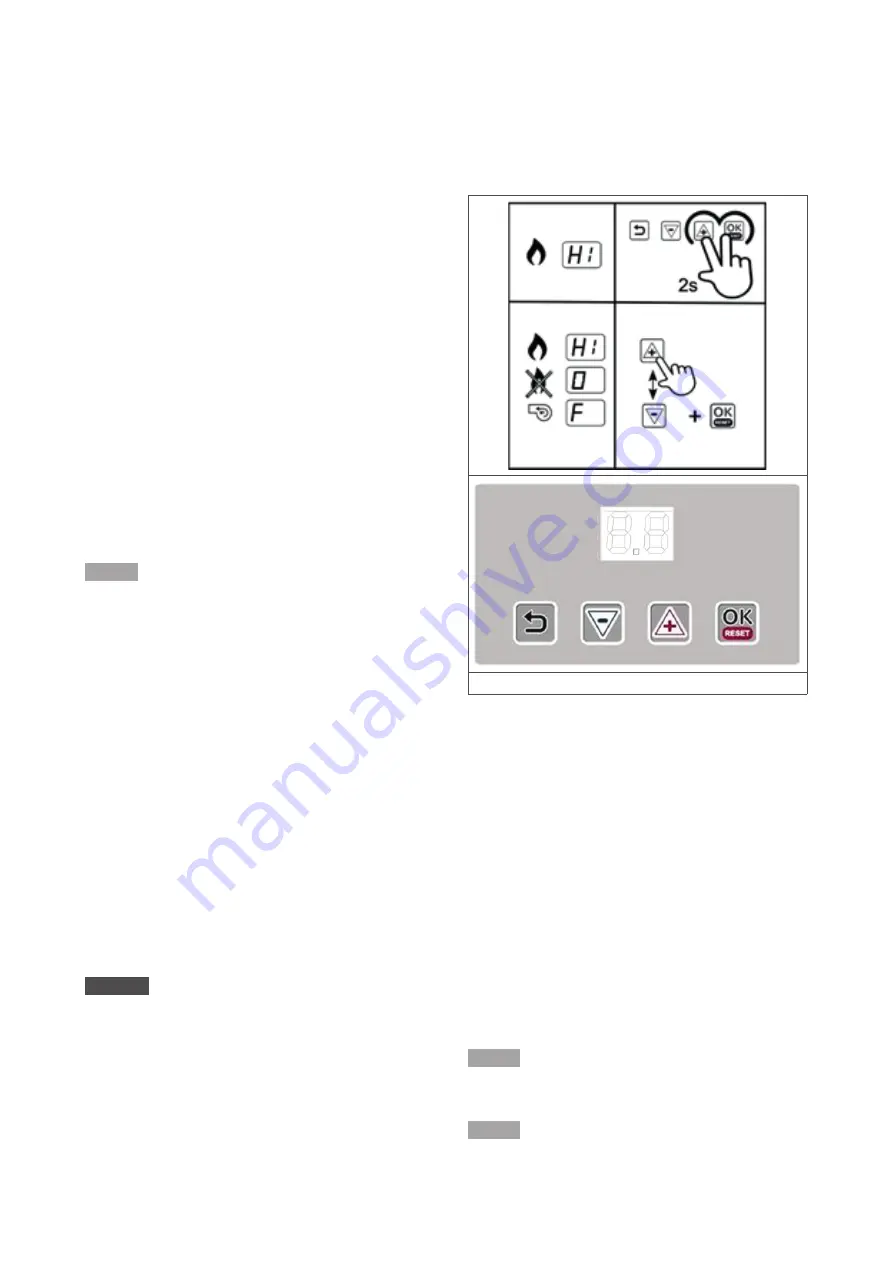
To commission the air heater via the display’s manual test
mode, do the following:
NOTICE
The display’s manual test mode will only work for
maximum 10 minutes.
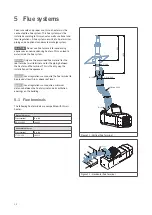
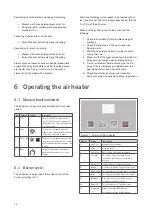
1. Press and hold the
Return
and
(–)
button for a
few seconds (figure 18). The display will alternate
between Lo and St. This means the heater will start
up in Low fire.
2. Press the
(+)
and
(–)
buttons to toggle between
Low and High fire (figure 18).
3. Press the
(–)
button until 0 is displayed to exit the
service. The air heater will always cool down the
heat exchanger for several minutes.
The test mode will automatically end after 10 minutes.
Figure 18 - Using the display
8 Combustion settings
In principle, it is not necessary to adjust the control shortly
after commissioning the air heater. When the control does
have to be adjusted after a period of use or after installing
a new heater, this must be done by a qualified person
using calibrated equipment.
DANGER!
A poor adjustment can lead to overheating of
the air heater and/or production of toxic carbon monoxide.
8.1 Adjusting the burner settings
The flow of gas to the burner is controlled with a gas valve.
The valve must be set to a high and a low burner pressure.
To adjust the burner pressures, do the following:
1. Look up the correct burner pressures (see §3.2).
2. Remove the cover from the gas valve. Use a (small)
screwdriver.
3. Switch on the air heater on high fire (see §7.2).
4. Set the high burner pressure by turning the outside
of the adjuster screw. Use a 10 mm wrench.
5. Set the air heater to low fire.
6. Set the low burner pressure by turning the inside of
the adjuster screw. Use a screwdriver.
NOTICE
Do not set the burner pressure lower than 3
mbar. This avoids problems with cross-lightning of the
burner.
NOTICE
Because the high and low burner pressures

