1143100
SmartPAC PRO User Manual
Appendix A – SmartPAC PRO Preventive Maintenance (PM) Monitor (Optional)
237
Table A- 2. PM Tracking Units
run hours
1
days
weeks
months
die changes
ch. cycles (1 through 16)
2
WPC press control faults, F50-F58
3
press overloads
4
1.
For SmartPAC
(without WPC), “run hours” refers to the length of time that SmartPAC is “on”.
For SmartPAC PRO
with WPC, it means how long the motor is “on”. (The version of SmartPAC
that you currently have is without WPC. Contact Wintriss Controls if you require WPC.)
2.
Ch. cycles 1 through 16 can be used only if you have a 16-channel ProCamPAC. Only ch.
cycles 1 through 8 can be used for an 8-channel configuration.
3.
These are only available if you have SmartPAC PRO with WPC and if you have wired and
assigned press functions to the user-definable inputs. (The version of SmartPAC that you
currently have is without WPC. Contact Wintriss Controls if you require WPC.)
4.
“Press overload” is only available with the AutoSetPAC option.
Installing the PM Monitor
For New Systems from the Factory
If you purchased a SmartPAC PRO system with the PM Monitor pre-installed at the factory, proceed
directly to
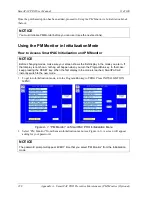
Using the PM Monitor in Initialization Mode
For Existing Systems
If you ordered the PM Monitor options separately (in other words, if you already had a SmartPAC
PRO, and you were just adding the PM option), you must first physically upgrade your SmartPAC
PRO system for compatibility. To upgrade your SmartPAC PRO, follow these steps:
1.
Purchase the option and obtain a purchased option code from Wintriss.
2.
Go to the Main Program menu.
3.
Press INITIALIZATION MENU.
4.
Press INSTALLED OPTIONS.
5.
Press OPTIONS MANAGER.
6.
On the Options Manager screen, find the PM Monitor. The box next to it says “Unlicensed.”
7.
Press the Unlicensed box. The License Code entry window appears.
8.
Key in the license code you received. Press Enter.
•
If the entry window closes and the box next to PM Monitor says Enabled, the option is
licensed. Go to step 9 to apply the change.
•
If the entry window says, “Invalid Entry!” press Backspace repeatedly to delete the code.
Check that you have the correct code. Key in the code again. Press Enter. If this still does not
work, press Cancel and contact Wintriss Tech Support.
9.
Press Apply and Restart. When the SmartPAC PRO restarts, the PM Monitor is ready to use.
Summary of Contents for SmartPAC PRO
Page 1: ......
Page 2: ......
Page 4: ......
Page 6: ......
Page 20: ......
Page 22: ......
Page 24: ......
Page 42: ...1143100 SmartPAC PRO User Manual 42 Chapter 1 Introduction to SmartPAC PRO ...
Page 142: ...1143100 SmartPAC PRO User Manual 142 Chapter 4 SmartPAC PRO Program Mode ...
Page 200: ...1143100 SmartPAC PRO User Manual 200 Chapter 6 Using DiProPAC Die Protection Optional ...
Page 222: ...1143100 SmartPAC PRO User Manual 222 Chapter 7 ProCamPAC Instructions ...
Page 254: ...1143100 SmartPAC PRO User Manual Appendix C SmartView Remote Viewing and E mail Setup 254 ...
Page 280: ...SmartPAC PRO User Manual 1143100 280 Appendix C Reporting Downtime and Scrap to SFC ...
Page 290: ...SmartPAC PRO User Manual 1143100 290 Index Y yellow fault 232 yellow sensor 169 ...
Page 292: ......
Page 294: ......
Page 296: ......
Page 298: ......
Page 300: ......
Page 301: ......
Page 302: ......
Page 303: ......
Page 304: ......
Page 305: ......
Page 306: ......
Page 307: ......
Page 308: ......
Page 309: ......
Page 310: ......
Page 311: ......
Page 312: ......
Page 313: ......
Page 314: ......
Page 315: ......
Page 316: ......
Page 317: ......
Page 318: ......


