SmartPAC PRO User Manual
1143100
Chapter 3 – SmartPAC PRO Initialization Mode
93
Example 1
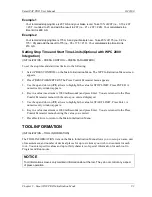
Your recorded stopping time is 207 mS and your brake is old. Take 10% of 207 (i.e., 0.10 x 207
= 20.7, rounded to 21) and add the result to 207 (i.e., 21 + 207 = 228). Your calculated stop
time limit is 228 mS.
Example 2
Your recorded stopping time is 175 mS and your brake is new. Take 20% of 175 (i.e., 0.20 x
175 = 35) and add the result to 175 (i.e., 35 + 175 = 210). Your calculated stop time limit is
210 mS.
Setting Stop Time and Start Time Limits(Optional with WPC 2000
Integration)
(INITIALIZATION
– PRESS CONTROL – PRESS PARAMETERS)
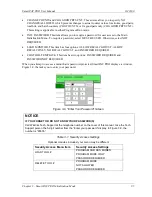
To set the stop time and start time limits, do the following:
1.
Select PRESS CONTROL on the Main Initialization Menu. The WPC Initialization Menu screen
appears.
2.
Press PRESS PARAMETERS. The Press Control Parameter menu appears.
3.
Use the up and down (
) arrows to highlight the value for STOP LIMIT. Press ENTER. A
numeric entry window appears.
4.
Key in a value (maximum is 1000 milliseconds) and press Enter. You are returned to the Press
Control Parameter menu with the value you entered displayed.
5.
Use the up and down (
) arrows to highlight the value for START LIMIT. Press Enter. A
numeric entry window appears.
6.
Key in a value (maximum is 1000 milliseconds) and press Enter. You are returned to the Press
Control Parameter menu showing the value you entered.
7.
Press Back twice to return to the Main Initialization Menu.
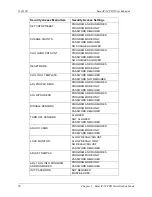
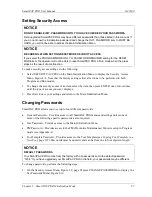
TOOL INFORMATION
(INITIALIZATION
– TOOL INFORMATION)
The TOOL INFORMATION item on the Main Initialization Menu allows you to set up a name, unit
of measurement, and number of decimal places for up to six items you wish to document for each
tool. You enter specific values and up to thirty characters of special information for each tool in
Program and Run modes.
NOTICE
Tool Information screens only maintain information about the tool. They do not control any aspect
of press operation.
Summary of Contents for SmartPAC PRO
Page 1: ......
Page 2: ......
Page 4: ......
Page 6: ......
Page 20: ......
Page 22: ......
Page 24: ......
Page 42: ...1143100 SmartPAC PRO User Manual 42 Chapter 1 Introduction to SmartPAC PRO ...
Page 142: ...1143100 SmartPAC PRO User Manual 142 Chapter 4 SmartPAC PRO Program Mode ...
Page 200: ...1143100 SmartPAC PRO User Manual 200 Chapter 6 Using DiProPAC Die Protection Optional ...
Page 222: ...1143100 SmartPAC PRO User Manual 222 Chapter 7 ProCamPAC Instructions ...
Page 254: ...1143100 SmartPAC PRO User Manual Appendix C SmartView Remote Viewing and E mail Setup 254 ...
Page 280: ...SmartPAC PRO User Manual 1143100 280 Appendix C Reporting Downtime and Scrap to SFC ...
Page 290: ...SmartPAC PRO User Manual 1143100 290 Index Y yellow fault 232 yellow sensor 169 ...
Page 292: ......
Page 294: ......
Page 296: ......
Page 298: ......
Page 300: ......
Page 301: ......
Page 302: ......
Page 303: ......
Page 304: ......
Page 305: ......
Page 306: ......
Page 307: ......
Page 308: ......
Page 309: ......
Page 310: ......
Page 311: ......
Page 312: ......
Page 313: ......
Page 314: ......
Page 315: ......
Page 316: ......
Page 317: ......
Page 318: ......


