1126700
SmartPAC 2 User Manual
5-34
Program Mode
5.
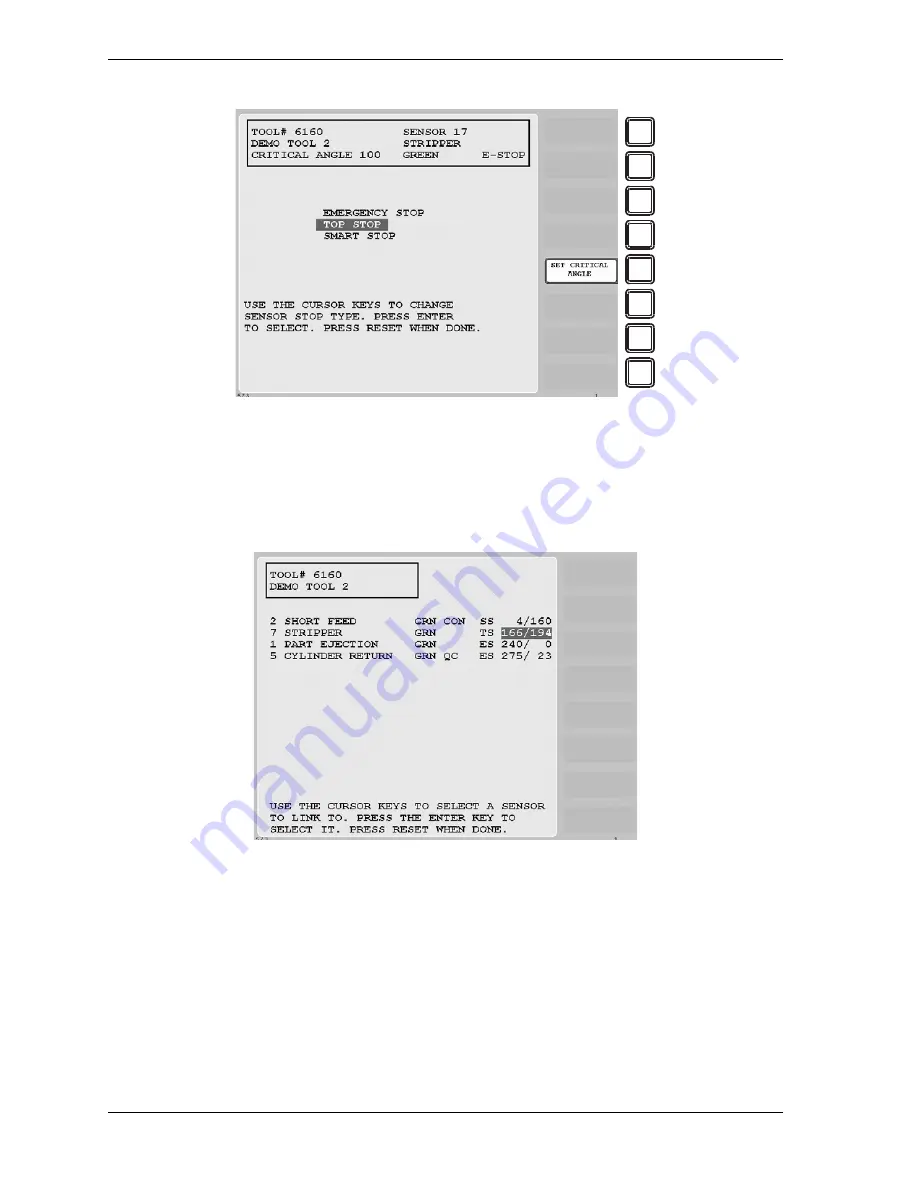
Select the stop type you want. The Sensor Summary screen displays (see Figure 5-37,
page 5-34) with the Ready signal On and Off angles shown for each green sensor
programmed in the group of sensors 1-16. Sensors are displayed in ascending On angle
order.
6.
Select the Ready signal you want. The Sensor Settings screen displays (see Figure 5-38,
page 5-35), showing the sensor name, sensor type, stop type, and Ready signal On and Off
angles you have selected. The screen also shows the number of the sensor in the group of
sensors 1-16 whose Ready signal is being used as the Ready signal for the sensor you are
programming.
Figure 5-36. Sensor Stop Type Screen
Figure 5-37. Sensor Summary Screen Showing Ready Signals for Green Sensors
F1
F2
F3
F4
F5
F6
F7
F8
Summary of Contents for SmartPAC2
Page 21: ...1126700 SmartPAC 2 User Manual xviii Table of Contents ...
Page 143: ...1126700 SmartPAC 2 User Manual 4 46 Initialization Mode ...
Page 197: ...1126700 SmartPAC 2 User Manual 5 54 Program Mode ...
Page 233: ...1126700 SmartPAC 2 User Manual 6 36 Run Mode ...
Page 245: ...1126700 SmartPAC 2 User Manual 7 12 Fault Messages ...
Page 271: ...1126700 SmartPAC 2 User Manual B 12 Updating SmartPAC 2 Firmware ...
Page 309: ...1126700 SmartPAC 2 User Manual E 6 Replacing SmartPAC 2 PC Board ...
Page 379: ......
Page 380: ......
Page 381: ......
Page 382: ......
Page 383: ......


