SmartPAC 2 User Manual
1126700
Program Mode
5-51
6.
When you have finished entering tool information, press RESET to return to the Tool
Program Menu.
SENSOR ENABLE/DISABLE & STATUS (Optional)
[PROGRAM - SENSOR ENABLE/DISABLE & STATUS]
This item, which appears on the Main Program Menu only when DiProPAC is installed,
enables you to view the status of your die protection sensors, enable or disable all the sensors
shown on the screen, and turn a selected sensor On or Off. You perform these tasks on the
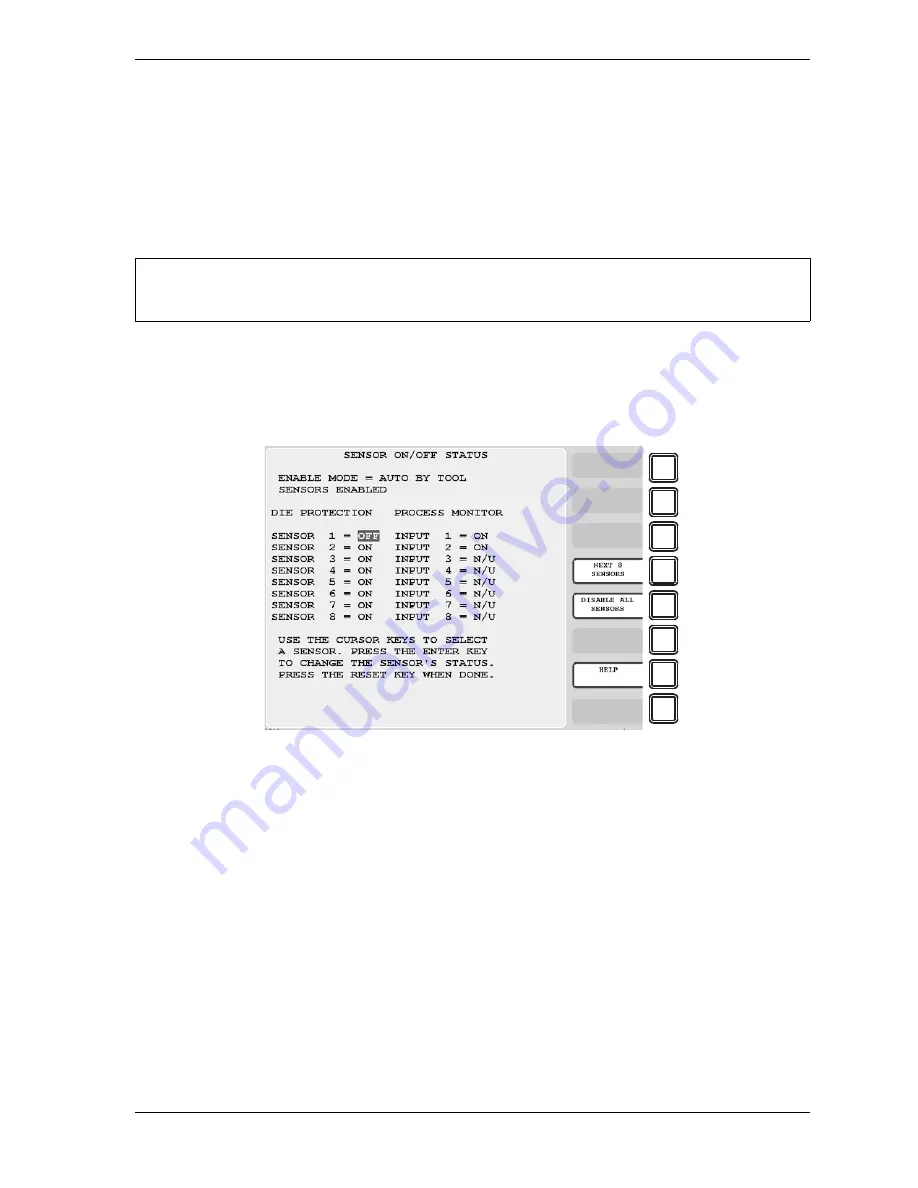
Sensor On/Off Status screen, which is shown in Figure 5-60.
Viewing Sensor Status
To view the status of your sensors, do the following:
1.
Select SENSOR ENABLE/DISABLE & STATUS on the Main Program Menu. The
Sensor On/Off Status screen displays with status settings for sensors 1 through 8
displayed. Sensors may have one of three status settings: OFF, ON or N/U (Not Used).
2.
To view sensors 9 through 16 (if a 16-sensor DiProPAC is installed), press F4 (Next 8
Sensors). The F4 label changes to “Previous 8 Sensors.” To return to the display for
sensors 1 through 8, press F4 again.
3.
Press RESET to return to the Main Program Menu.
For help with this menu item, press the HELP key.
Figure 5-60. Sensor On/Off Status
NOTICE
F1
F2
F3
F4
F5
F6
F7
F8
Summary of Contents for SmartPAC2
Page 21: ...1126700 SmartPAC 2 User Manual xviii Table of Contents ...
Page 143: ...1126700 SmartPAC 2 User Manual 4 46 Initialization Mode ...
Page 197: ...1126700 SmartPAC 2 User Manual 5 54 Program Mode ...
Page 233: ...1126700 SmartPAC 2 User Manual 6 36 Run Mode ...
Page 245: ...1126700 SmartPAC 2 User Manual 7 12 Fault Messages ...
Page 271: ...1126700 SmartPAC 2 User Manual B 12 Updating SmartPAC 2 Firmware ...
Page 309: ...1126700 SmartPAC 2 User Manual E 6 Replacing SmartPAC 2 PC Board ...
Page 379: ......
Page 380: ......
Page 381: ......
Page 382: ......
Page 383: ......


