background image


i

Respond  Lite Technical Manual   10 

4.


The remote will display Config Mode. 


5.


When the remotes have been configured they will automatically power down. 


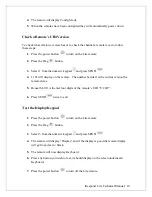
Check a Remote’s UID/Version 
 

To check what version a remote has or to check the channel a remote is set to follow 
these steps. 

1.


Press the power button 

 to turn on the Lite remote. 


2.


Press the Flag 

  button. 


3.


Select 1 from the numeric keypad 

and press SEND 


4.


L101 will display on the remote.  The number beside it is the current version the 
remotes have. 


5.


Beneath L101 is the last four digits of the remote’s UID “U:####”. 


6.


Press SEND

twice to exit. 


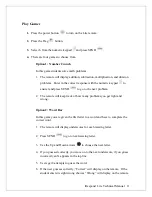
Test the Display/Keypad 
 

1.


Press the power button 

 to turn on the Lite remote. 


2.


Press the Flag 

  button. 


3.


Select 3 from the numeric keypad 

and press SEND 


4.


The remote will display “Display” and if the display is good the remote display 
will go from clear to black. 


5.


The remote will now display Keyboard. 


6.


Press any button you wish to test, it should display on the screen underneath 
Keyboard. 


7.


Press the power button 

 to turn off the Lite remote. 


Summary of Contents for iRespond UltraLite

Page 1: ...iRespond UltraLite Technical Manual Wireless eSystems ...

Page 2: ... Off Channel Scan 2 Setting Base UID 2 Adjusting Base Offset 3 Turn on in Programming Mode 3 Lite Remote Unit 4 Login by Pin 4 Login Anonymously 4 Answer Multiple Choice Questions 4 Answer Multiple Response Questions 5 Answer Fill in Short Essay Questions 5 Change the Remote s Channel 7 ...

Page 3: ...our more times to save and exit configuration mode 8 The base will automatically shut off Adjust the Power Output The Power Output is set to 0 when shipped The power output may be changed to help strengthen the RF signal when transmitting to many remotes or at far distances 1 Press the power button to turn on the Lite base 2 Immediately press F1 while Wireless eSystems scrolls across the base s sc...

Page 4: ... Device Address appears press ENT This number should not be altered 4 Select ENT at Output Power 5 Select ENT at Output Channel 6 Select ENT at Channel Offset 1 and again at Channel Offset 2 7 Use the up and down buttons to turn channel scan on Yes or off NO 8 Press ENT again to save configuration and exit 9 Base will automatically shut off Setting Adjusting Base UID The Lite base s UID is set bef...

Page 5: ...e Address should be displayed 4 Press ENT three times Base will read Offset 1 5 Connect spectrum analyzer to base s antenna connection 6 Offset 1 is for Lite remotes Offset 2 is for Touch remotes Use the Up and Down arrows to adjust offset until the spectrum analyzer shows the base on the center frequency for that offset 7 Press ENT and complete Steps 5 6 for Offset 2 8 Press ENT twice when comple...

Page 6: ... log in again verify your PIN with the instructor To Login Anonymously Instructor must have the iRespond session set up to allow anonymous logins 1 Press the power button to turn on the Lite remote 2 At the PIN screen press the SEND button 3 If you return to the PIN screen verify Allow Anonymous Logins was checked in Session Setup To Answer Multiple Choice Questions 1 Select the appropriate A E bu...

Page 7: ...ric keypad to enter in the correct response to the Fill in question 2 To change a response use the Left arrow to backspace through the answer 3 Press SEND to go to the next question or to submit your answer To Create and Save New Homework to Remote Unit 1 Press the power button to turn on the Lite remote 2 Press the F1 button 3 The remote will display Slot There are 8 slots to enter homework to 4 ...

Page 8: ...nd Down arrows to change it to Logout Yes 13 Press SEND The homework will be saved and the remote will return to the PIN screen To Edit Review Homework File Saved to the Remote 1 Press the power button to turn on the Lite remote 2 Press the F1 button 3 The remote will display Slot There are 8 slots to enter homework to 4 Using the numeric keypad to enter a slot 1 8 and press SEND 5 If homework is ...

Page 9: ...question by selecting Go and then the number they wish to return to 3 Students may go to the next flagged question by selecting Go and then pressing the Flag button Change the Remote s Channel 1 Press the power button to turn on the Lite remote 2 Press the Flag button 3 Press 2 from the numeric keypad and press SEND 4 When Address is displayed on the screen press SEND This number should never be c...

Page 10: ...ress the Flag button 3 Press 2 from the numeric keypad and press SEND 4 When Address is displayed on the screen press SEND This number should never be changed 5 At Power press SEND 6 At Channel press SEND 7 At Debug press SEND 8 When Chn Hop displays on the screen use the Up and Down arrow keys to turn channel hopping on yes or off no 9 Press SEND to save and turn off the remote Turning Automaton ...

Page 11: ... off the remote Turn Remote on in Programming Mode 1 Press and hold the F1 button 2 Press and release the power button without letting go of F1 button 3 When USB Program Utility appears let go of F1 4 Remote will shut off when it has completed programming Turn Remote on in Configuration Mode Remotes must be turned on in configuration mode to run auto configuration on a remote group Auto configurat...

Page 12: ...l display on the remote The number beside it is the current version the remotes have 5 Beneath L101 is the last four digits of the remote s UID U 6 Press SEND twice to exit Test the Display Keypad 1 Press the power button to turn on the Lite remote 2 Press the Flag button 3 Select 3 from the numeric keypad and press SEND 4 The remote will display Display and if the display is good the remote displ...

Page 13: ...t problem 2 The remote will keep track of how many problems you get right and wrong Option 2 Word Bar In this game you are given the first letter to a word and have to complete the correct word 1 The remote will display underscores for each missing letter 2 Press SEND to go to next missing letter 3 Use the Up and Down arrows to choose the next letter 4 If you guessed correctly you move on to the n...

Page 14: ...llars using the numeric keypad 4 After selecting 1 2 or 3 Three symbols will cycle through 5 If you have won anything the amount you won will display underneath the total and your total will increase to reflect winnings FCC Non modification statement Changes or modifications not expressly approved by Wireless eSystems Inc could void the user s authority to operate this equipment This device compli...

Reviews: