R01.i
RT System 2 v2.3 Deployment Guide
183
© 2010-2014 Wireless Seismic, Inc. All rights reserved.
E. Weighted Base
Hardware Supplied
E.2 Hardware Supplied
The following hardware is supplied with the tripod mast:
i
4 - Bolt, Carriage 1/4 - 20 x 3/4"
i
12 - Bolt, Carriage 1/4 - 20 x 5/8"
i
4 - Bolt, 1/4 - 20 x 3/4" Hex Head
i
4- Bolt, 1/4 - 20 x 1/2" Hex Head
i
24-Nut, 1/4 - 20
i
24 - Lock washer, 1/4 Int. tooth
E.3 Assembly Instructions
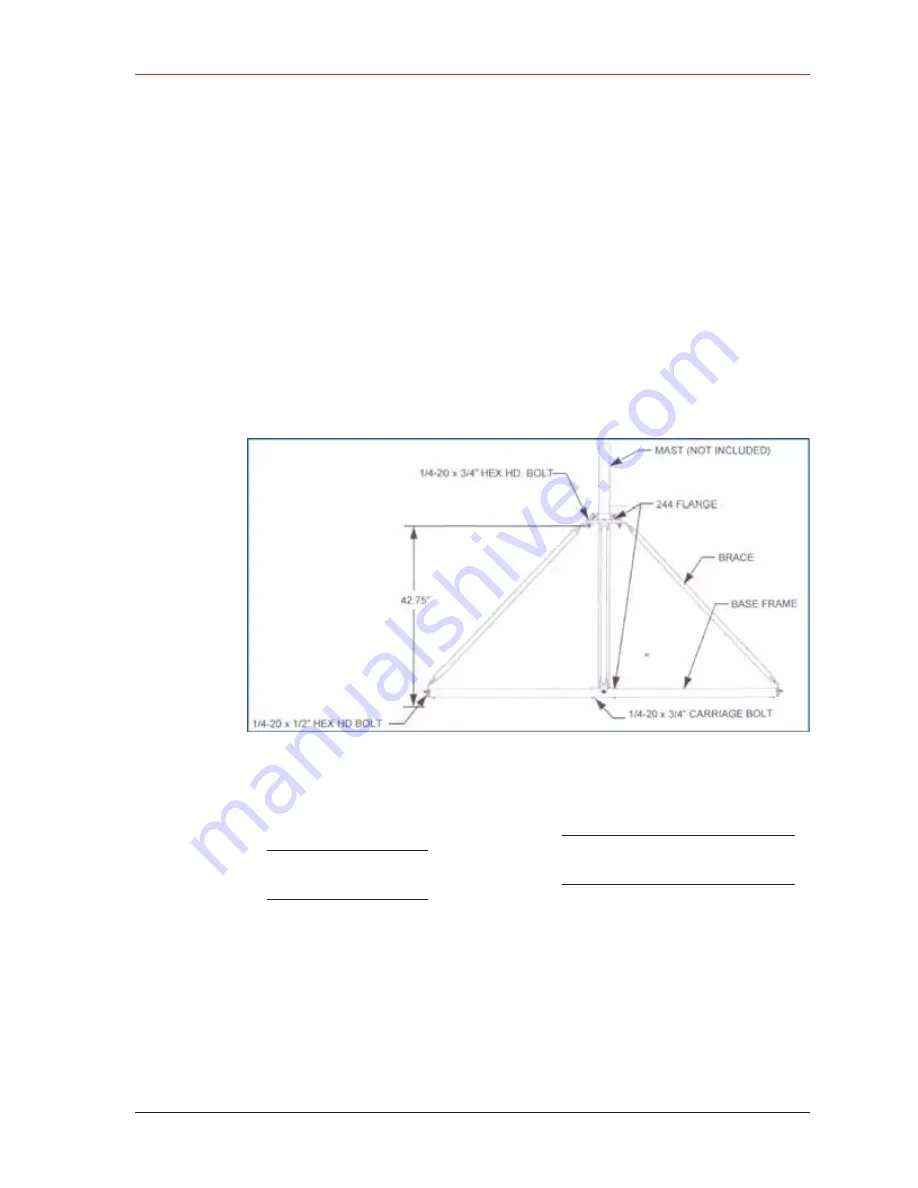
This section provides instructions and illustrations for assembly of the tripod.
To assemble the tripod:
1
Assemble one 244 Flange to the Center Support Plate using four 1/4-20 x 3/4" carriage
Bolts, Lock washers and Hex Nuts. Make sure to assemble the Bolts with the Heads on
the underside of the frame. Hex Nut should be on the top side of the frame.
2
Assemble Base Frame and Center Support Plate using twelve 1/4-20 x 5/8" carriage
Bolts, Lock washers and Hex Nuts. Make sure to assemble the Bolts with the Heads on
the underside of the frame. Hex Nut should be on the top side of the frame.
3
Assemble the four (4) Braces to the upper support flange using four 1/4-20x3/4 Hex
Head Bolts, Lock washers and Nuts.
4
Assemble the other end of the braces to the base frame using the four (4) 1/4-20 x 1/2"
Hex Head Bolts, Lock washers, and Nuts.
5
Insert Bolts into upper and lower flange.
6
Slide the mast (not included) into position and tighten securely and weigh.
Wade Antenna Ltd., Ontario, Canada
Figure E–2 Tripod Assembly, Front View


