20
WPS-750-DOM-AH Installation Manual
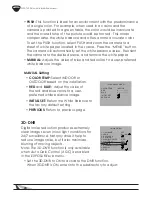
• PUSH: This function is ideal for an environment with the predominance
of a single color. For example, when used in a casino and the
camera is pointed to a green table, the color would be inaccurate
and the overall tone of the picture would be too red. This mode
compensates the white balance and offers a more accurate color.
To set the PUSH function, select PUSH and zoom the camera to a
sheet of white paper located in the scene. Press the “MENU” button.
The camera will automatically set the white balance value. Reorient
the camera to the desired scene, and remove the white paper.
• MANUAL: Adjusts the value of blue and red colors to a user-preferred
white balance image.
MANUAL Setting
• COLOR TEMP: Select INDOOR or
OUTDOOR based on the installation.
• RED and BLUE: Adjust the value of
the red and blue colors to a user-
preferred white balance image.
• INITIAL SET: Return the White Balance to
the factory default setting.
• PREVIOUS: Return to previous page.
3D-DNR
Digital noise reduction produces extremely
clear images even in low light conditions for
24/7 surveillance. Not only does it help to
reduce image noise, but it also minimizes
blurring of moving objects.
Note: The 3D-DNR function is only available
when Auto Gain Control (AGC) is enabled
in the EXPOSURE sub menu.
• Set the 3D-DNR to ON to activate the DNR function.
When 3D-DNR is ON, enter into the subdirectory to adjust:
<MAIN MENU>
1. CAM NAME
OFF
2. LENS
DC IRIS
3. EXPOSURE
4. DAY/NIGHT
DAY
5. WDR/BLC/ECLPS
WDR
6. WHITE BAL
ATW
7. 3D-DNR
ON
8. EFFECTS
9.SPECIAL
0. EXIT
RET
<WB MANUAL MENU>
COLOR TEMP
INDOOR
RED
0 -------|-------
BLUE
0 -------|-------
INITIAL SET
PREVIOUS
Summary of Contents for WPS-750-DOM-AH-BL
Page 2: ......


