Copyright©2020 Wisely Laser Machinery Limited All Rights Reserved
V 20.0.1
- 17 -
Chapter 7 Basic Operation
第七节 简要操作
Turn ON
1. Connect the main power.
2. Turn on the laser power with the key.
3. Press the button named “Scan Head” to turn on the power of scanner.
4. Press the button named “Red Light Pointer” to turn on the Red Dot Pointer.
5. Power on your PC or laptop.
6. Connect the machine with software via USB cable.
7. Run software “EzCad”.
8. Load the material and put it in right position under the lens.
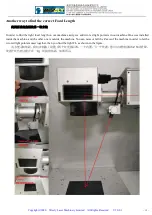
9. Close the door and adjust the right Focal Length by pulling the Z axis up and down.
10. Make or load a file which you want to mark in the software.
11. Set the marking parameter for the marking jobs.
12. Prepare to mark.
打开机器
1.
连接电源。
2.
打开激光电源的钥匙开关。
3.
按“
Scan Head
”按钮打开振镜的电源。
4.
按“
Red Light Pointer
”按钮打开红光指示器电源。
5.
打开台式电脑或笔记本电脑。
6.
通过
USB
线将机器与软件连通。
7.
运行“
EzCad
”软件。
8.
将材料放到振镜下方的聚焦位置。
9.
关闭防护门,可通过上下移动
Z
轴立柱来找到正确的焦距。
10.
在软件中制作或加载要打标的文件。
11.
设置打标加工的参数。
12.
准备标记。
Turn OFF
1. Save files (Or you do not need to save any files).
2. Close the software.
3. Shut down your PC or laptop.
4. Power off the laser source by key, scanner and red light pointer by pressing the buttons.
5. Disconnect the main power.
6. Cover the lens with lens cover.
关闭机器
1.
保存文件(或不保存文件)。
2.
关闭软件。
3.
关闭电脑。
4.
关闭钥匙开关,振镜和红光指示器的按钮
5.
切断电源。
6.
用场镜盖盖住场镜。
7.

