11
02
Installation & Network Connection
assembly
1.
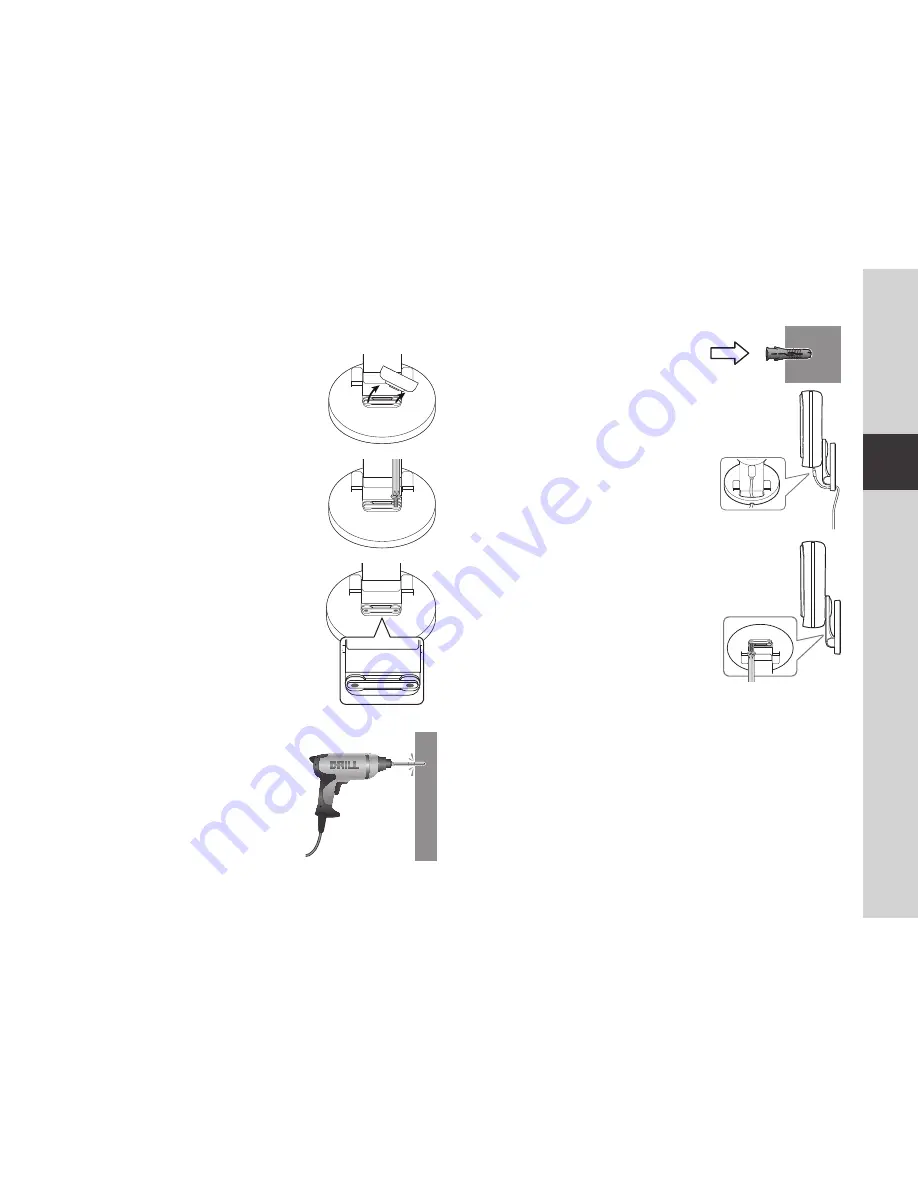
Remove the rubber packing attached to the
camera mount.
2.
Take out the screws (M3xL20) and anchors
(Φ5x25mm).
3.
If installing on a wooden wall, mount the bracket
wall using the screws as shown in the figure on the
side. First, using a Phillips screwdriver, tighten the
screws in the two holes on the wall to which you
want to attach the bracket.
4.
If installing on a concrete wall, mount the bracket
using screws and anchors. First, mark the wall to
which you want to attach the bracket as shown in
the figure.
5.
On the mark, drill a hole to a depth of about
3cm in the wall using a drill bit and drill with a
5mm diameter for concrete. Remove any
debris remaining in the hole after drilling.
J
`
Use caution when drilling to avoid injury.
6.
Insert an anchor in each of the 2 holes for the
screws, then hit the back of the anchor with a
hammer or a rubber mallet until it is
completely inserted.
7.
Slide the power adapter into the base opening
as shown in the picture. Connect the power
adapter to the camera.
8.
Drill the screws into the anchor holes until the
bracket is firmly secured in place.
SNH-P6415BN


