background image


14 

3.4


Torque sensor 


3.4.1 

When you first ride your Wisper bike, you will notice that the motor will start working as 


soon as you put pressure on the pedals. This is the standard or torque mode. The more 


pressure you put onto the pedals the more powered assistance you will receive. 

3.4.2 

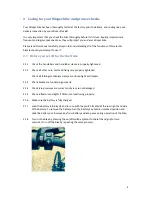
You will find the assist buttons(marked with a 

+

 and a 

-

) on the handle barcontrol. Each time 

the 

+

button is pressed, the LCD will movebetween 0 and F and the corresponding power 

level increases in increments of 25%. Setting 4provides 100% power. The default level is set 

to 1 when the bike is first turned on. We recommend that you press, the 

-

 button once 

before you mount the bike so the motor and torque sensor is deactivated. Once on the bike, 
press the + button once to activate the assistance mode. Always start of in level 1, onceyou 
are moving you can change to a higher level. 

3.4.3 

Setting 4 is generally used when you need the maximum amount of assistance from the 


motor, but this will drain the battery the fastest. Lower settings are used when you do not 


need the assistance at 100% power.In high traffic situations or poor conditions such as ice 


and snow, instant full power could be dangerous. Power settings can be changed when the 


bike is stationary or when on the move. 

3.4.4 

Setting H is used to turn off the torque sensor.  On setting H as soon as the pedals are 
rotating you will receive maximum assistance from the bike.  You will not get any assistance 
on start off until the pedals have been turned ¼ of a revolution. H setting should only be 
used when you want maximum assistance from the bike without putting much pressure on 
the pedals. Using H setting will reduce your range by up to 30% 

IMPORTANT! Make sure your throttle and handlebar grips are always intact and in good condition. 
Uncovered handlebar tubes can be very dangerous.  
 

3.5


Battery capacity meter, riding style and affect on range 
 

3.5.1 

The range of the bike (distance covered between recharging of the battery) is greatly


influenced by the level of assist selected, the amount of pedal assistance provided by the 


rider and the use of the throttle. 

3.5.2 

If a high level of assist is selected, then the range of the bike will be reduced compared to 


using a lower level of assist. 

3.5.3 

The Wisper torque system detects the speed the pedal cranks are turning and the amount of 


pressure being exerted on the pedals. This information is fed into an on board computer 


(controller) to give the rider the most natural riding experience possible.  

3.5.4 

The optimum range is achieved when the rider pedal effort is maximized and an ideal 


situation is for the rider to aim to match the power being provided by the bike on an equal 


basis. 

Summary of Contents for 806Torque 2017

Page 1: ...1 Owner s Manual Wisper 806Torque 2017 Model December 20161st edition We strongly recommend that you read this entire manual before using your Wisper bike...

Page 2: ...on off switch and lock 3 2 The ON OFF button and Light button 3 3 The Throttle 3 4 Torque sensor 3 5 Battery capacity meter riding style and affect on range 3 6 Brakes 3 7 Stem and handle bar clamps...

Page 3: ...ou are travelling too quickly you probably are Always test your brakes prior to using the bike and remember the bike will not stop as quickly in the wetas it would in the dry Before you use the bike f...

Page 4: ...properly tightened 2 1 2 Check all other nuts bolts and fixings are properly tightened Check all folding mechanism clamps are closed tight and locked 2 1 3 Check brakes are functioning properly 2 1 4...

Page 5: ...ng the LCD display please refer to separate hand book available from Amps Electric Bikes or your retailer 2 1 11 Remember to validate your warranty by visiting www wisperbikes com mywarranty and filli...

Page 6: ...urned off see above If your battery falls below minimum Voltage it may not be recoverable 2 3 6 Do not expose the bicycle or battery pack to fire heat sources acid or alkaline substances 2 3 7 When le...

Page 7: ...connect the new Wisper 575Wh battery and charger system directly to the battery manufacturer s technical department s computer Software updates will be uploaded to the battery and charger and system d...

Page 8: ...he tubes The recommendedtorque tightness ofcrucialfixingsisas follows Frontaxlenuts 46N m Backaxlenuts 70N m Handlebarand stem clampbolts 12N m Handlebarstemexpanderbolt 10N m Seatpillarclampnut bolt...

Page 9: ...5Wh 2 6kg Long range Samsung 575Wh 3 4kg Both batteries use identical battery cases so are interchangeable between 705 806 or 905 Wisper bikes Remote Control Service System RCSS on 575Wh only Deep sle...

Page 10: ...k anodised alloy with ergo support grips Stem Black anodised alloy adjustableheight Kick stand Black anodised alloy Gears SHIMANO 8 speedcassette with 8 speed quick fireselector Chain ring 170mm 52 to...

Page 11: ...l problem 1 Re install battery 2 Call service 3 Call service Low range after recharging the battery 1 Tyre pressures too low 2 Undercharge or charger fault 3 Battery capacity loss or damage 4 Hill cli...

Page 12: ...on on the top button c on the handle bar control isolates the power from the bike When the on off button is pressed for 3 seconds the LCD symbols will become visible When the on off button is pushed a...

Page 13: ...the on off C button found on the LCD If you presswhen the bike s power is on the LED headlight and rear light will illuminate The LCD display will also become back lit Press it againto switch off the...

Page 14: ...r when on the move 3 4 4 Setting H is used to turn off the torque sensor On setting H as soon as the pedals are rotating you will receive maximum assistance from the bike You will not get any assistan...

Page 15: ...s better to start a journey with a fully charged battery and to recharge it at the end of each journey 3 6 Brakes 3 6 1 Disc brakes are fitted to the front and V brakes to the rear wheels of the bicyc...

Page 16: ...disc should be cleaned with a proprietary brake cleaning solution 3 7 Stem and handle bar clamps 3 7 1 Your bike has been fitted with an adjustablehandlebar and stem clamp that allows youto change th...

Page 17: ...l the lever away from the stem the stem will now fold away from the clamp When unfolding the stem make sure the clamp is solid against the stem the chromedlockingknob is pushed back up into position a...

Page 18: ...Folding the pedals is very straight forward Simply push the pedal in towards the bike with your hand or foot and fold down To unfold lift the pedal back to its normal position Make sure it has located...

Page 19: ...connect and click into position when fully engaged Each connector has a different number of pins and an alignment arrow so it is important to ensure the connectors are only mated in their original pos...

Page 20: ...the rear wheel it is necessary to disconnect the main motor cable connecting the motor to the bicycle electrical system This operation is best achieved by turning the bicycle upside down 3 12 2 Locate...

Page 21: ...side of the handlebar The two levers located underneath the shifter can be pulled and pushed to select the gears over the range 1 to 8 4 Warranty battery maintenance and user responsibilities Repair o...

Page 22: ...1 Damage resulting from misuse not maintaining the vehicle or not following the guidelines within our user guide or using the vehicle for any kind of competitive sport 2 Accidental or deliberate dama...

Page 23: ...ill more than a new 36V 10Ah 378Wh battery Choosing a larger battery not only gives you more power and range but is often more economical in the long term 4 1 4 The key to having a long lasting batter...

Page 24: ...nsure there is no noise or squeal 6 Check smooth action and adjustment of front suspension forks 7 Check adjustment of bearings in headstock Adjust if necessary 8 Check security of all handlebar stem...

Page 25: ...hly to closed position Adjust if necessary 5 Check functionality of LCD display Includes selection of five power assist levels speed readout and all functions are correct as described in the user manu...

Page 26: ...26 customer Copyright May 2016 Amps Electric Bikes Ltd...

Reviews: