11
INSTALLATION
1. Connect one end of coil cord to the jack in the handset and the other end to
the jack in the base unit.
2. Plug one end of phone line to the line jack in the base unit and connect the
other to the wall jack.
OPERATION
1.Make a call: Pick up the handset get dial tone and dial the number.
2.Answer the call: Pick up the handset to answer the call.
3.End a call: Press the hook switch or hang up the handset to end the call.
4.Redial: Pick up the handset, press REDIAL to redial the last dialed number.
5.Flash: Use for transfer or intercom behind the PBX systems.
TROUBLE SHOOTING GUIDE
SYMPTOM
CAUSE AND REMEDY
Phone is not working.
Is the phone cord connected properly both
in wall jack and in the base unit? Does the
wall socket has signal?
Ringer volume is too low.
Is ringer volume set on low?
WALL MOUNTING
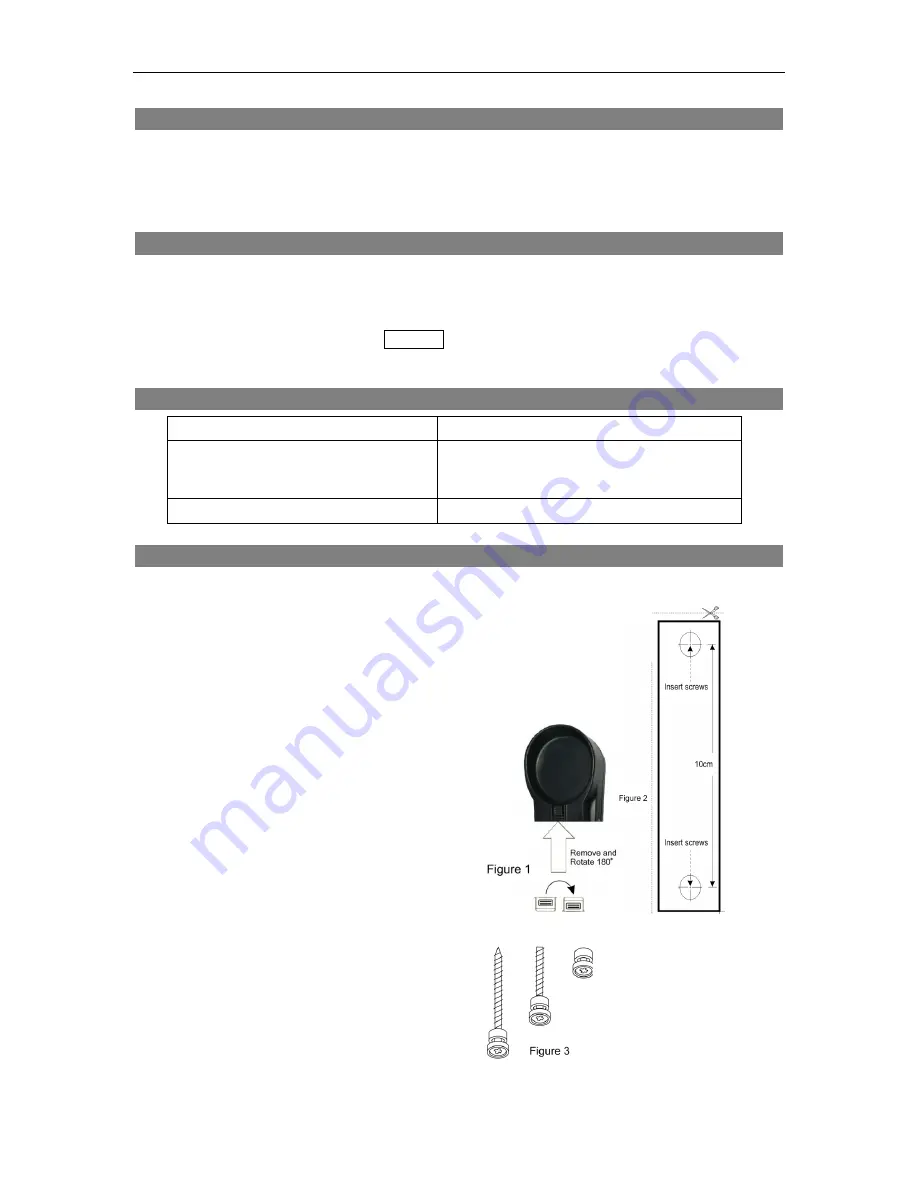
The phone can be wall mounted if user
needed, when wall mounting, user has to
change the position of the handset hook
guide & fix the base unit on the wall, the
steps as below:
1. To change the position of handset hook
guide
a. Remove the handset hook guide by
sliding upwards (Figure 1).
b. Rotate 180 degrees and re-insert.
The handset hood guide will ready
for wall mounting (Figure 1).
2. Fix the base unit on your original wall
mount, or you may follow the instructions
as below of no wall mount on the wall
a. Choose
a
location
close
to
telephone wall jack.
b. Draw mark 8,3 cm vertically apart on
the wall (Figure 2).
c. To check the location of mark before
drilling to make sure no any wiring or
hidden pipes behind the wall.
d. Drill and then insert screws into the
wall and leaving the heads around 2
millimeters out of the wall, adjusting
it if necessary (Figure 3).
e. Fix the base unit on the wall.


